
Posted in Gaming, Sims

The Sims Saga: Which Do I Prefer?

Image result for the sims

When you here the game Sims, what comes to mind? I think about The Sims games, creating a character and controlling their life. A lot of people forget that the Sims first originated from SimCity, where you created a city and made sure that it was successful.

I’m not going to talk about SimCity, though. This is mainly about The Sims. I’ll be honest, I’ve never actually played the Sims, but for it’s time, it was amazing. To be able to control their life, made them do whatever our hearts wanted them to do.

It was like GTA, but without the violence and free will to move your Sim manual. You could even create your dream house, have a family, or get the job of your dreams. When I got hooked, it wasn’t with the first The Sims, it was The Sims 2.

The Sims 2

Image result for the sims 2

The first time I saw The Sims 2, was when I was on YouTube. I had came across it and it was recommend to me. A lot of people actually used The Sims 2 game, to create movies or series, or what got me hooked on, was the teen pregnancy series.

You must think that I’m weird to like to watch them, but seriously, look up the series ‘My Life’. The creator of that series, she really got me to thinking that I wanted to do something creative like that. If you actually watch her series, from her very first episode, to her newer ones, she has come a long way.

The Sims 2 had more to offer, as well. There were more add-on’s to the game, such as the different seasons, hobbies, and even jobs. It made the game play more like real life.

I finally had a chance to buy it for myself, and I am currently, trying to learn how to film and make a good series, that I will post on my YouTube channel.

Even if you aren’t trying to make a series, its a great way to past the time on a rainy day. Hell, I even when forward and created my fiance, son, daughter, and myself into the game. I highly recommend getting this game! It’s the best of both worlds.

Now, let’s talk about its, aftermath…The Sims 3.

The Sims 3
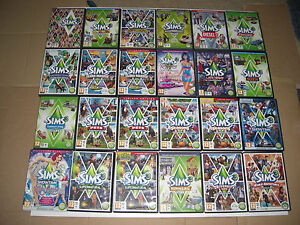
Image result for the sims 3

I’m going to try my best not to bash this game. It wasn’t a bad sequel to The Sims 3. They added a lot of new things, such as making it easier to custom clothes and items, you didn’t have to wait for loading times to get from one place to another, and you could follow your Sim to work, the hospital, etc.

There was one BIG issue with this game. It is SO buggy. If you didn’t have the best computer in the world, you were bugging because your game would lag. Brand new or with mods, it would lag, or the loading time would take forever. Especially if you are in create-a-sim.

To me, the creators wanted to get this game out, as soon as possible because of the high demand that The Sims 2 was, so they did rush it, a little, by adding some stuff that the other games never had.

The one thing that I LOVED about it, was that you could follow your Sim anywhere without having to deal with those loading screens and the way you could custom, almost everything.

The Sims 3 was the first Sims game that I have ever own and I had the season, pets, and supernatural packs that made the game play so much fun! I wonder, now that I have a better computer, if it would run better?

Last, but not least, let’s get to the newer Sims game that came out in the last few years, The Sims 4.

The Sims 4

Image result for the sims 4

Again, this is another game I haven’t touched, yet, and I have looked into seeing if it is really worth getting, but to me, the creators went back a couple steps. You think with a newer game, it would be better and would fix the problems from the last game, well, they did, but not very well.

I have heard that the game play is okay, graphics are okay, etc. It is missing A LOT from The Sims 3 game. You have loading screens for EVERYWHERE you go, even if you are going to the next door neighbor.

It’s not as buggy or laggy, as The Sims 3 was, but they had to get rid of a lot of stuff, in order to fix it, which a lot of people were disappointed in. The Sims 4, seems to me, boring. Just because they didn’t add anything new that would make us get excited.

Although, they did add a pack that basically makes you do your Sims job. Which was something that we could do in the other games, but I would rather just fast-forward my Sim’s job, then doing it, I’m already controlling pretty much them, why should I have to do their work for them?

Which is worth playing?

Image result for the sims

The Sims 2, hands down. I would recommend it to everyone. It plays great on Windows 10, there is a few glitches, but it’s still playable. I like how the Sims are in this game and how you can do so much.

Plus, it still has that SimCity feeling to it, so that I could make my own town, I could. I am hoping to get a few more packs, just to play around with it some more. I do have the the Late Night and University packs, so I am hoping to either get Pets or Seasons next.

If you are a Sims fan, which game do you prefer? Leave a comment down below! There has also been a rumor that they are working on The Sims 5, do you thinks they should have another Sims? If so, what do you think they need to improve or leave alone?

Posted in Arts and Crafts

How To Make A Latch Hook Pillow/Pillow Case (Craft Odysseys)

Image result for latch hook pillow

Good Morning all of my dearies! So, I figured I would show you how I make my latch hook pillows. I have already done a tutorial on the latch hook, and how simple and easy it is to do.

Now, I did this all on my own, I didn’t find this online, I came up with the idea because of the fact that some of the latch hooks were too amazing to just have as a rug. So, I figured that I would make a latch hook and turn it into a pillow. Not all of my latch hook pillows are perfect, I haven’t really mastered it, but I try to be better than the last time.

These are great gifts for family or friends, I would say for everyone, but it depending on the size of the latch hook and making the backing, it can be a very long process. The quickest that I was able to do, was about 2 months, but that was a small foot by foot latch hook. If you have kids, expect the project to take longer.

So, first things first, you need to have the following supplies:

  • Latch Hook kit
    • If you are a beginner, I recommend with starting out with a small latch hook, a foot by foot one would be perfect to start on and it won’t take as long as a bigger one.
  • Yarn (Medium)
    • The backing I just basically knitting small squares together or two long parts that I end up sewing together. The color can be any color you want it to be, as long as it is medium thickness and somewhat matches your latch hook.
    • I would try and get two yarn rolls, just to start out, but do keep in mind that you will also need it to sew the pillow together.
    • *Note* Try and avoid black yarn, especially if you are a beginner, black yarn is very hard to work with. Dark colors might be okay, but try and avoid them, if you are just starting out.
  • Metal Thick Needle
    • You’ll need this to sew your pillow together, or pillow case. I recommend using a thicker needle (Not talking about knitting needles!), the reason is because it will make it easier to sew them together. Plus, with the thinner needles, you can tend to break them, believe me, I have broken a few.
  • Scissors
  • Knitting Needles
    • Make sure that you have the knitting needles suggested size, it is on the yarn roll and suggests a size.
  • Rug Binding
    • This you will used around the sides for the latch hook, making sure that it doesn’t fall apart when finished.
  • Fabric Glue
    • I found that it was easier to use fabric glue to keep the rug binding together. You can use an iron, but I have tried and It didn’t work, I’m not sure if I did it right or not.
  • Stuffing (for making a pillow)
    • You can stuff it and then close it, or if you or anyone you are giving the latch hook pillow has any pets, I would take a pillow case and fill it and then put it into the pillow. It’s totally up to you.

Once you have everything, that I have suggested to have, you can finally start! First, before we can begin our pillow, we need to complete the latch hook, first. This might be the longest part that you need to do to make this pillow.

Then, knit the backing, you can either knit a classic square, or make it longer and have different pieces that you end up sewing together. Whatever is easier for you to do, I found that the squares were easier, depending how big your latch hook is, it made it easier to see the progress versus just knitting a long part.

The reason why we should make the latch hook first, is because once we trim it down, it will be easier to measure or know how long or wide you need to go. Some latch hooks don’t have a printed picture on them, some of them are blank and give you a big blank latch hook, just to make sure that you have enough to make the latch hook.

That’s only with the bigger latch hooks, a since foot by foot is usually has a printed design on it, so that you can follow the pattern.

After both parts are completely, just sew them onto the latch hook, making sure that you cover the latch hook grid. If you are making a pillow case, only sew around it, leave the top untouched, so that you are able to place a pillow into the opening.

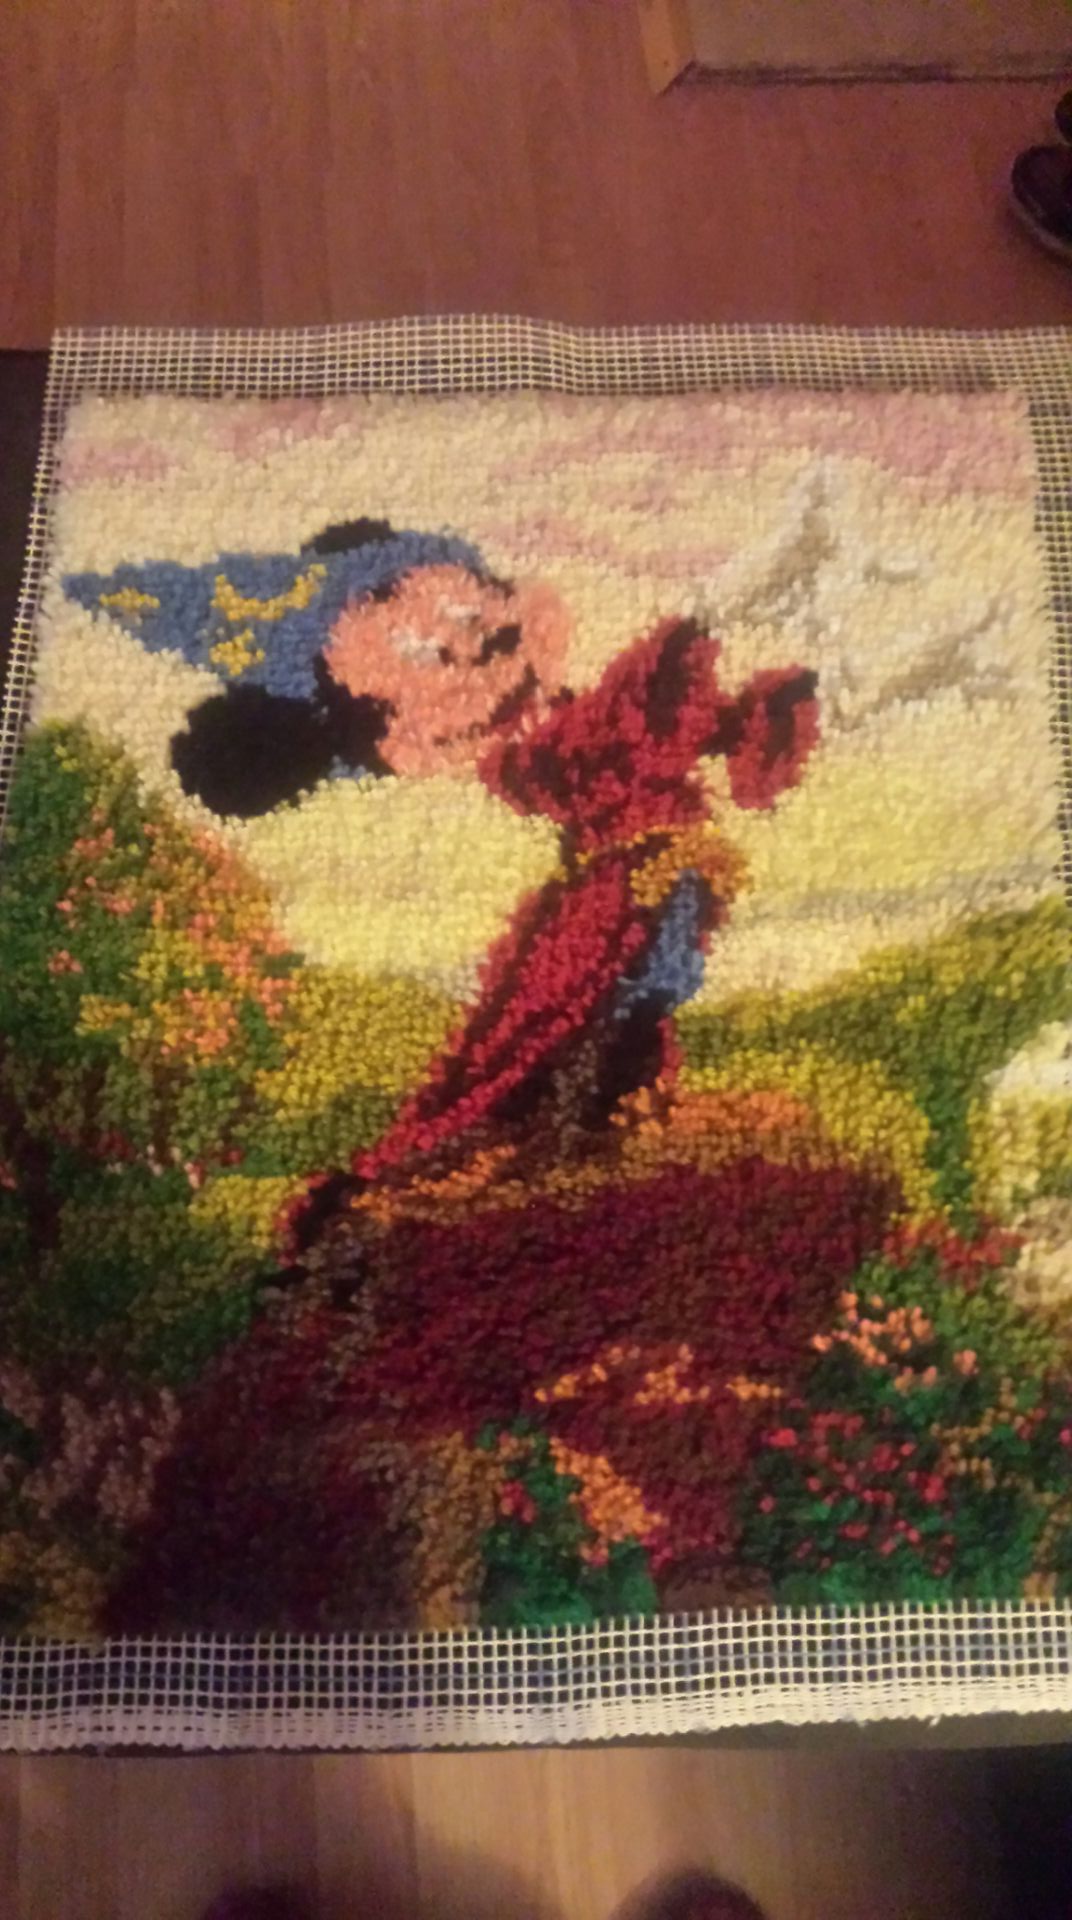
20180612_175756.jpg

It should, almost look like the picture above, this was a project that I made for my aunt for her birthday. Her favorite Disney princess is Belle, so I made her a small foot by foot pillow.

This latch hook, I got from Hobby Lobby, but I am pretty sure you can find it on Amazon, you might be lucky and find it at Walmart, but I wouldn’t get your hopes up. This latch hook did not have a grid, with the picture, so that you can follow it on key.

The picture was printed on the latch hook and I made the best judgement for each one. The background isn’t green, it’s purple, I changed it to my aunt’s favorite color, instead. Another note, for this latch hook, the yarn is SUPER thick and was a pain in the ass to hook on.

However, the yarn I used for the background was a simple medium yarn, what most latch hooks use, so I was glad that the background wasn’t as difficult to do.

Next Tuesday, I have a surprise! I am going to show you how to make a book mark! Not just any kind of book mark, a crochet-made bookmark!

Posted in Arts and Crafts

How To Loom Knit A Scarf -Figure 8 Stitch (Craft Odysseys)

Happy Tuesday to all my crafters! Today, I’m going to take you step-by-step on how to loom knit a basic scarf. I’m going to break it down, just in case some others go way too fast.

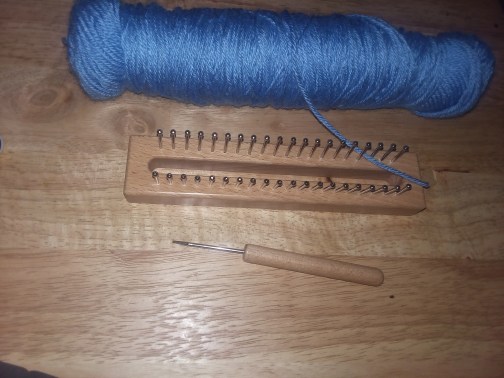
20180703_145052.jpg


Now, I am going to be using a solid blue color yarn, I figured using a plan color would be easier to focus on. I’m also using a medium size yarn, which is a basic yarn that you would get from the craft store.

If you don’t have a looming set or kit, you can buy them on Amazon, Walmart, or your local craft store. The one I have is the KB Tadpole Loom, I got this from either Walmart or Kmart. It comes with the loom set and a little booklet, that shows you how to 8 different thinks with the loom.

So, first thing is first, we need to create a slip knot. Now, if you don’t know what a slip knot is, that’s okay because I am going to explain it too you. A slip knot is a basic knot that is used for knitting, crocheting, looming, etc, projects. I basically holds the start of your work together.

A lot of people do a slip knot differently, you don’t have to do it my way, but I would look on how other’s make a slip knot and choose whatever makes you comfortable. Here is a quick visual on how I make a slip knot:

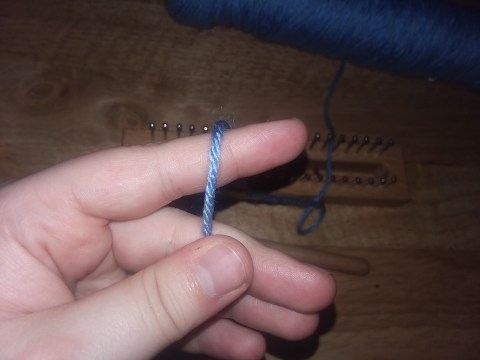
  1. Find the start of your yarn and hold on to it. I have used this yarn before, as you can see. If you are using a brand new yarn, you can either find the start of it by grabbing the middle string, that might be sticking out, or look around the yarn and see if you can find the other end. Personally, I rather grab from the outside, because mostly every time that I grab onto the middle and pull, sometimes it be in a knot.
    1. 20180703_145501.jpg
  2. Wrap the yarn around your finger, leaving a enough space in between them. See photo below:
    1. 20180703_145513-1.jpg
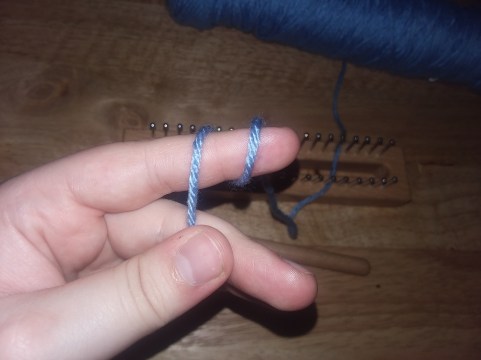
  3. Next, you are going to pull the first yarn over the second yarn, like this, see below:
    1. 20180703_145557.jpg
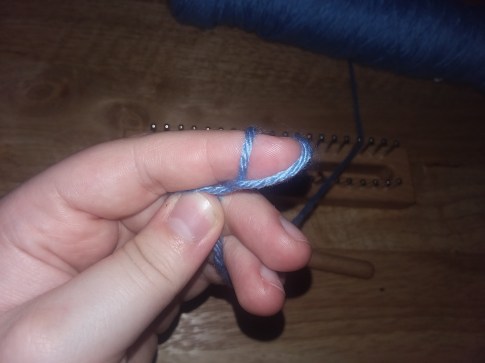
  4. Then, you are going to pull the end of the yarn, so that it’s tight, not too tight on your finger, though.
    1. 20180703_145616.jpg
      • And there you have your slip knot!

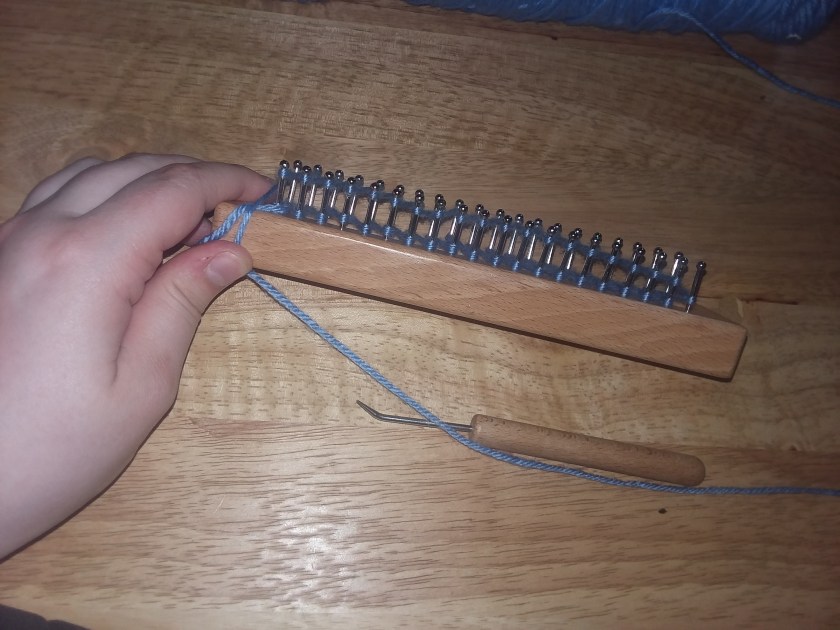
Now that we have a slip knot, we can begin! So, take the slip knot off of your finger and place it on one of the end pegs, and tighten it, not too tight, though. Like shown below:

20180703_145650.jpg

What we need to do next is wrap the yarn around the pegs. Pay very close attention to how we do the figure 8 stitch.

It will look tricky at first, but it’s very simple, just make sure that you are wrapping each and every peg, as shown in the picture above. Once you get to the other side, see below, go back and re-wrap all the pegs, using the same stitch that you just did.

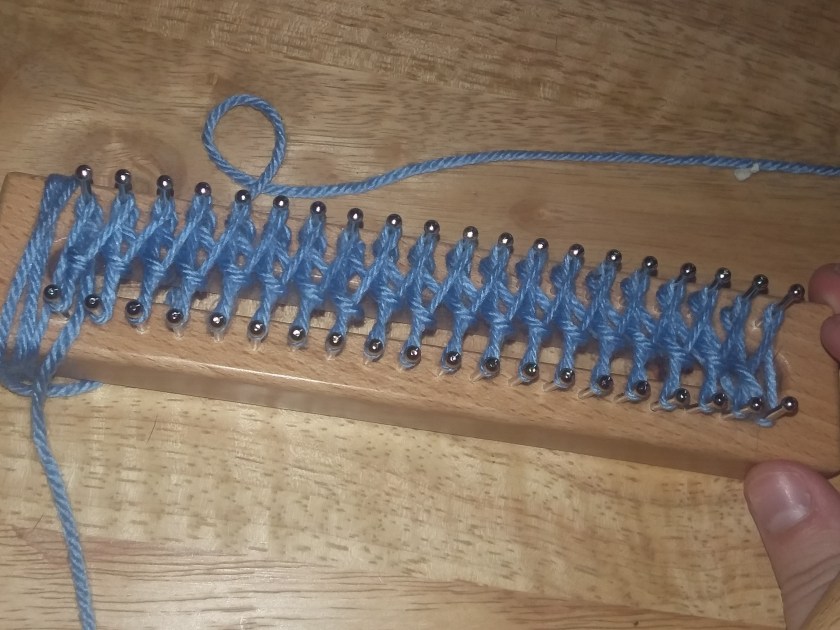
When you finish wrapping all the pegs again, your work should look like this, if I explained it well enough. This is the top view:

20180703_150058.jpg

Here is what the side view will look like:

20180703_150113.jpg

If you haven’t already noticed, that there was one peg that was only wrapped once. That is okay! It is supposed to be like that. Every time that you wrap them a second time, there will always be one that isn’t wrapped twice.

Now, because this loom doesn’t have a end peg that you can wrap around, I wrapped the yarn around the side of my loom, because if you don’t, your work will come undone. That is the only down fall with this loom, it doesn’t have a place to wrap your yarn.

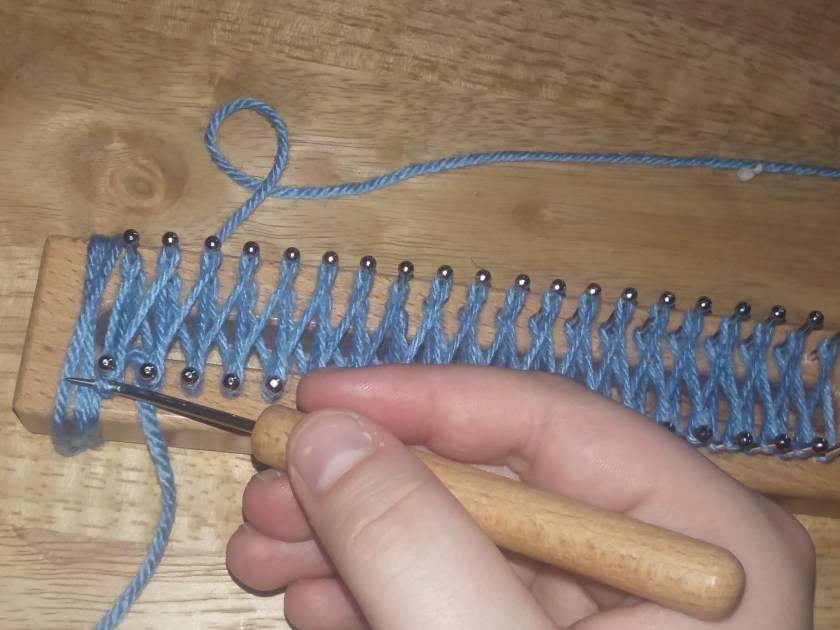
Anyway, here comes the more difficult part. You will need your hook for this step. Take your hook and grab, from the first set of yarn that we cased on, you are going to pull it over the peg and over the second yarn. Note: It doesn’t matter which side you start on, but which every one you decide to start on, finish it before moving on to the other side.ย 

20180703_150230.jpg


You keep doing this, on the side you are working on, it should look like this, when you finish your first side.

20180703_150345.jpg

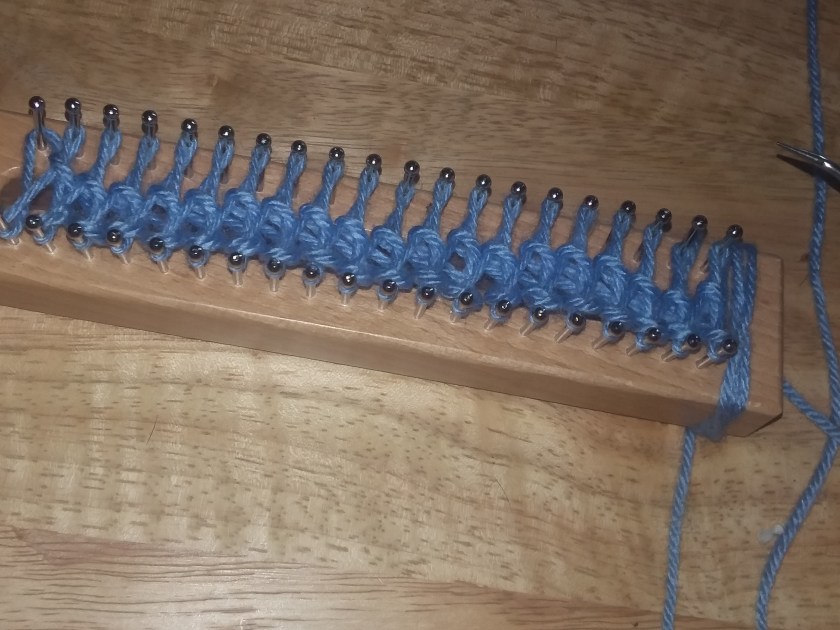
It’s okay if they are a little loose, most of them will end up in the middle anyway, so it’s okay that they don’t, at first.

Once you have completed the other side, your work should look like this:

20180703_150500.jpg

Then, just gently push the middle of your work down and recast another figure 8 stitch, until you get it to the length you desire. I have added a chart, for the average lengths, but if you want a scarf that fits perfect, for you or whoever you are making it for. Hold you arms out side and have someone measure from fingertip to fingertip, that will give you the exact length you need.

Image result for scarf sizes

How To End Your Work

I don’t have any pictures on how to cast off, so I am going to explain the best I can. I will be making a YouTube video about this blog post and will attach, once it is uploaded. I will make sure to have pictures, as well.

Basically, you’ll be transforming one side to the other and then binding off. So, grab your hook and take one of your yarn, from your first peg, and wrap it around the peg across from that peg. Note: I’m pretty sure you can start from either side, when you bind off. But don’t quote me on it.ย 

ย Once you have finished that, and got to the final hook, your work should just come off and you should be all set.

There you have it! I’m sorry if I didn’t explain it a little better. I will be making a video on how to do it, as soon as possible and I will edit at this post, once I do! If you have any ideas or want me to try out something new, let me know in a comment or send me an e-mail at katie_farrington@aol.com!


Posted in Arts and Crafts

Crocheting VS Knitting (Craft Odysseys)

Happy Tuesday! I have another Crafty Sassy coming to you! I am going to talk about the difference between crocheting and knitting and how they are different from each other. Let’s jump right in!

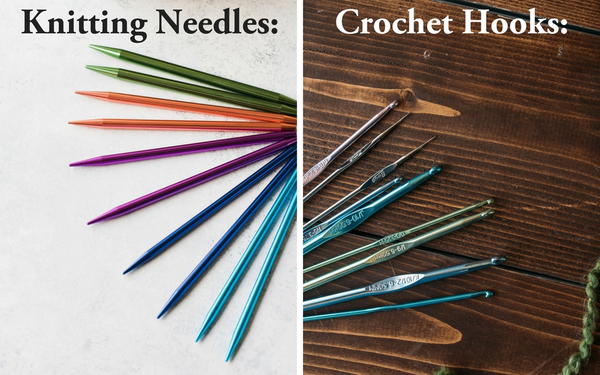
So, the major difference between the two is that you don’t use the same tools. Which a lot of people will say, “What are you knitting?” when you are really crocheting. Or vice versa. For crocheting, you use a hook, and for knitting, you use long needles. The better thing about crocheting is that you can see more progress than you can with knitting, depending on what you are knitting. However, knitting can look more flawless and neat, depending on the stitch you use.

Image result for knitting vs crocheting

Crochet

Now, I’m not a pro at crocheting, but I have managed to crochet a granny square, and I am working on a granny square blanket for my fiancรฉ. To me, at first, crocheting looked very difficult. Even when I tried to practice a single crochet square, I always seemed to mess up, somehow.

Image result for crocheting projects

After trying for a while, I gave up. More so, I took a long break and headed to YouTube. I am one of those people who can’t just read the book and look at pictures to do something; I have to physically see them doing what I am trying to learn.

I figured I would start simple and look for a video to make a granny square. I found the best tutorial by the Nervous Knitter. Link for the videohttps://www.youtube.com/watch?v=vDdXrZB1FOE

Since crocheting can be very fast, she slowed it down every step, and it was much easier to follow. I watched the entire thing, twice, just to make sure I did it right, and now, I know it almost by heart.

Image result for crocheting projects

With crocheting, once you get the pattern down, it’s like riding a bike; you don’t forget it very easily. Crocheting, you can do so much. The best part is that you can see your progress, so working on a granny square blanket, I see the progress, which makes me excited to keep on going!

Once I am finished with my fiancรฉ’s blanket, I will post a picture on here and show you how to do a granny square tutorial, as well!

Knitting

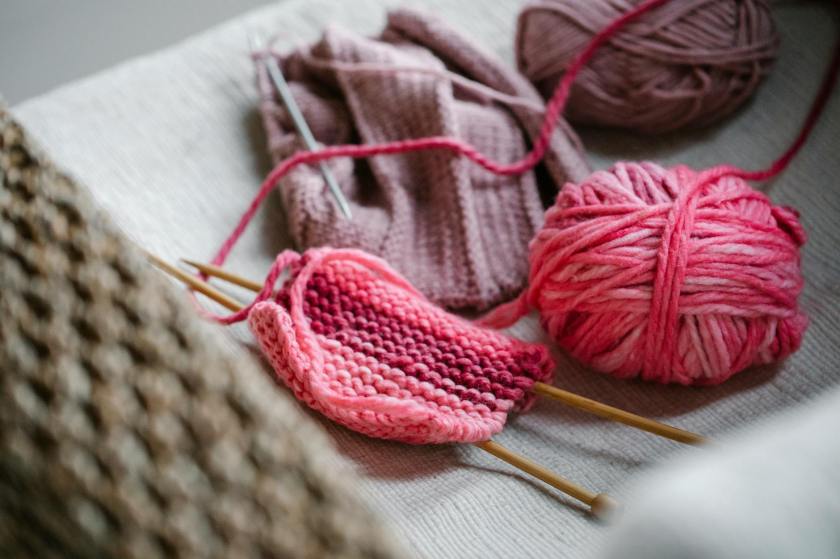
Knitting was the first thing that I ever did, or tried out. I knitted my son’s first blanket. It was very simple to do. At that time, I preferred to knit rather than crochet. The only problem with knitting, it felt like my project was never going to be finished.

Image result for knitting projects

Don’t get me wrong, knitting was very basic and was easier to start out, but once your project gets bigger, you don’t have very much, to me, encouragement to keep going. Plus, I also seemed to lose a stitch or two, and my project would come out all uneven, and with me trying to make things perfect, I would restart multiple times.

But there is also another way to knit, without using the needles. You can loom knit as well. I just got a giant set of different looming sizes and shapes. (Next Tuesday, I will be going to a tutorial on how to loom knit a scarf!)

Image result for loom knitting

Knitting was something that I did for my latch hook pillows, the backings of them. I knitted them like I was making a blanket, but the needles can only hold on so much, unless you have the needles with the wires, which I don’t currently have.

Image result for knitting needles

Although knitting was an easier way to have my projects looking a little neater, not perfectly neat, but neat as a way, there were no unwanted holes, just a solid pattern. Knitting, to me, is more for making a really great scarf or, if you have the knitting needles with the wire, a hat or even a blanket.

Which one would be better for beginners?

I would try out knitting first, just because the concept is simpler and easier to follow than crocheting. Try something simple, such as knitting a scarf or a square, just to get some practice.

Image result for knitting needles

Once you feel like you know the basics for knitting a simple scarf, try challenging yourself and try to crochet a granny square. If you are like me and need to physically see what is going on, I am going to try my best and make little tutorial videos to help you guys out.

If you get really frustrated with any of it, take a break. Taking a break from your work is okay to do! Especially if you have children, and they are making it difficult to work on anything, its okay to put your project away and come back to it. Your work will still be there when you want to go back to it.

Another tip that really helped me out, before jumping into crocheting or knitting, or any project, take a step back and just watch videos of people doing those things. Watch how they do their work and whatever tips or things they do, that you feel or know would help you out, use them!

Watching other people crochet and knit, I’ll pick up the little things that they do, so that I can used to my advantage or help better myself in crocheting or knitting different things.

Also, if you aren’t sure what kind of knitting needles or hooks you should get, try some out. I prefer metal ones, just because it’s easier, although I haven’t tried out the wooden or ones with handles. I literally just bought a set from Wish and have stuck with them ever since, although, because they don’t have a handle, my hands can get sweaty, and it makes it harder to work the yarn.

I do recommend trying them out and seeing which ones you think, for yourself, make it easier to crochet or knit.

Image result for knitting needles

One thing that I highly recommend is to work with bigger yarn! I know a lot of people say not to because it will make it harder to work with the thinner yarn, but it will let you be able to look up closely at how it is done. So that if you feel you made a mistake, with the thicker yarn, with the bigger yarn, you will be able to see clearly what you did to mess up.

So, next Tuesday, I will be doing a step-by-step on how to loom knit and a simple figure 8 scarf.

Posted in Mom Talk

My Little Heart Warrior

**WARNING**

*This is a very true story. Tissues might be needed. It was difficult to write this, but it is something that helps me express what had happen with my son and his short journey. Please, just take caution when reading.*

There are a lot of ‘Mom Blogs’ out in the web. Some talk about how to take care of a child or their experiences with their child’s first achievements in life. But I haven’t seen very many that talk about the experience of having a child with a heart disease. Let’s just say that it’s very much an emotional rollar coaster.

Well, that’s what it was for me. My son was diagnosed with HLHS (Hypoplastic Left Heart Syndrome) when I was 22 weeks pregnant with him. Basically, HLHS is when the left side of their heart is either underdeveloped or never formed. Once he was born, he would have to go into surgery within the first week of life.

Altogether, he would have to go through 3 major surgeries with in the first 3 years of his life. Now, I was 18 when I was pregnant with my son, Liam. Image being me at 18, and being told that there was a very big change that he wouldn’t make it. Liam’s everyday life would be either life or death.

The happy family that my fiance and I imaged had changed. We didn’t know if he would make it to his first birthday. We had so many unanswered questions. Would he be able to play sports when he gets older? Would he need a heart transplant in the future if his starts to fail? Or the big question that we wanted to know: Would he ever make it home from the hospital?

Because of how serious his disease was, we weren’t able to have him, in our state. We were recommended to go down to Boston Children’s Hospital. We were told that they deal with congenital heart defects everyday. It made me and our family feel a lot better about having Liam there.

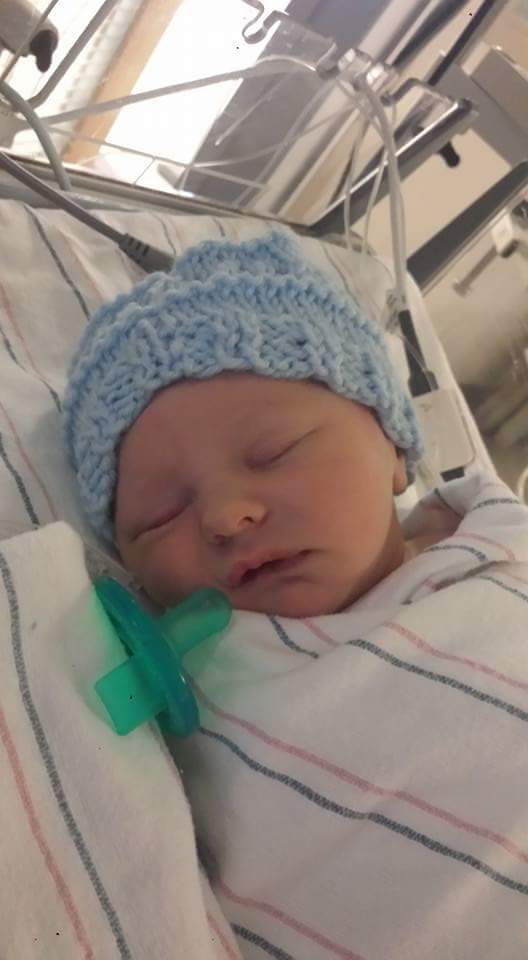
Once Liam was born, he was the most beautiful baby boy that I ever laid eyes on. You couldn’t see that there was anything wrong with him, but on the inside, there was a struggling heart that we would of never noticed.

As soon as I hear him cry, I started to cry myself. They cleaned him up and gave him medicine, to keep the values from closing. We could only hold him for a minute before they took him up to where he needed to be.

I finally got to hold him longer, later that day. I wanted to keep holding him because I knew that once he had his surgery, it would be a very long time until we were able to hold him again. They planned for his first surgery to be on June 27th, 2016, 3 days after his birth.

My fiance and I spent the entire day with him, holding him, getting as much closeness as we could. Until, the morning of his surgery came. We walked down with him, until we got to the point we weren’t able to go past. We both kissed his and held his little fingers. Praying that god would watch over our little boy.

During that day, we got out of the hospital, trying to get our minds off of the fact that they were doing surgery on our son. I wanted to wait all day, but my fiance and I agreed it would be best to go out and get some fresh air. We got frequent updates, while Liam was in surgery. It made me feel better that someone cared enough to let us know that everything was going smoothly and that they would keep us posted until he was our of surgery.

Once they called to let us know that he was doing great, they told us that he was all set to see visitors. I was nervous and scared to see how he looked. Even when we got closer to his room, tears already started to pour down my face.

As a parent, you never want your children to go through surgery or be hooked up to anything. Seeing Liam for the first time out of surgery, was life changing. His chest wasn’t closed, they keep the chest open for a few days to make sure everything is working out fine before they close it. Every time I would go to see him, I asked that they covered his heart, just when I was in there. I don’t know why, but I felt uncomfortable.

As weeks went passed, they finally closed his chest and slowly started to take him off some medication and his breathing tube. We were finally able to hold our son again, after about 4 weeks from his surgery.

We thought that things were going great, he was able to leave the NICU and move over to what they called was ‘The Floor’, meaning that Liam still needed nurses, but not 24/7, like he did in the NICU. The doctors said that once he was able to start eating from a bottle or breast and a few other things, he would be able to go home.

Day 2, of being on ‘The Floor’, was the most horrible day of my life. The nurse had come in to give Liam his medicine and he was being fussy, so she suggested that I pick him up and rock him. All of a sudden, my worst nightmare had happen. He stopped breathing in my arms.

The nurse took him and pressed the code blue button, 7-8 other hospital staff rushed in to help, they took him back over the NICU. I followed them, shocked and frighted. My fiance rushed over to the hospital, they wouldn’t allow both parents to stay in the room together, so he had to stay at a place that was a mile away from the hospital.

My hands wouldn’t stop shaking. I didn’t know what to do, they had a nurse stay with me until my fiance got there. All I could say was, ‘he stopped breathing in my arms.’

They did CPR on him for 45 minutes until they were able to get on bypass. They didn’t know what happened. They figured it was a blood clot that blocked blood from reaching his heart. The told us that they were going to try and take him off bypass slowly and hope for the best, but if he was still on it after a week, there was a good chance that Liam wouldn’t make it.

During the time he was on bypass, Liam had brain damage, from getting CPR for too long, kidneys and liver were starting to fail. We ended up sitting down with a few doctors and his surgeon. We also got our immediate family to come up, for the support. They said that once we can get him off bypass, that they would be able to determined if he would still have brain activity, but by the looks of what they were trying to read, he had little to none brain activity.

My fiance and I looked at each other and prayed that god wouldn’t take Liam from us. He did. On July 23rd, 2016 at 4 in the morning, our son had passed away. When they took him off bypass, he was doing fine, but slowly started to decline. My fiance, his mother, my mother and I, were with him when he passed. I held him until his heart stopped beating.

Everyone I knew, their baby got to come home in their car seat,ย  but Liam never even left the hospital. He didn’t come home in a car seat. He came home in a box. Every mother’s worst night mare.

It was really hard to write this, but I think it’s time that everyone knows that not every baby born in this world is perfectly normal. I rather tell people my experience than let every mother or soon-to-be mother think that everyone’s child is born healthy.

Because my son wasn’t born healthy. His heart disease was something that not even doctors know how it was caused. I’ve googled it thousands of times, no one know’s why HLHS happens or any congenital birth defect.

This year will be two years that Liam has been gone. I’ll never get to see him on his first birthday or see him walk or talk for the first time. He was two days shy of being a month old.

But there is one thing that I want to let everyone know. Whether your child was on this world for a day, month, or years, you can’t just get over it. People think that because Liam wasn’t even a month old, that I can just get over it.

To this day, I still cry about him, not as much as I first did, but I do still cry about him. I always will. He is my little Simba and I miss and love him so much.

On a happier note, Liam gave us a surprise from up above. We were blessed with our daughter, Isabella on October 25th 2017, our rainbow baby. I believe that he knew we were ready to be parents, as cheesy as it may sound, and gave us our healthy daughter.

Every year on his birthday, we release balloons, in honor of him. In honor of our heart warrior, our little Simba. Now, our Simba is looking down and watching over his little sister from up above.

Liam Michael (June 25th, 2016 – July 23rd, 2016)

Liam Michael
Our little heart warrior


Thank you for reading the short version about my Liam. I’m currently in the process of writing a book about the entire experience that goes more in-depth, and it talks more about what I went through during my pregnancy with Liam and the aftermath after he passed.

I’m not sure when it will be released, but I will let you all know when it does get released, as this is Liam’s 10th year he hasn’t been with us, and I’ve honestly been thinking a lot about it and really want to make it into an actual book.

Posted in Arts and Crafts

Intro to Latch Hook Projects (Craft Odysseys)

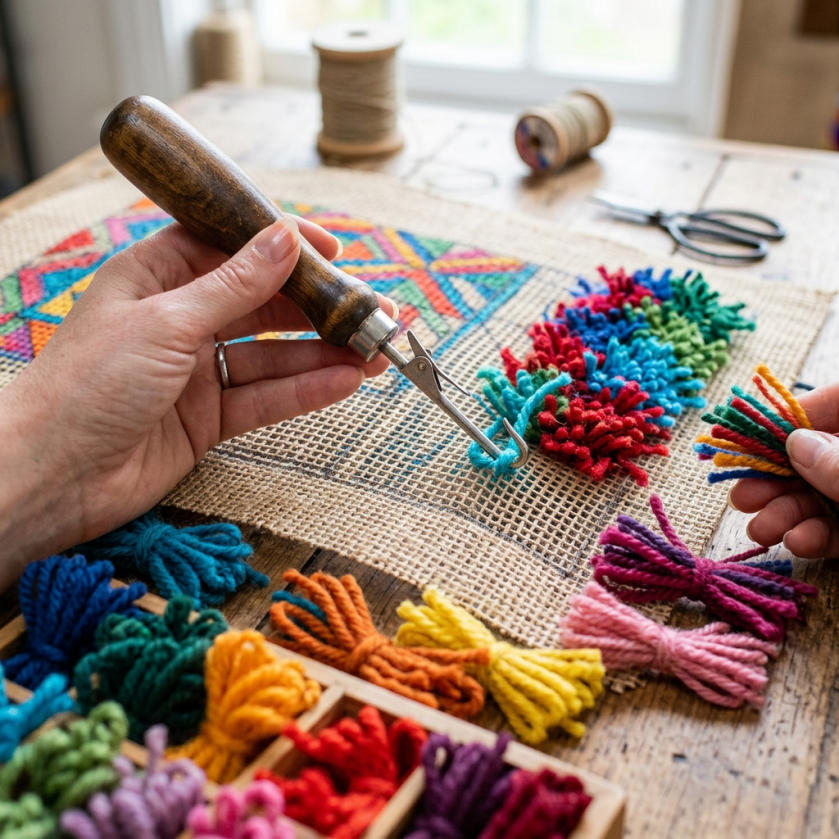
I mentioned that I have worked with a few latch hooks, but I never went in detail on what they really are. Latch Hooks are like rugs that are made up of yarn on a grid. There are many things you can with latch hooks. I personally, like making pillows, but they are a lot of hard work.

Image result for latch hook grid

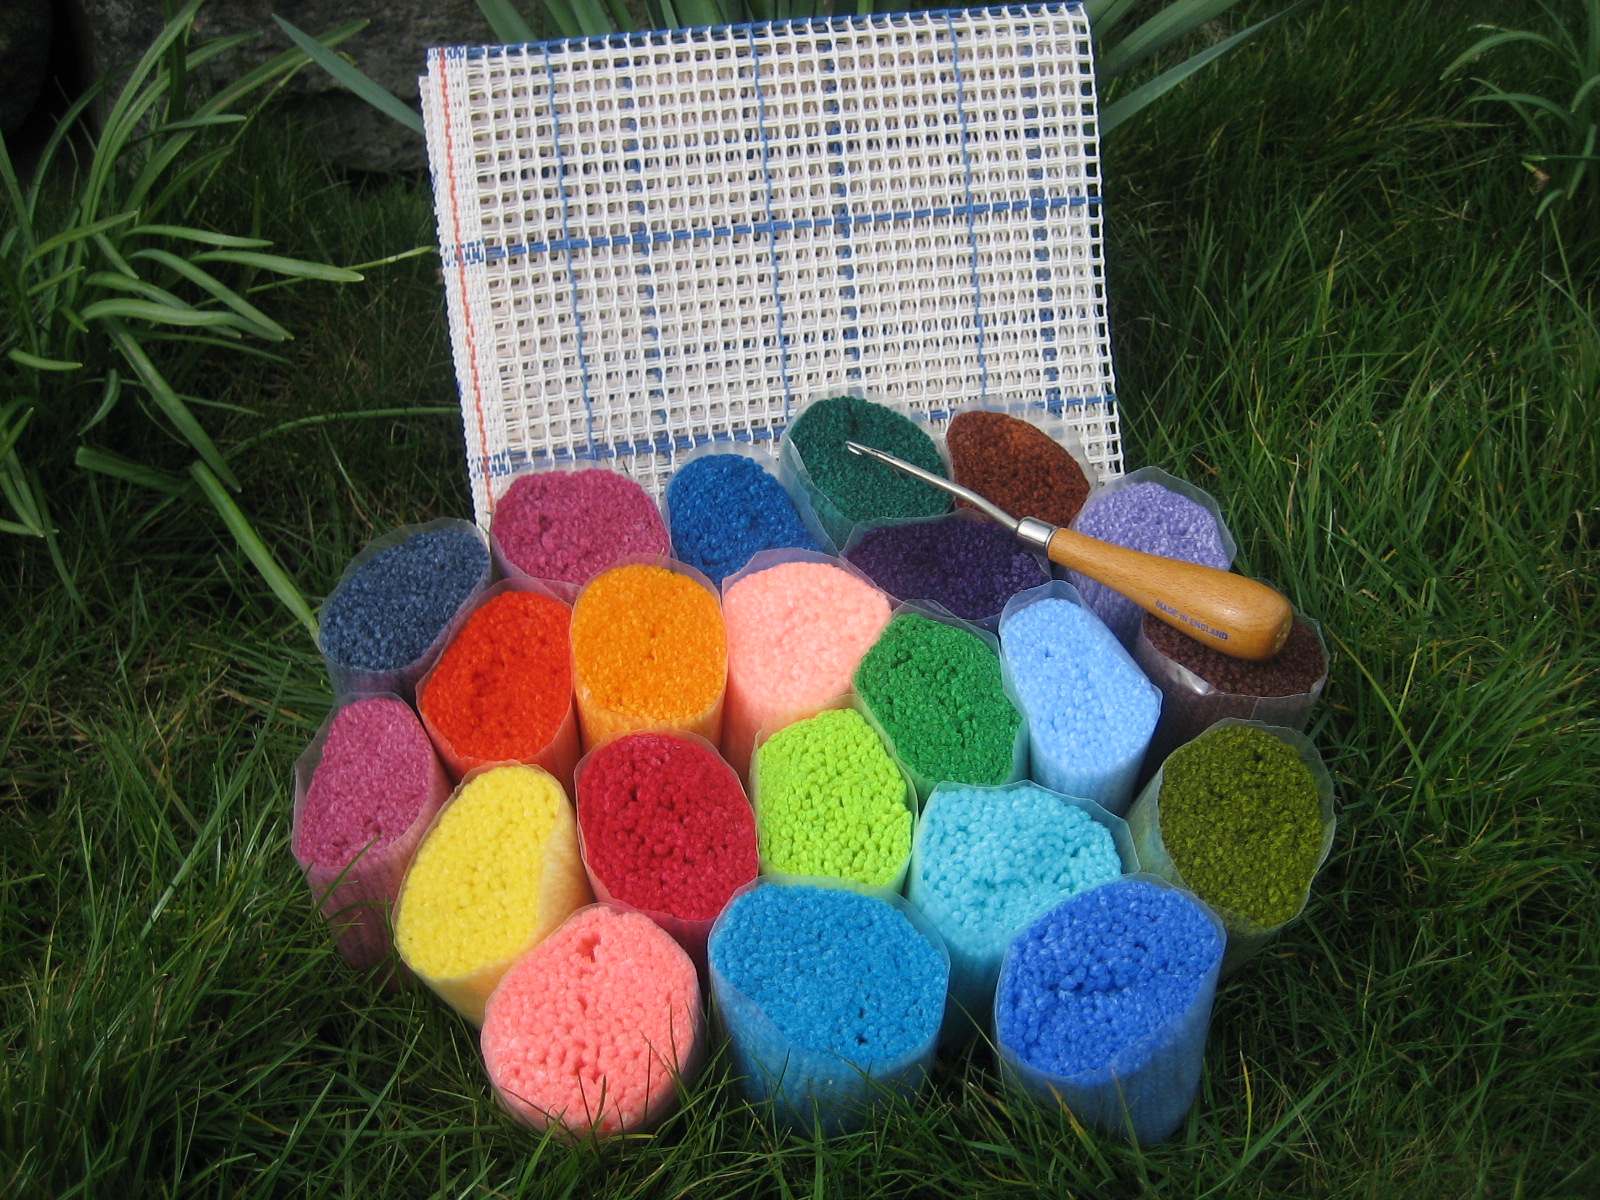
The picture above is what a latch hook looks before you start or add on anything. Also, that is the tool you use to ‘tie on’ the yarn. Now, if you are intersected in making one of these and you are just a beginner, I recommend buying a latch hook kit. It will come with everything you need: the grid, the cut up yarn, and the hook tool.

Image result for latch hook kit

Not all kits are the same! The picture above shows what you would get in a kit, but be warned, not all kits have their colored yarn organized perfectly like this! Some grid might actually have the print of the picture already on the grid, to help guide you through the process.

Also, if you haven’t noticed, most of the latch hook grids have multiple blue squared on them, that helps with knowing where to start, it you aren’t lucky enough to have a kit with the picture printed on the grid. Most of the squares are 10×10, by counting them, but some grid might be different and be like a 10×9 or 9×10.

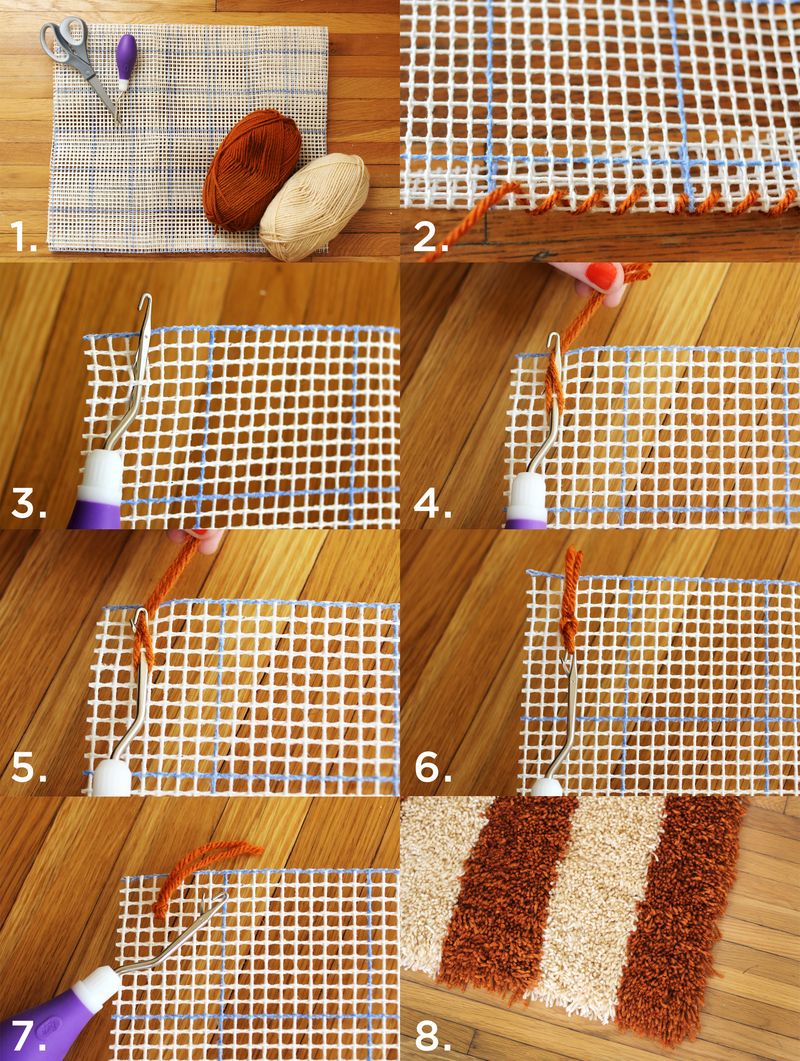
Image result for latch hook how to

The process is very simple. I didn’t think so, at first, but it is very easy to do. The picture above with show you a little better than how I explain it.

  1. Take a piece of yarn, whatever color you need and wrap it around your hook, your latch hook tool.
  2. Take the hook, while holding on to the yarn that is wrapped around it, and insert into the grid, just the hook and make sure that the hooks open, as shown above.
  3. Next, take your end pieces of your yarn, remember, you still have it wrapped around you hook, and pull it into your hook, making sure that your latch hook tool flap, we will call it, doesn’t close. You have to make sure that stays open for this step!
  4. Then, take your latch hook and pull it through that square, where you want to place the yarn. The hook tool flap will close to keep the yarn in it’s place when you pull through the square.
  5. Last, but not least, tighten the knot and make sure it is on tight!
  6. Once that is done, you keep repeating until the project is done!

Image result for latch hook how to

Sorry, if I didn’t explain it very well. This picture above does a better job, but I figured I would give it a shot and try.

When you finish your project, you will noticed that you have extra strands of yarn leftover. Some kits will add more than enough to finish, other’s might give you enough to just barely finish the project. If you are like me and keep everything, keep the extra strands, just in case you need them for another project, you never know.

If the kit didn’t give you enough yarn, there is another way to get some more. You can always go to a craft store, or look online, and find the color yarn and cut it yourself, but using the size of what the kit gave you. Or, some craft stores will have the yarn cut up already for you, so if you are making the latch hook for someone, they have it for you to grab and go.

Latch Hooks is great for all ages, plus, if you are just starting to get into crafts and such, this would be the way to start out. You can do so much with latch hooks, they don’t just have to be a rug. They can be pillows, stuff animals, wall hangings, etc. They even have blank grids that you can freestyle.

The only downfall with the latch hooks, is that it can take up a lot of your time, sometimes. It’s nothing that you can pick up and finish all in one sitting, maybe if you are quick and did it all in one night, or had a small one to work with. This type of project is a pick up and finish later type of project.

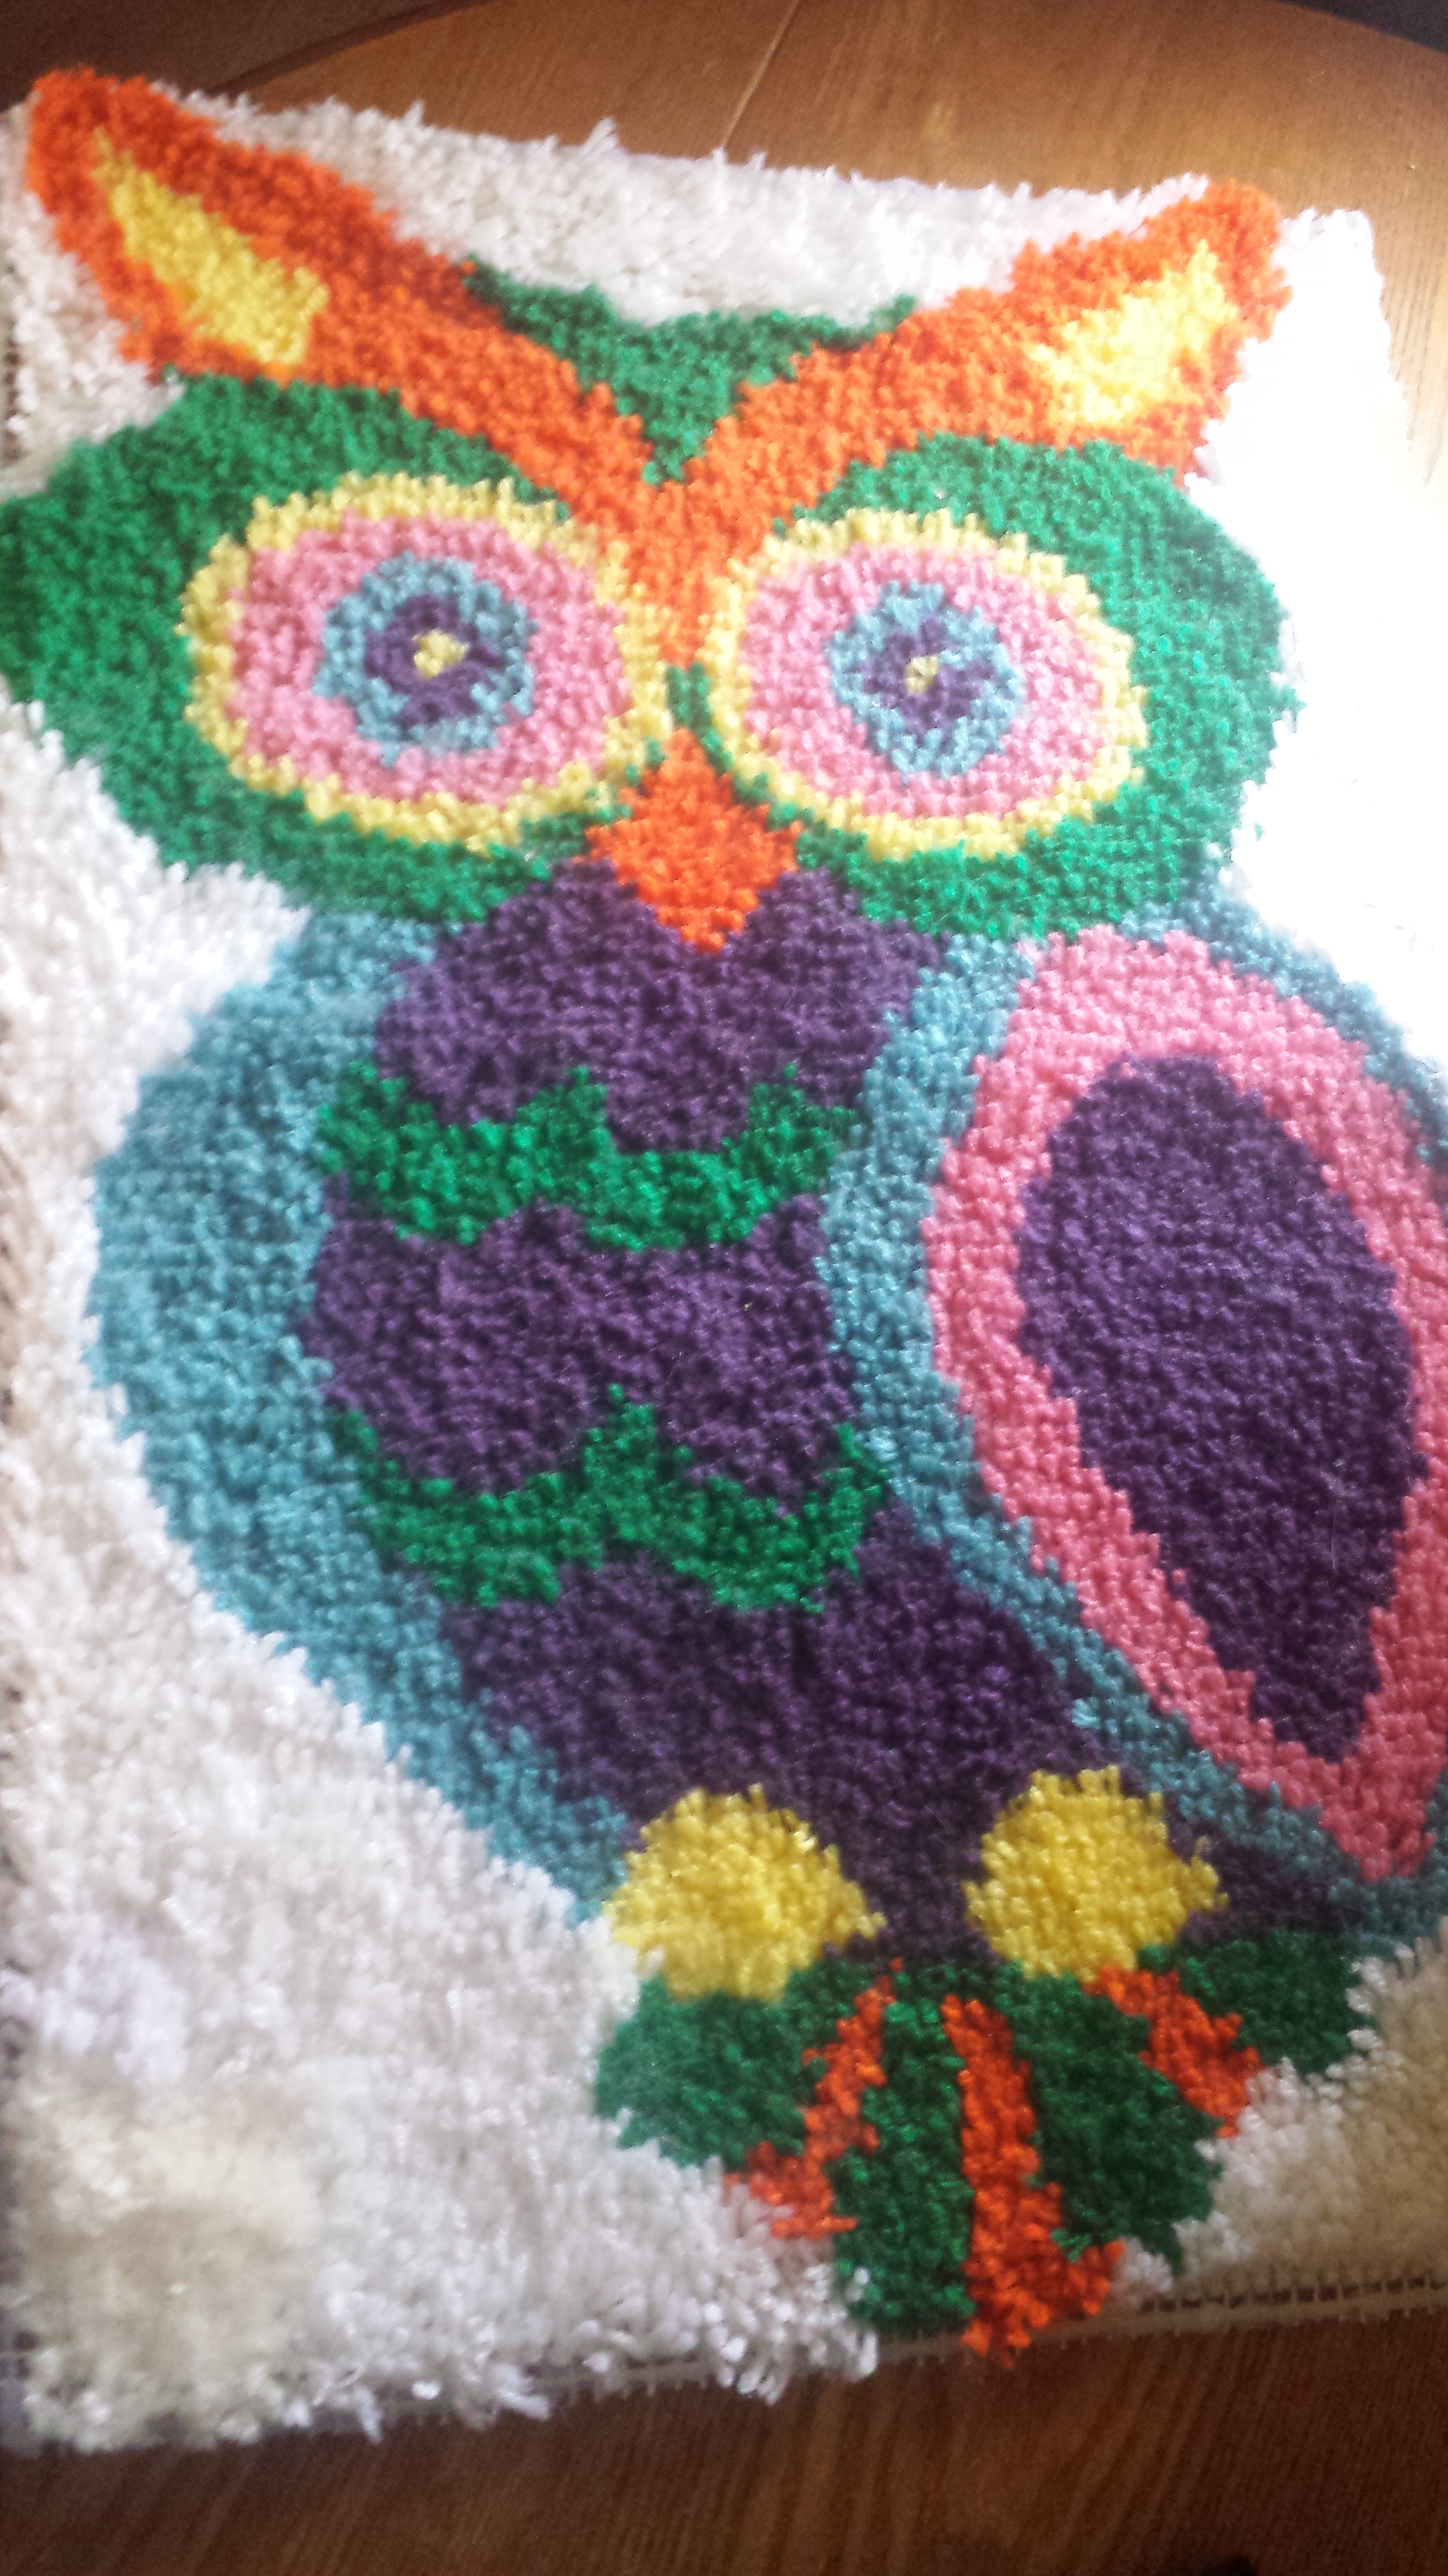
Anyway, I will had a few pictures below of the latch hooks that I have finished. So far, I have made two pillows and two pillow cases. None of which have been for me, but all the ones I have given away, have loved them. Not because I did a great job, but it was something that I made for them and those are the best kinds of gifts!

20170416_094834.jpg

20161212_185354.jpg20180218_152714.jpg20180612_175756.jpg

If you are very intersected in wanting to make one of these, check out your local craft store. You won’t have much luck at a Walmart or Kmart, but Amazon does have a very wide selection!

Posted in Mom Talk

How to Deal With Family Drama (The Mom Odysseys)

Whenever I hear the term “drama”, it immediately makes me think of high school. I honestly thought that drama would be out of my life for good after I graduated high school, boy was I wrong.

There is drama almost everywhere you look. Whether its at work, social media, or family, its bound to happen at some point. The best kind of drama is when its not happening to you. However, it is very difficult to avoid or stay away from since not everyone is going to agree with you.

Family drama can cause issues and damage, depending what the issue is at hand, it might cause some to avoid or even go low contact with other family members. Like for example, I don’t talk to my father, he did a lot of bad stuff in the past that I don’t want my children around him at all. It was a decision I made for my children and myself.

Because of this, it has caused issues for other family members, which I don’t care anymore. Some people think I should forgive him and others agree with my decision and respect me more that I don’t want my children around toxic people like that.

As a parent, you’ll always have to deal with drama, whether it’s family or in-laws. You tend to deal with more if you are co-parenting. The best advise for that drama is to remain civil the best you can. I think of it as getting along for my daughter’s sake since I would rather get along versus have my daughter stress over her parents fighting.

A lot of people, like myself, will tend to not say what’s on my mind, especially to people I know can get very emotional and take to heart. I don’t do it because I have no back bone, I do it because it keeps the peace and its not something I have to stress about it.

Over time, I’ve realized that I am a recovering people pleaser which I’m trying my best to stop doing that. Its hard, especially if you are like me and want to make sure everyone gets along. (You can tell that I’m a Libra!)

Here are the top suggestions for trying to avoid the unwanted family drama:

  1. Set Clear Boundaries – I have struggled with this one, a lot. Looking back, I wish I was more clear on what my boundaries were when it came to A LOT of things, but the past is in the past. Setting boundaries lets the other party know that this is the line and don’t go past it, but in a kind way.
  2. COMMUNICATE – Communicate is key to any relationship! Whether it’s family, your co-parent, friends, neighbors, etc. You need to communicate directly. In a nice way, or in a way that can help you get the other party to understand.
  3. Don’t Gossip – I know this is hard for ANYONE to do, especially when its family. When its family, its kinda hard NOT to gossip because if you don’t hear about it at all, you’ll find out or hear others gossiping about it at the family reunion or holidays. Not gossiping can help with the spread of miscommunicate. Which can have a snowball effect on its own.
  4. Find out what triggers others to react – Especially when you are telling someone boundaries, before you react, think about what tone or words will trigger this person so that you can avoid a blowup. Before you react, count to 3 and take a deep breathe. I do this especially because I’ve react before thinking about how to say something and it doesn’t go well.

These are a few things that can help you, but don’t be upset if they don’t work. There are special cases where NOTHING works and you are stuck with trying to please a person who cannot be pleased.

One thing that helps me, is journaling. Looking back at how I felt in that moment and trying to understand how I could handle the situation differently. If its something I really don’t want to remember, I’ll rip it up or burn it and its like a sense of relief off my shoulders.

What are the best ways you have handled family drama?

Posted in Mom Talk

How To Deal With Unwanted Advice (The Mom Odysseys)

Once you find out your expecting your first child, its an amazing feeling! Your excited to experience being pregnant and feeling your child grow to giving birth and watching them grow. However, the moment you get pregnant, the unwanted advise will start to kick in.

Some people are very genuine, but there are others that will pull the whole, “When I was pregnant,” or “I raise my kids this way.”ย  It can be very overwhelming and it does make you very cautious about how you will raise your kids because you’ll feel like you need to raise your kids the way they are telling you.

Best part, you don’t NEED to take their advise.

I would nod and thank them anyway. I was always raised to be kind and respectful to my elders or anyone in general. I would say usually, “Thank you for the advise, I’ll keep that in mind.” Saying something as simple as that is sweet and perfect to use.

As a mom, you will get told by everyone how to care for your child. From your family to doctors to strangers. Even before the baby’s born, you will be told how to even take care of yourself.

What’s important is what’s best for YOU. If you aren’t sure about something, whether when you are pregnant or kids, ask your provider, they would know what is best. Of course you can always go to your mom, but if you really are unsure, going to a professional would be the best advise that you can get.

When I was first pregnant with my son, I wasn’t as vocal as I wanted to be. It was all new, exciting, and I was scared shitless. I was worrying about all the wrong things that could happen with the pregnancy, especially with it being my first. I was even more overwhelmed when I found out my son was going to have a heart condition.

Even when they knew about his heart condition, I still got the unwanted advise. I don’t think many people understood that with his heart condition, it was all together going to be a different situation. I just kept to myself and thanked them anyway since I was more worried about if my son was going to make it.

My daughter, it was completely different. I put my foot down to a lot of stuff. I’m still trying to make sure that peoples advice doesn’t change the way I want to raise my kids. Plus, we as moms, get judged on everything.

With my more recent daughter, I did get some advise, but honestly I did take most of it in consideration since there has been a huge gap between my oldest daughter, to my youngest and there had been a lot of changes since she was little.

To me, I will take the advice into consideration, but if it’s something that I, as a parent, will not do to parent my child, then I speak up. Sometimes, I can’t speak up to others about this because I’m afraid of hurting their feelings, but I have learned that when it comes to you parenting your kids, the only feeling that matters is your kids and yours.

There are three ways you can handle unwanted advise:

  1. Ignoringย  it – This is what I usually do, if a stranger were to approach me with unwanted advise. I usually will nod my head. Sometimes, I do it with family, its easier to do, if you don’t want to make a big deal out or you know it will turn into a giant fight, this would be your best go to.
  2. Speaking up, in a polite way – If you are a person that voices your opinion, but don’t want to offend anyone. This would be more towards close friends, maybe family. Telling them in a polite way, will make it seem not as harsh as bluntly coming out and telling them what is what.
  3. Bluntly telling them straight up – I only go this far, if I’m frustrated. If I have had a bad day and didn’t have any coffee, I snap. I usually will only snap at family, because they have been in my shoes. Plus they understand that they would rather me snap at them versus my kids.

There is one thing that we always need to keep in mind. How we parent our kids, may not be the same as other, but we should respect how others parent. The world we live in now, there are too many people judging before they know the full story, but when it comes to advise, we need to handle it as we feel comfortable.

Posted in Mom Talk

Why You Shouldn’t Smoke Around Your Children (The Mom Odysseys)

Back in the day, we didn’t know how bad smoking cigarettes can be. Now, you don’t see any commercials promoting cigarettes or tobacco. If you do, its very rare to see an add for cigarettes. No matter how much people hate it, there are people who still smoke today and I don’t think it will go away anytime soon.

I’ll admit, I have tried a cigarette a few times, but thankfully it wasn’t something I got addicted to. It also helped that most of my family didn’t smoke around us either, which made me grateful I didn’t get into that. I’m actually shocked that I didn’t start smoking when I was living with my ex, who ask smoked as well as his family.

Even though I have never became addicted to it, I could see how difficult it is to try and quit. I watched my ex tried to quit, but would always cave when his family was around because they still smoked. He almost had quit for a full year before our daughter was born to then give it up the day after we had her.

Back in the day, people were smoking all the time with kids around. In public places or in their own homes. No one realized the dangers until more research was done to show and prove that they can kill you faster than eating fast food every day. They also found out that second hand smoke was just as bad as smoking the cigarette.

Which is why I will keep my kids away from cigarette smoke as much as I can. Smoking is a bad habit, but you shouldn’t make others or your children have to deal with your habit. I know so many people I went to high school where if they lived in a household where their parents smoked, 9 times out of 10, I saw them pick up the same habit.

Even when you are in another room or holding up the cigarette away from the child, they can still inhale the second hand smoke. Especially in a car. Rolling down the windows WILL NOT prevent the smoke from getting to the child. Thankfully in Maine, you can get fined for smoking in the car with any minor under 15 or 16.

As a mother, who had a child with a heart condition, it’s even more fatal. I’m one of those moms that will not go into a house or car if it smells like cigarette smoke. I was never around it and I want my kids to not be around it.

I will be making sure that my kids don’t get into that awful habit. My daughter knows whenever she sees a cigarette to think of it as a ‘cancer stick’. Since one of the possibilities with smoking can be getting cancer from it.

I’ve lost family members because of their smoking habits, I don’t want to risk my children’s life just because someone needs to have a cigarette.

Posted in Mom Talk

Being a Stay-At-Home Mom (The Mom Odysseys)

Image result for stay at home mom

A lot of moms don’t have the pleasure to stay home with their children nowadays. In order just to live, you need both parents income and even that can barely keep you afloat. Even then its still a struggle to afford daycare on top of all the other bills as well.

Back in the day, the husband would be out working, while the wife stayed home to care for the kids, keeping the house clean and in order, and as well as making sure that there was a cooked meal ready for when the husband got home.

Being a stay-at-home mom isn’t for everyone. I honestly never really thought about being a stay-at-home mom much until after I had lost my son and got pregnant with my daughter that I didn’t want to miss out on her growing up and reaching milestones that I would never get to experience with my son.

After I had her, I knew I would have a very difficult time leaving her when I had to go back to work. So, her father and I decided that being a stay-at-home mom would be the best thing for not only me, but it would save us on having to pay for childcare as well.

At the time, I didn’t have my license and the only places I could walk were just to my mother-in-laws, which I didn’t do much because we lived on a very busy street. Not to mention, I was living in a trailer park that also wasn’t close to any store at all either.

We did have a mini backyard that I had a swing that I could go out on, which was nice to have, but I felt very alone during the day and even more at night. Since my daughters father worked night shift, I barely had time with him during the day before he had to leave for work.

I did feel very alone, even though I was with my daughter, I felt so alone. The social interaction I would get from her father, was more of what bills need to be paid, what groceries we needed, and what we were going to do the weekend. I felt like I was on zombie mode.

Which is why I started to get into blogging more and even had a pen pal that I would e-mail just to stay sane. Sure, I had my family I could call and text, which I did often, but they didn’t really understand what struggles a stay-at-home mom can go through.

I become very depressed after the 2nd year of being a stay-at-home mom. I loved being able to spend time with my daughter and watching her grow up and learn new things, but I also hated being stuck and alone most of the day.

Thankfully, I did manage to get out at least once a week when my mom would come on Sundays. We would do our usual visit to see my great-grandmother or do something fun for the day either visiting family or shopping or just getting out of the house.

The sad part was, the moment I got home, I was alone again.

My depression got so bad to a point that I didn’t think I’d ever get to the point of not being here. However, the voice in my head kept telling me, “your daughter needs you.” That was the thing that kept me going, but it also terrified me of how she would have to cope if I went through with it.

Thankfully, my mom helped me get myself out of the tunnel of darkness and back on my feet. After the 3rd year of being a stay-at-home mom, I got a job and started working again.

After that, I moved in with her, got my license, bought my first car, and worked on myself within the first 6 months of leaving my ex. As much as I loved spending all the time in the world with my daughter, I was slowly losing myself.

I never regret being a stay-at-home mom because my daughter and I had lots of fun and she always made me smile, especially on my bad days. If I had to go back and do it again, I think I would, but I would find a remote job so that I didn’t loose my mind completely.

Being a stay-at-home mom is hard, but the memories and watching your child grow up and hit milestones, is priceless. I really wish we didn’t live the way that we did so that more mother’s could experience it for themselves for at least the first year.

I wish I did that with my youngest daughter that I had back in February of this year, but with how my current living situation is, it would be difficult to do. I did take a longer maternity leave with this one, but ended up going back to work shortly after.

Overall, choosing to be a stay-at-home mom has is ups and downs, however, it is up to you to see if that lifestyle is something for you. After being back in the workforce, I personally wouldn’t be able to do it again, unless I was working from home.