Posted in Crochet Blanket 2019

Temperature Blanket Update 2019 – August

August has finally ended and fall is closer than we know it! Temperatures have stayed the same for the most part, but now are starting to get a little cooler as we watch the leaves change colors we watch the end of summer slowly turn into fall.

I did use a different yarn for the last few 80 degree days, but I have a feeling we won’t have any more of those days in the future. I can’t wait to slowly watch our colors go back into the blues and purples.

20190903_125500.jpg

I also wanted to note that I will be putting an update on how I would redo or change anything from this year’s temperature blanket because as you can see, this is pretty huge for a blanket, let alone, it’s bigger than my bed, even sleep on a queen!

Anyway, here are the colors that I used, just in case you forgot what each of them meant.

20181222_124142
100 degrees – Fire Red (I Love This Yarn)
90 degrees – Pumpkin (Red Heart Super Saver)
80 degrees – Bright Yellow (Red Heart Super Saver)
70 degrees – Jelly Bean (I Love This Yarn)
60 degrees – Green (Main Stays Basic Yarn)
50 degrees – Turqia (Red Heart Super Saver)
40 degrees – Soft Blue (I Love This Yarn)
30 degrees – Dark Orchid (Red Heart Super Saver) *Changed to the following – Violet (Red Heart With Love)
20 degrees – Orchid (I Love This Yarn) *Changed to the following – Orchid (Red Heart Super Saver)
10 and below – Light Gray (I Love This Yarn)


How do you tell which color to use?

I, personally, go with the overall temperature. So, let’s go by today, for example:

Today in Maine, the overall temperature is 17 degrees. I would choose the light gray.

Let’s say that it was an overall temperature of 22 degrees, I would choose the Orchid color. All my temperatures, for my colored yarn, has to have the same number first number. If that makes any sense, I’m sorry if it doesn’t!

What was the highest temperature for this month?

So, the highest has been 90, we never reach a 100-degree day, which I was hoping to at least happen once. I do go for the overall highest temp, but its never been 100, but has gotten very close to it!

What was the lowest temperature for this month?

The lowest, we actually hit a 60-degree day. We have had a lot of 70 or 80 degree days but finally hit a 60-degree day this last week. I believe we will start to see more of those to come in the upcoming weeks!

Do you post daily updates?

Yes, I do. On my Facebook page, I post a picture of the square for each day. I also tried to post every week’s worth, but it was hard to keep track of, so I’ll be posting monthly and daily instead.

If you haven’t liked my Facebook Page, here is the link below! It keeps you posted and updated on my temperature blanket and any updates for my blog and YouTube channel, as well!

https://www.facebook.com/katiesblog96971617/?ref=bookmarks

Posted in Crochet, Easy Patterns

Crafty Sassy: Crochet Travel Bag (Easy)

Hey Dearies! Back with another super cute pattern! This is a market back that I had a blast making! Plus it was super simple to make as well. I ended up making this for my nieces 5th birthday and she loved it!

I would say that this bag a normal size for a bag, it’s not huge, but it’s big enough to fit what you would normally put in your purse. Well, for me, but you can use it for anything!

This pattern is going to be split into 3 parts. The base, handle, and gussett (which is a long part than connects both of the bases, I will explain more as we get there to hopefully make a little more sense).

Let’s begin talking about what you will need for this project:

  • Medium Yarn
    • Make sure you have 2 skiens of the colors you want to use. You will be working with 2 strains of yarn with this project.
    • I used Red Heart in white and orchard. You don’t have to change colors unless you want to, but I did just to see how it would look like.
    • 5.0 mm hook
    • Sewing needle
    • Stitch markers

Base and Handle (Make 2 of these)

Grab 2 strains of yarn, of your choice, chain 37. 

Row 1: Single crochet in the second chain from your hook and in each chain across. Turn. (36)

Row 2: Chain 1. single crochet across. (36)

Rows 3-12: Repeat row 2. Once row 12 is done, you can change into another 2 strains of color. I dropped the white by cutting it and crocheting over it. I just grabbed the other end of the yarn I was working on to replace my white.

Note: You don’t have to switch colors, but I did.

Row 13: Chain 3 (counts as a double crochet), skip the first stitch, double crochet in the next stitch and in each st across. Turn. (36)

Rows 14-19: Repeat row 13. Once at row 13, go back to using the 2 main colors that you were working with before. (You don’t have to do this unless you want to!)

Rows 20-27: Repeat row 2. Turn.

Now, we are going to be working on the handle part, we are NOT fasting off, not yet, but I just wanted to make sure before you start to fasten off. 

Row 28: Chain 1, single crochet in the next 6 stitches. Chain 50. Single crochet the last 6 stitches.

Row 29: Chain 1. Single crochet in the 6 stitches. Work a single crochet in each of the chains. Single crochet in the last 6 stitches. Fasten off and sew in any loose ends.

Once you have made two of the bases with handles, lets start on the gussett, or the part we are going to use to connect it all together!

Gussett (Make only 1 of these)

Working with 2 strains, again.

Row 1: Single crochet in the second chain from the hook. Single crochet across. Turn. (5)

Row 2: Chain 1. Single crochet across. Turn.

Repeat row 2 until it measures out to be about 30in. Fasten off and weave in any loose ends. Fold the gussett, from front to back, at the folded part, place a stitch marker on the row that is in the middle fold.

Assembly: 

There are two ways to do this:

  1. Single crochet around the long sides of the gussett and single crochet around the 3 sides of the bases. Sewing them together.
  2. Single crocheting all the pieces together, using 2 strands.

Whichever way you want to do it, is fine. I found that the first one made it a little bit easier for me to connect them, but I also wanted that nice thick border it has.

When you connect them, the short side of the gussett is the closest to the handles.

If you are single crocheting around, to connect them, make sure that when you get to the corner, you single crochet 3 times.

20190816_160722.jpg

There you have it! I’ve been one of those people that just love the crochet bag idea and I had to share this on with you all! A very simple pattern, but it can be tricky to assemble!

Make sure you follow my Facebook page for updates on my blog and more extra fun stuff! I do lots of giveaways!

https://www.facebook.com/katiesblog96971617/?ref=bookmarks


Posted in Beginner Patterns, Crochet

Crafty Sassy: Crochet Basic Squared Coasters (Beginner)

Hey Dearies! Back at it again with another super easy pattern for you! This even goes with the can cozies we made last week, but I will be adjusting the size so that it will fit all sizes!

If you want to make a can cozy to go with this, here is the link: https://katiesblog96971617.com/2019/08/06/crafty-sassy-crochet-can-cozies-beginner/

So, when it comes to coaster patterns, a lot of them don’t make them as big as they need to be for normal or bigger size mugs/cups. Sometimes the pattern’s picture is zoomed in, so you really can’t tell if they are that big unless you make them yourself.

20190813_083031.jpg

Let’s talk about what you will need:

  • Medium Size Yarn
    • I’ll be using Red Heart Super Saver in White and the border in the same blue mix as the can cozy.
  • 5.0 mm hook
  • Sewing needle

Let’s begin.

Chain 18

Row 1: Single crochet into the 2nd chain from your hook and in each remaining chains. Chain 1 and turn your work.

Row 2: Single crochet across. Chain 1 and turn. Repeat until your desired length.

20190813_080927.jpg

Note: I kept crocheting until the height of my coaster was about 4in. You also have to keep in mind that we are also adding a border as well!

Once at your desired length, fasten off and weave in your ends.

Boarder

Grab another color, or you can use the same color to make the base. I’ll be using the same blue mix colored yarn for the border.

Insert your hook on any side of your coaster. Chain 1 and single crochet across. When you reach a corner, make sure to make 3 single crochets in that same corner.

Fasten off and weave in any loose ends!

20190813_083001.jpg

There you have it! A perfect and simple coaster to make for your guest or just yourself. If you still want to make the can cozy that goes with this pattern, make sure to check out the link at the top of the page.

Make sure you follow my Facebook page for updates on my blog and more extra fun stuff! I do lots of giveaways!

https://www.facebook.com/katiesblog96971617/?ref=bookmarks


Posted in Crochet Blanket 2019

Temperature Blanket Update 2019 – July

Hey Dearies! With July finally coming to an end, it’s time to show you what our lovely temperature blanket is looking like! So, this month has been SOOOOO hot! Although we haven’t reached 100-degree weather, it has felt like 100 degrees on some days!

As you can see, our blanket looks different. It has an addition to it, and let me explain why.

So, as I have mentioned before, this is my first crack at the whole temperature blanket thing. I didn’t have a lot of time to really think this through and get the yarn I needed for the blanket.

I was gonna add the addition to the beginning of June, but totally spaced it, when connecting my squares together. I didn’t realize until I was in the middle of July that I wanted to do so. With that being said, I finished off July with the addition.

Let me tell you, I didn’t plan for the blanket to be this BIG, but on cold winter days, this will be the perfect thing to snuggle with on those chilly days. Anyway, take a look of it yourself!

20190731_125616.jpg
January, February, March, April, May, June, and July.

I tried my best to get the entire blanket in the shot, but for the future, I will be taking two pictures, just to make sure that I get the entire blanket in the shot! Literally, I was moving furniture around just so I could get a full shot of how big it is.

This is in my living room if you were wondering. The bigger it gets, the harder it will be to take photos, but I will try my best to keep giving you an update on it!

20181222_124142
100 degrees – Fire Red (I Love This Yarn)
90 degrees – Pumpkin (Red Heart Super Saver)
80 degrees – Bright Yellow (Red Heart Super Saver)
70 degrees – Jelly Bean (I Love This Yarn)
60 degrees – Green (Main Stays Basic Yarn)
50 degrees – Turqia (Red Heart Super Saver)
40 degrees – Soft Blue (I Love This Yarn)
30 degrees – Dark Orchid (Red Heart Super Saver) *Changed to the following – Violet (Red Heart With Love)
20 degrees – Orchid (I Love This Yarn) *Changed to the following – Orchid (Red Heart Super Saver)
10 and below – Light Gray (I Love This Yarn)

How do you tell which color to use?

I, personally, go with the overall temperature. So, let’s go by today, for example:

Today in Maine, the overall temperature is 17 degrees. I would choose the light gray.

Let’s say that it was an overall temperature of 22 degrees, I would choose the Orchid color. All my temperatures, for my colored yarn, has to have the same number first number. If that makes any sense, I’m sorry if it doesn’t!

What was the highest temperature for this month?

We have had a few days of 90 degrees, which are the orange squares. We haven’t hit 100 degrees, yet, but this is Maine. It’s rare for it to hit 100 degrees, but it has been 100 before in the past. It’s gotten close, but once it does, you’ll start to see some red squares when we do!

What was the lowest temperature for this month?

70 has been the lowest temperature we have seen, but only if we have a wonderful rainy day! Although, we have been getting a lot of thundershowers, that I HATE! Thunder scares the crap out of me and makes my anxiety go from 0-100 pretty quick when it comes to that.

Do you post daily updates?

Yes, I do. On my Facebook page, I post a picture of the square for each day. I also tried to post every week’s worth, but it was hard to keep track of, so I’ll be posting monthly and daily instead.

If you haven’t liked my Facebook Page, here is the link below! It keeps you posted and updated on my temperature blanket and any updates for my blog and YouTube channel, as well!

https://www.facebook.com/katiesblog96971617/?ref=bookmarks


Posted in Crochet, Easy Patterns

Crafty Sassy: Crochet C2C Phone Case (Easy)

Hey Dearies! I’ve got another free pattern for you guys and I can’t wait to show it to you all! So, as you all know, if you follow me on Instagram, I showed you one of my pieces that was a C2C (Otherwise called a Corner 2 Corner), that I sadly rushed and didn’t pay attention to the details and ended up taking it apart.

Now, I am currently been practicing with the C2C stitch and I figured this pattern would be an awesome idea, especially if you want to try and make this particular stitch. This phone case is a basic ‘sleeve’ case.

For this case, I ended up pulling out an unused skein of yarn that has been sitting in my closet of yarn, that I got for Christmas. I also know a LOT of people and family members who just LOVE camo stuff and I figured, why not use it for this!

Let’s talk about what you will need:

  • Medium Yarn
    • I am using the Red Heart Super Saver in Camo.
    • You can use whatever colors you wish, but using a mixed colored yarn makes it more fun!
  • 5.0 mm hook
  • Sewing needle

Let’s Begin!

Making the Base

First thing is first, grab your yarn and make a slip knot onto your hook!

Row 1: Chain 5. Double crochet into the 3rd chain from the hook. Double crochet into the next 2 chain stitches.

Row 2: Repeat row 1. *Slip Stitch into the opening gap of the last square you made, in the chain 3 space. Chain 2. Make 3 double crochets in the same gap that you made your slip stitch in. * Repeat * one more. Turn your work.

Repeat Row 1 and Row 2 until you reach your desired height. Mine has 12 squares for my height, I wanted to make it a little bit bigger so it wasn’t so snugged tight. 

When you reach the desired height, turn your work and slip stitch into the next 3 stitches. After that, Chain 2 and make your 3 double crochets. You do this same thing for your width as well. (I did about 13, making sure it wrapped around my phone, but adding an extra row, making it 14 just so it wasn’t as snug.

I know this can sound confusing, but if you need to watch someone do this, I will be leaving a link from Heart Hook Home, that shows you what you need to do. If you are like me, you want to see what you need to do, but once you learn to do it, you’ll catch on pretty quick!

This video was SO helpful when I was looking for a good C2C teaching video. You see, when you do a normal C2C, they have you chain 6 instead of 5, making the project have more of a gap between squares.

Anyway, how long you want to make your width, is totally up to you. I based it on how long it needed to be to wrap around my phone, but I added another row so that it wouldn’t be so tight.

Here is what it will look like:

20190723_085157.jpg
As you can see, my length is about 12 squares going up and my width is about 14 squares going across. 

Border/Sewing Together (Optional)

Now, for the next part, you can do of 2 ways.

  1. Single crochet around the entire base. 
    1. I went with the first one because it does make it easier to add the buttonhole to the case itself. It also makes it look nice and neat.
    2. When you single crochet around, make sure to make 3 single crochets in all of the corners. You’ll see why when we come to the next step!
  2. Fold it and sew it together. 
    1. You can do the second way, but if you are looking for an easier, and simple way to sew them together, step one is the way to go! If you are set on step 2, just skip down to the buttonhole step.

Once you have finished with step 1, grab your sewing needle, sew in any loose ends before we begin. Get enough yarn, that you will think will be enough, and thread your needle.

Note: I usually grab more than necessary, but the extra yarn that is leftover, we are going to use for the buttonhole or you can use it for any scrap projects in the future! NEVER THROW YOUR SCRAPS!

Once your needle is threaded, line the two ends together and tie a know. This will make it so that our sewing is a little thicker. Then start sewing! I went back an forth, going through both of the stitches from the single crochet.

Sew ONLY 3 of the sides, one of the short sides will be the opening for the case itself. Cut any extra yarn and weave in any loose piece of yarn. Any extra yarn we will be using for our next step!

20190723_093834.jpg

Here is what mine looked like, once I sewed around it all!

Buttonhole and Button

By the opening at the top, find where you want to place your buttonhole.

Slip knot the extra yarn onto your hook and insert it onto the top. Single crochet in that same spot.

Chain 20.

Note: You can chain more or less, depending on where you want your button to be, just remember, you need to make sure that it will reach the button. You can always sew the button to where you want it to be and then create the buttonhole. 

Single crochet into the next stitch/and or place.

Fasten off and weave the ends. Add your button and you are done!

20190723_094737.jpg
This is what mine turned out to be!

There you have it! I think these would be perfect gifts for stocking stuffers for the teens or adults. I won’t be surprised if you can fit a PSP or DS in these no problem!

Don’t forget to follow me on Instagram or like my page on Facebook. I update my Facebook page, a lot, so if you are wondering when I’ll have a new post or when I go live, that is the place to check out!

https://www.facebook.com/katiesblog96971617/?ref=bookmarks

Posted in Crochet, Easy Patterns

Crafty Sassy: Crochet Circle Coasters (Easy)

Hey Dearies! Back again with another super cute pattern! Not only is this super cute, but it is one of those patterns you can play around with the colors. I figure this would be the perfect time to show you how to make a coaster since we are in summer!

This pattern will have TWO sizes, since I’ve found most patterns, for coasters, are usually very small or not big enough for your super big mugs, which what I use on the daily! So, let’s start with what you need!

What you need:

  • Medium Size Yarn
    • I’m using Red Heart Super Saver in a light purple and dark purple.
  • 4.5mm crochet hook
  • Sewing Needle

Alright! So, let’s begin!

Make a magic circle with your main color.

Round 1: Chain 3. (This counts as your first double crochet.) Work 11 double crochet in the circle. Pull the tail of the magic circle to tighten and close the circle. Slip Stitch in the top chain of the beginning of chain 3.

Round 2: Chain 3. (Counts as your first double crochet.) Work a double crochet in that same stitch. Work 2 double crochets in each stitch around. Join with a slip stitch in the beginning of chain 3.

Round 3: Chain 3. (Counts as your first double crochet.) Work 2 double crochets in the next stitch. *Double crochet in the next stitch. 2 double crochets in the next stitch.* Repeat from * around. Join with a slip stitch in the top of chain 3.

Round 4: Chain 3. (Counts as your first double crochet.) *1 double crochet in the next 2 stitches, 2 double crochets in the next stitch. * Repeat from * around. Join with a slip stitch in the top of chain 3.

Round 5: Chain 3. (Counts as your first double crochet.) *1 double crochet in the next 3 stitches, 2 double crochets in the next stitch. * Repeat from * around. Join with a slip stitch in the top of chain 3. Fasten off.

This should fit most cups, if not, you can always add another row or so! Also, if you see your project curling up, stretch it out and adjust, if you have too. Now, if you don’t want to make the swirl design, just sew in your loose ends and create for your table!

Contrast Swirl

Since I am using a dark purple, I’m going with a light purple. You can also use white for any dark colors for the swirl part as well!

Insert your hook near the center of the circle, in between the next 2 stitches, from round 1 and pull up a loop. Insert your hook in between the next 2 stitches and pull up another loop.

Keep doing this around in the same manner, creating a spiral until you reach the end of the last round. Fasten off and weave your ends.

20181101_090147.jpg

You can make a set of 4 coasters, for your table, or make more so that you have them for when you have company over on a hot day, these will not only help keep the water droplets from soaking into your table but they will look super cute!

Tip: If you don’t like the fact that your coaster slips and slides on your tables, try taking a hot glue gun and make dots on the back of the coaster. Let them dry and they see if that helps prevent it from sliding around.

Make sure to follow me on my Facebook page! That is where I give most of my updates on my blog or Youtube channel!


Posted in Arts and Crafts, Crochet, Easy Patterns

Crafty Sassy: Crochet Striped Washcloths (Easy)

Hey Dearies! So, today I figured I would teach you how to create a simple washcloth! If you are very new to crochet, this would be the place to start! Creating washcloths are one of the most basic thing to crochet, not to mention, it helps you with learning how to single crochet.

When a beginner is looking for a project to practice on, washcloths are usually where they start from. You can make them with different stitches or styles! This particular pattern also shows you how to change colors and to create a simple single crochet border!

Let’s talk about what you will need:

  • Medium Yarn
    • This pattern requires two types of colors. You can use any colors you would like!
    • I’ll be using Red Heart Super Saver in White and Cherry Red.
  • 3mm hook
  • Sewing needle
  • Stitch Marker (optional)

Now, let’s begin!

Using your main color, chain 35. (I’ll be starting with the White first.)

Row 1: Single crochet in the second chain from the hook. *Single crochet into the next stitch.* Repeat from * to the end. Turn. (34)

Tip: You can place a stitch marker at the end of each row, it will make sure that you don’t lose track or make sure that you don’t add any unwanted stitches!

Row 2-23: Chain 1. *Single crochet into the next stitch.* Repeat from * to the end. Don’t chain 1 on the last row, we are going to change colors at this point! (34)

Should measure about 4 3/4in (12cm). Change to your other color. (I’ll be switching to the Cherry Red.)

Row 24-25: Chain 1 with your second color. *Single crochet into the next stitch.* Repeat from * to the end. Don’t chain 1, when you are the last row.

Switch back to your main color.

Row 26-27: Chain 1 with your main color. *Single crochet into the next stitch.* Repeat from * to the end. Don’t chain 1, when you are the last row.

Row 28-29: Chain 1 with your second color. *Single crochet into the next stitch.* Repeat from * to the end. Don’t chain 1, when you are the last row.

Switch back to your main color.

Row 30-31: Chain 1 with your main color. *Single crochet into the next stitch.* Repeat from * to the end. Don’t chain 1, when you are the last row.

20190709_114444.jpg

Row 32-33: Chain 1 with your second color. *Single crochet into the next stitch.* Repeat from * to the end. Don’t chain 1, when you are the last row.

Switch back to your main color.

Row 34-38: Chain 1 with your main color. *Single crochet into the next stitch.* Repeat from * to the end. Fasten off. Weave in any ends from switching colors.

20190709_121439.jpg

This is what it looks like the washcloth without the boarder. You can leave it like this, but for me, I think the border adds or makes it look better and evener.

Border

Grab the secondary color that you used for the stripes, and attach it to the side of the washcloth. You can start where ever, but I recommend not starting on a corner.

Chain 1 and then single crochet around your washcloth. When you get to the edges, make sure you make 3 single crochets in each corner.

Once you have reached to where you started, slip stitch into the next single crochet and fasten off. Weave in any loose strings.

20190709_123421.jpg

There you have it! A simple washcloth for you! This was the very first one that I’ve ever made. I was one of those beginners that just jumped into beginner patterns and never got a chance to create a washcloth.

The best part, you can use this in the kitchen, bathroom, or living room! Where ever you need it! However, when you do finish creating this, it will be very stiff. The more you get it wet and use it, the more it will start to loosen up.

I recommend hand-washing these in lukewarm water, and having them air dry. Once they begin loose enough, you can put them into the dryer, but I would be careful. I’ve had a few projects unravel in the washer before.


Posted in Crochet Blanket 2019

Temperature Blanket Update 2019: June

Hey Dearies! Another month as went and gone, but we officially in the summer months for sure! I’ve already had to re-stock on the 70 degrees weather since I really didn’t plan this too well, but it was something that was completely new to try out.

Lately, it has been either raining or just too hot to do anything. For us crocheter’s or ‘hookers’, we would rather be inside in the cool AC, working on our projects, especially if you are working on blankets.

Although I will admit, I did go outside a few times with my hook and crocheted outside, but once the sun starts to move around, you just want to find another place with shade. Not to mention the bugs are crazy this year!

Now, let’s take a look at what we have so far:

20190702_145618.jpg
January, February, March, April, May, and June

As this blanket is getting bigger, it’s been harder to take pictures of it, not to mention each of my squares is bigger than a normal temperature blanket would be.

Oh, and don’t mind the toys that are scattered around the blanket, I was taking this photo, just after my daughter woke up from her nap. I had to rush a little bit, just to make sure that I got the entire blanket in the frame.

Not to mention, my daughter wanted to have fun on the blanket itself!

20181222_124142
100 degrees – Fire Red (I Love This Yarn)
90 degrees – Pumpkin (Red Heart Super Saver)
80 degrees – Bright Yellow (Red Heart Super Saver)
70 degrees – Jelly Bean (I Love This Yarn)
60 degrees – Green (Main Stays Basic Yarn)
50 degrees – Turqia (Red Heart Super Saver)
40 degrees – Soft Blue (I Love This Yarn)
30 degrees – Dark Orchid (Red Heart Super Saver) *Changed to the following – Violet (Red Heart With Love)
20 degrees – Orchid (I Love This Yarn) *Changed to the following – Orchid (Red Heart Super Saver)
10 and below – Light Gray (I Love This Yarn)


How do you tell which color to use?

I, personally, go with the overall temperature. So, let’s go by today, for example:

Today in Maine, the overall temperature is 17 degrees. I would choose the light gray.

Let’s say that it was an overall temperature of 22 degrees, I would choose the Orchid color. All my temperatures, for my colored yarn, has to have the same number first number. If that makes any sense, I’m sorry if it doesn’t!

What was the highest temperature for this month?

Yes, we have hit the high 80’s, which means it won’t be much longer until we start to see some higher temperatures. For the most part, it’s been in the ’70s, but as we start to get into July, the temperature is sure to crank up.

What was the lowest temperature for this month?

We only had maybe a day or two that was just in the ’60s, which is just the way I like it. As we get more into July, we may not see another 60-degree day for a little bit, but hopefully, it will and give us a chance to cool down.

Do you post daily updates?

Yes, I do. On my Facebook page, I post a picture of the square for each day. I also tried to post every week’s worth, but it was hard to keep track of, so I’ll be posting monthly and daily instead.

If you haven’t liked my Facebook Page, here is the link below! It keeps you posted and updated on my temperature blanket and any updates for my blog and YouTube channel, as well!

https://www.facebook.com/katiesblog96971617/?ref=bookmarks

Posted in Arts and Crafts, Beginner Patterns, Crochet

Crafty Sassy: Crochet Ice Pop Cozies (Beginner)

Hey Dearies! So, since we are in summer, I wanted to give you all a pattern that was perfect for this season! As I was growing up, one of the favorite cold treat to have on a hot day, other than ice cream, was freeze pops!

We would always have so many of them that the only ones that were left in the fridge were the colors that we didn’t care to have. My favorites were red, pink, and of course blue!

These cozies are not only super cute, but they are perfect for the little ones and those who don’t like holding cold stuff in their hands. These are just a simple and very basic to make, so if you are short on time, these can be finished within a  few minutes, depending on how fast you crochet.

I have also included two sets of the same pattern, one for switching colors and the other one for making just solid colors. The color switching one will be first and the solid color one will be after that.

Here’s what you will need:

  • Medium Yarn (In any color you would like, or have two colors for more fun!)
  • 4.5 mm hook
  • Stitch Markers (This is optional, but if you are a beginner, I highly recommend to use.)
  • Sewing Needle

Let’s Begin! (Color Switching)

20190611_101902.jpg

Chain 13 and slip stitch into the first ch to create a ring.

Round 1: Ch 2. 13 half double crochet in the ring, slip stitch on the top of your ch 2 to close. Work each round continuously; use a stitch marker to help keep track of the rounds.

Round 2: 13 half double crochet around.

Round 3: 13 half double crochet around.

Round 4: 13 half double crochet around. (This is where you can choose to switch colors if you like.)

Round 5: 13 half double crochet around.

Round 6: 13 half double crochet around.

Round 7: 13 half double crochet around. (This is where you would switch your colors again.)

Round 8: 13 half double crochet around.

Round 9: 13 half double crochet around.

Finish off and sew in ends.


Let’s Begin! (Solid Color)

20190611_101853.jpg

Chain 13 and slip stitch into the first ch to create a ring.

Round 1: Ch 2. 13 half double crochet in the ring, slip stitch on the top of your ch 2 to close. Work each round continuously; use a stitch marker to help keep track of the rounds.

Round 2-9: 13 half double crochet.

Finish off and sew in ends.

This is something that can be done very quickly and it’s also fun to mix the colors around. These are also perfect for selling at craft fairs since it is something simple to create!

Also, if you don’t like the size of the cozie, you can always add more rows to make it longer.

Another thing, if you wanted it to sit at the end of the freeze pop, you can always sew the bottom of it. However, I like the cozy being the size it is since it’s easier to move and adjust when you are eating the freeze pop.


Don’t forget to check out my Facebook page! I try to go live on Tuesdays and if you like my page, I do polls and free giveaways as well! Also, this is usually the first place that I post updates on my blog as well!

https://www.facebook.com/katiesblog96971617/


Posted in Crochet Blanket 2019

Temperature Blanket Update 2019: May

Hey Dearies! Another month has passed for 2019! We FINALLY are getting some warmer weather, just in time for summer! As you can see, I have taken the picture from the floor and not on my bed because the blanket is starting to get really big!

I bet you are wondering how long it will get, huh? Well, not much longer because once the end of June has come and gone, I will be starting July from the beginning of our blanket. I know that it’s not something people do normally when it comes to temperature blankets.

So, let’s talk about this month some more! So, we finally hit a few 70 degree days, but nothing has gotten warmer than that, though, it has felt like that. Not very many 40 degree squares, but it looks like we won’t be seeing days like those for awhile!

20190603_201720.jpg
January, February, March, April, and May.

Sorry for the picture quality not being the best, but we can see every square all in one frame, which is harder, especially trying to fit it on the bed to take a perfect picture of it.

As always, here is the chart of colors that I am using, nothing has really changed, but I think I did switch out a brand for the 60 degrees color to a Red Heart brand since my entire blanket is almost completely made up of it.

The good thing is, the color didn’t really change at all, still the same color, just a different brand.

20181222_124142
100 degrees – Fire Red (I Love This Yarn)
90 degrees – Pumpkin (Red Heart Super Saver)
80 degrees – Bright Yellow (Red Heart Super Saver)
70 degrees – Jelly Bean (I Love This Yarn)
60 degrees – Green (Main Stays Basic Yarn)
50 degrees – Turqia (Red Heart Super Saver)
40 degrees – Soft Blue (I Love This Yarn)
30 degrees – Dark Orchid (Red Heart Super Saver) *Changed to the following – Violet (Red Heart With Love)
20 degrees – Orchid (I Love This Yarn) *Changed to the following – Orchid (Red Heart Super Saver)
10 and below – Light Gray (I Love This Yarn)

How do you tell which color to use?

I, personally, go with the overall temperature. So, let’s go by today, for example.

Today in Maine, the overall temperature is 17 degrees. I would choose the light gray.

Let’s say that it was an overall temperature of 22 degrees, I would choose the Orchid color. All my temperatures, for my colored yarn, has to have the same number first number. If that makes any sense, I’m sorry if it doesn’t!

What was the highest temperature for this month?

We finally got to 70 degrees, but haven’t reached that 80 degrees either. As we keep going into June, the weather will start to warm up a little more for us.

What was the lowest temperature for this month?

We had a few days that were 40 degrees, which aren’t that cold, but I would rather them be 50 degree days instead. We might see another 40-degree day, but I think we are in the clear and might only see 50-60 degree days in the future.

Do you post daily updates?

Yes, I do. On my Facebook page, I post a picture of the square for each day. I also tried to post every week’s worth, but it was hard to keep track of, so I’ll be posting monthly and daily instead.

If you haven’t liked my Facebook Page, here is the link below! It keeps you posted and updated on my temperature blanket and any updates for my blog and YouTube channel, as well!

https://www.facebook.com/katiesblog96971617/?ref=bookmarks


Posted in Arts and Crafts, Crochet, Easy Patterns

Crafty Sassy: Crochet Adult Size Dragon Ball Z Goku Hat (Easy)

Hey dearies! Today I am back with a NEW pattern that I had to try and recreate. As you all know, some patterns can be available for a limited time or a price. A lot of creators rather create the items instead of having an option to buy the pattern.

Especially, if you know someone or really want something that they have created. Well, that’s what happened to me. As I was scrolling on Pinterest, I happened to see this hat set:2019-05-21.png

As soon as I saw it, I showed it to my fiance, who is a HUGE Dragon Ball Z fan and loved it! So, I looked into seeing if there was a pattern or someone who sells the pattern itself. Sadly, I didn’t get a pattern or couldn’t purchase a pattern.

When you can’t get a pattern, what do you do?

Recreate it, of course! Now, this was a simple recreate because the beanie is simple and those patterns are free, but I put a little twist to mine. I’m going to show you how to make the orange hat, the green one I am still currently looking for another pattern for the antenna’s, but once I do, I’ll have that pattern up for you all!

Let’s talk about what you will need:

  • Medium Size Yarn (In Orange, Black, and White)
    • I used Red Heart Super Saver Pumpkin, since I still have a huge skein of that left and same with the white.
    • I also used I Love This Yarn for the black, since I didn’t have any Red Heart in black.
  • 5.0mm
    • You can change the hook size to a 5.5mm or 6.0mm because the beanie will be really snug when it’s finished.
  • Sewing Needle
  • Scissors

*Note: This size fits an adult. My fiance’s head size is 21 inches, but I did adjust the pattern so that it wasn’t so tight. If anyone wants me to re-adjust the size if you want me to make one for the kiddos or baby sizes!

Let’s Begin!

-Hat-

Starting with the orange yarn, chain 5 and slip stitch in the first stitch chain to form a loop

Row 1: Chain 2. Make 10 double crochets in the loop. Join at the top of the first double crochet with a slip stitch. (10)

Row 2: Chain 2. Make two double crochets in each stitch. Join as you did before in row 1. (20)

Row 3: Chain 2. *Double crochet in the first stitch, Make 2 double crochets in the next stitch* Repeat * around. Join. (30)

Row 4: Chain 2. *Double crochet in the next 2 stitches, 2 double crochets in the next stitch* Repeat *around. Join. (40)

Row 5: Chain 2. *Double crochet in the next 3 stitches, 2 double crochets in the next stitch* Repeat * around. Join. (50)

Row 6: Chain 2. *Double crochet in the next 4 stitches, 2 double crochets in the next stitch* Repeat * around. Join. (60)

Row 7: Chain 2. * Double crochet in the next 5 stitches, 2 double crochets in the next stitch* Repeat * around. Join. (70)

Row 8: Chain 2. *Double crochet in the next 6 stitches, 2 double crochet in the next stitch* Repeat * around. Join. (80)

Row 9-15: Chain 2. Double crochet in each stitch. Join. (80)

Row 16-19: Switch to the black yarn. Chain 2. Double crochet in each stitch. Join. (80)

Row 20: Chain 1. Single crochet in each stitch. Join. Fasten off. (80)

Now that our hat is done, we need to create the circle part.

-Symbol Base (White circle)-

Grab the white yarn, chain 5 and slip stitch into the first chain to create a loop.

Row 1: Chain 2. Make 10 double crochets in the loop. Join. (10)

Row 2: Chain 2. Make 2 double crochets in every stitch. (20)

Row 3: Chain 2. *Double crochet in the first stitch, 2 double crochets in the next stitch* Repeat * around. Join. (20)

Row 4: Chain 2. *Double crochet in the next 2 stitches, 2 double crochets in the next stitch* Repeat * around. Join. (30)

Row 5: Chain 2. *Double crochet in the next 3 stitches, 2 double crochets in the next stitch* Repeat *around. Join. (40)

Row 6: Chain 1. Single crochet in each stitch. Join

Row 7: Change to black yarn. Chain 1. Single crochet in each stitch. Join. Fasten off.

The next part is totally up to you. My fiance didn’t want the symbol that they had, in the original picture, so he wanted me to do this symbol instead:

2019-05-21 (1).png

I’m sorry that I don’t know the symbols, but this is what he chose. You have to do one of two things to get the symbol on the white piece.

  1. Sew on the symbol.
  2. Puffy Paint it on.

I’ve never used puffy paint, but I wanted to give it a try and still give the ‘3D’ effect. I can sew, but let’s be honest, I got very frustrated on trying to do so. The good thing about sewing is that you can pull it from your project.

Here’s how the puffy paint came out:

20190521_164903.jpg

You don’t have to do either of the symbols, get creative and put whatever you would like!

Once you are done with the symbol, make sure that if you used the puffy paint, let it dry for about 4 hours before touching it or doing this next step.

Take your hat and white symbol circle, grab some black yarn and sew on the circle symbol piece to the hat. And you should be all set to wear it!

I’m going to try my best and create the other hat, but make sure you are following my Facebook page! I usually update when I’m about to create a new pattern or if you want to suggest any ideas that you would like me to recreate!


Posted in Crochet Blanket 2019

Temperature Blanket Update 2019: April

Hey Dearies! I know I’m a little behind on the update, but I was currently out of the 50-degree yarn and of course, it was the last square for April. The yarn FINALLY came in yesterday, so I was able to finish up April.

So, this month, as you can see, we are starting to warm up a little more! Although it did rain quite a bit in April, we did have some nice days! We haven’t hit 70-degree weather, yet, but I’m pretty sure that we will see some next month for sure!

20190514_140308.jpg
January, February, March, and April!

Now, as you can see, this blanket is getting pretty big! The more we get into summer, we will start to see the rise in temperatures quite a bit. In Maine, once it gets hot, it gets hot pretty quick before it stays like it.

Right now, this is my kind of weather. Not too hot, but not too cold. Just enough where you might need a sweatshirt, but even if you sit in the sun, you won’t want to have keep taking it off.

Just in case you forgot what colors and yarn I’m using, here it is:


20181222_124142
100 degrees – Fire Red (I Love This Yarn)
90 degrees – Pumpkin (Red Heart Super Saver)
80 degrees – Bright Yellow (Red Heart Super Saver)
70 degrees – Jelly Bean (I Love This Yarn)
60 degrees – Green (Main Stays Basic Yarn)
50 degrees – Turqia (Red Heart Super Saver)
40 degrees – Soft Blue (I Love This Yarn)
30 degrees – Dark Orchid (Red Heart Super Saver) *Changed to the following – Violet (Red Heart With Love)
20 degrees – Orchid (I Love This Yarn) *Changed to the following – Orchid (Red Heart Super Saver)
10 and below – Light Gray (I Love This Yarn)

How do you tell which color to use?

I, personally, go with the overall temperature. So, let’s go by today, for example.

Today in Maine, the overall temperature is 17 degrees. I would choose the light gray.

Let’s say that it was an overall temperature of 22 degrees, I would choose the Orchid color. All my temperatures, for my colored yarn, has to have the same number first number. If that makes any sense, I’m sorry if it doesn’t!

What was the highest temperature for this month?

We are still in that 60-degrees mark. We haven’t hit 70-degrees, yet, but we were pretty close to it. As we begin May, we should at least see a few days that will hit 70-degrees.

What was the lowest temperature for this month?

We didn’t get as cold as 20-degrees is, but we did have a few days that were pretty low, which was 30-degrees

Do you post daily updates?

Yes, I do. On my Facebook page, I post a picture of the square for each day. I also tried to post every week’s worth, but it was hard to keep track of, so I’ll be posting monthly and daily instead.

If you haven’t liked my Facebook Page, here is the link below! It keeps you posted and updated on my temperature blanket and any updates for my blog and YouTube channel, as well!

https://www.facebook.com/katiesblog96971617/?ref=bookmarks

Posted in Arts and Crafts, Crochet

Crafty Sassy: Crochet Hooks, What Should I Get? (For Beginners)

Hey Dearies! Since I am working on a few projects, I figured I would talk to you about the many crochet hooks that you can come to choose from. Especially if you are a beginner, knowing what hooks to get can is very important!

20190423_090427.jpg

As a beginner myself, I jumped right into buying a set of crochet hooks from Wish and went from there. However, since I got lucky and only paid 3 bucks for a mini set, I wish I would’ve known there was more than just one type of hooks.

Each type of hooks can have a different feel or how they are in general, but before we get into how they feel, let’s talk about the different kinds of hooks you can get:

  • Aluminum Hooks
  • Plastic Hooks
  • Steel Hooks
  • Wooden/Bamboo Hooks
  • Japanese Hooks

I’m going to break each of these down just so you can get a picture of how they are like and if they are for you. The only ones that I don’t have in my possession, are the Japanese Hooks, but I will still explain and have a photo of them just so you know what they look like.

Also, I am going to put a chart of the different sizes of hooks you can get and how they are labeled, as well.

Image result for crochet hooks size chart

As you can see, there are 3 different types of labels for these hooks. USA, English, and Metric. The easiest one to go by is Metric, I found that it was easier to find hook sizes by using their actually metric size.

To me, using letters to determine which size hook, has been confusing and usually if a pattern says a hook size as a letter, I always end up looking up in my crochet books or search in Google, to get the metric size. Hence why my patterns, don’t have the hooks in letter sizes.

If you are a beginner, Metric is the way to go, but you can determine which one you feel most comfortable following. If you are wondering how small these hooks can be, they can get pretty small or really huge.

Now, let’s get down to talking about the actual hooks themselves.


Aluminum Hooks 

WIN_20181220_14_45_00_Pro

There are one of the most common hooks you can get. I prefer them/use them, for almost every project! These hooks were one of the first ones that I bought to get into crocheting. They can come in all different colors and can go as little as 0.60!

However, for the little hook sizes, you have to be VERY careful. I actually have a few of the tiny ones and let me tell you, they can bend very easily. I haven’t even used them once, but they bent trying to get them out of the packaging!

Lucky, I haven’t reached a project where I’m required to use them, yet.

Another thing to look out for is that they can’t get wet! When I mean by that is if you have sweaty palms or hands, they can tend to be more difficult to work. First time I used them, I was so excited and nervous that it made it difficult to want to work with them.

Although, you can get grips or even use tape to place around the handle of the hook, making it easier to grip and easier to handle your work better!

Overall, they are perfect for beginners! Plus, I love the different colors you can get them in. My family usually get me crocheting books, and some of them come with these hooks, so I have already started a collection with my metal hooks!


Plastic Hooks

Image result for crochet plastic hook

These next hooks are another fun-coloring type of crochet hook. Now, I want to let you all know that I haven’t had the pleasure to work with a plastic hook in a ‘normal’ size, meaning the only sizes I have are an 8.0-11.5.

Have I worked with them? Yes, I actually used one of them to make a basket for my mini balls of yarn. I do plan on getting myself a plastic set, just so I can have them for an option, which a lot of crocheters tend to so that.

These hooks work pretty well, I don’t have any complains, although I have seen and heard from a few people, that they are very easy to break, which I figured they would because they are made up of plastic.

However, I haven’t had one break on me, ‘knock on wood’, but I can see the smaller ones breaking a lot quicker than the bigger ones.

Overall, I see more people use the bigger plastic hooks more than I do the smaller ones.


Steel Hooks

20190423_090234.jpg

I know you are probably thinking, ‘What’s the difference between these and the aluminum ones?’. Well, there are a few differences, but let me explain why.

These hooks have a built-in handle, which is perfect for if you have sweaty hands, as I do from time to time. Not only that, having a handle makes it easier for you to grip the hook better, but it makes it easier to control smaller hooks.

Yes, they do make them in smaller hooks. I actually bought myself a set, that also came with a storage bag, because I was looking for something to help me better grip my smaller hooks, especially, since I crochet a lot of towel toppers.

Although, these are one of my ‘go to’s’, the only problem I have with them is the grips. Now, the set that I bought, had rubber grips, but they were starting to slide off and it made it bothers me when they do that. Especially, when you are crocheting.

If you do want to get yourself a set of these hooks, go for the ones that are built onto the hook itself. If you do end up getting a rubber set, take some hot glue or craft glue, and glue the inside of the rubber piece, and slide your hook back on.

Overall, they do have some very cute grip holders and they can come in multiple colors. These are definitely a must, especially, if you are a beginner!


Wooden/Bamboo Hooks

20190423_085900.jpg

These hooks were the first thing that I really wanted, as soon as I got into crocheting! They were handmade and hand-carved, but I really just wanted them as an option and to grow my hook collection.

They are so smooth to the touch and have a point at the top of the hook, which makes going into stitches easier. The size of every hook is hand carved into the hook itself. These were so pretty I didn’t want to use them, but I did have some problems.

The ones I have, they felt weird to use, but when it comes to trying out different hooks, it can take a while to adjust, but it felt weird to use them. It’s not that I didn’t like them, I just the hook itself is very awkward.

I even put on a handle, which I didn’t want to do, but with the handle, it was a little easier.

The smallest size they go, in carving them with would, is a 3.0. Anything smaller is just a metal hook with a wooden grip, which I would like to note, the wooden grip is very strong and I haven’t had any problems with it.

Overall, I like to have a set, just to have it, but I have used them before. It does take some type to get used to, but you also need to be careful because since these are made up of wood/bamboo, they are very easy to break. Hence why they don’t go smaller with size!


Japanese Hooks

Image result for japanese crochet hooks

Now, as I said in the beginning, I’ve never tried these, so I can’t really give a good detailed explanation whether they are good or bad. I do see quite of bit of other crocheters that do use them.

What I have read, from my crocheting books, these hooks are perfect for people who have small hands and it helps with arthritis. From the looks of these hooks, they do look very comfortable.

Overall, you have to try them to get the feel from them. I do plan on getting a set in the near future.


In order to find out what hook works for you, try them all out! Of course, you don’t have to buy the entire set of them, you can always get just one of each and see how they are for you!

I like to have options, especially when crocheting. Have a set of each different hook can give me more options to choose from, no matter what size hook I need!

Leave a comment down below letting me know what kind of hook you prefer to use! I’d love to know!

Don’t forget to follow my Facebook page, I update my temperature blanket daily on there, go live crocheting, and even have free giveaways! Link is down below!


https://www.facebook.com/katiesblog96971617/

Posted in Arts and Crafts, Beginner Patterns, Crochet

Crafty Sassy: Crocheting a Completely Solid Mini Granny Square (Beginner)

Hey Dearies! I wanted to show you how to make a solid granny square, but this one is an actually solid granny square. The reason why I wanted to show you what a complete solid granny looks like, I wanted to also kinda see what I’m going to use it for.

The question I know I’m going to get asked is, ‘What’s the difference between a solid granny square and a completely solid granny square?’

Well, let me show you!

The purple square is a completely solid granny square. The blue one is a granny square, which is actually what I used to make my temperature blanket. The difference is that you can’t see the holes that are made for making the granny square.

*Note* They are NOT the same size. The completely solid granny square or the purple one is only 2 rows. While the other square has 5 rows.  

I actually found the pattern on Youtube because I was looking for it for one of my ‘big’ projects. Needless to say, I got very lucky and it just happened to be in my suggestions for videos to watch.

Here is the link for the video: https://www.youtube.com/watch?v=d3TElIayQS8&t=640s

Now, you are probably wondering, ‘What project were you going to use to make with these?’

Well, here’s the thing. I love making stuff for others and I wanted to make my mother a blanket for her birthday, but I ended up going with the C2C method. The only problem was that I jumped into it and made a lot of mistakes.

To the point where I ALMOST finished it, but instead of printing out another sheet and20190416_084725.jpg 
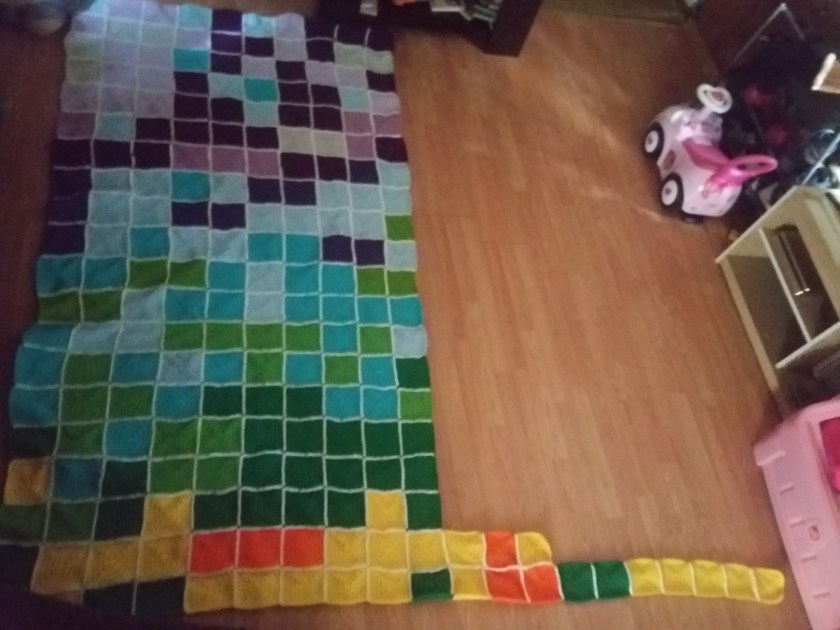
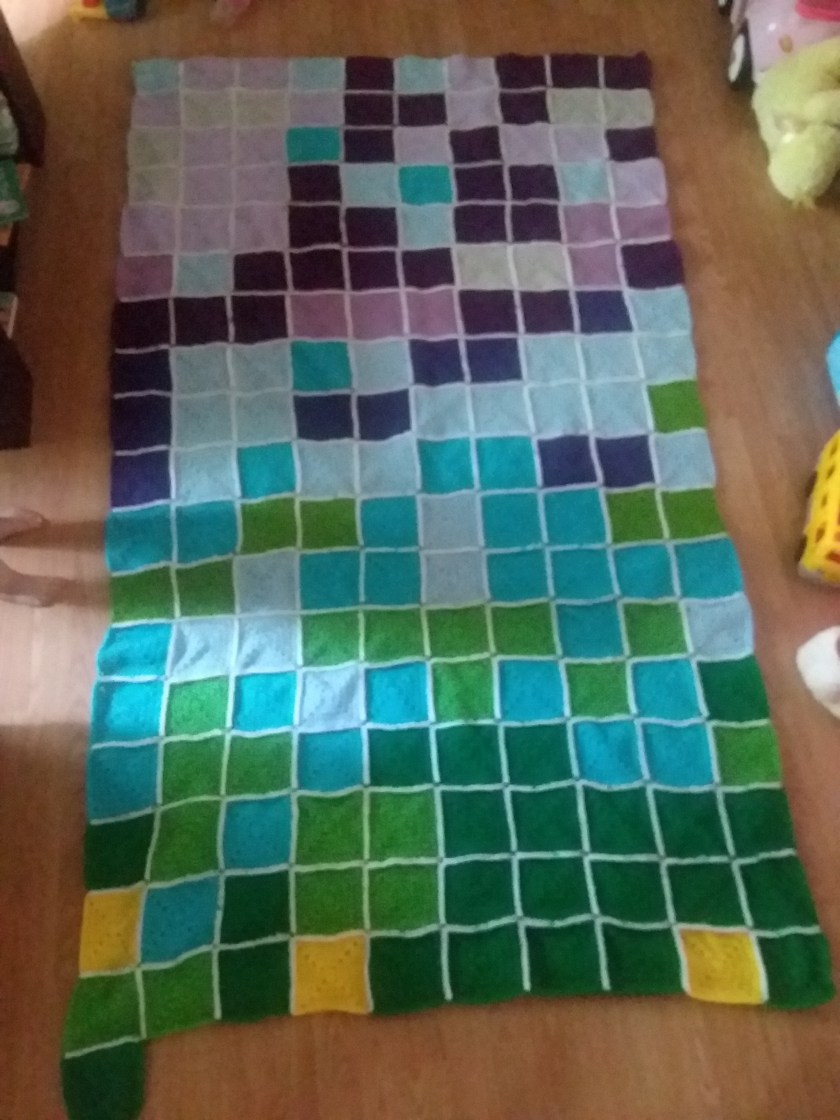
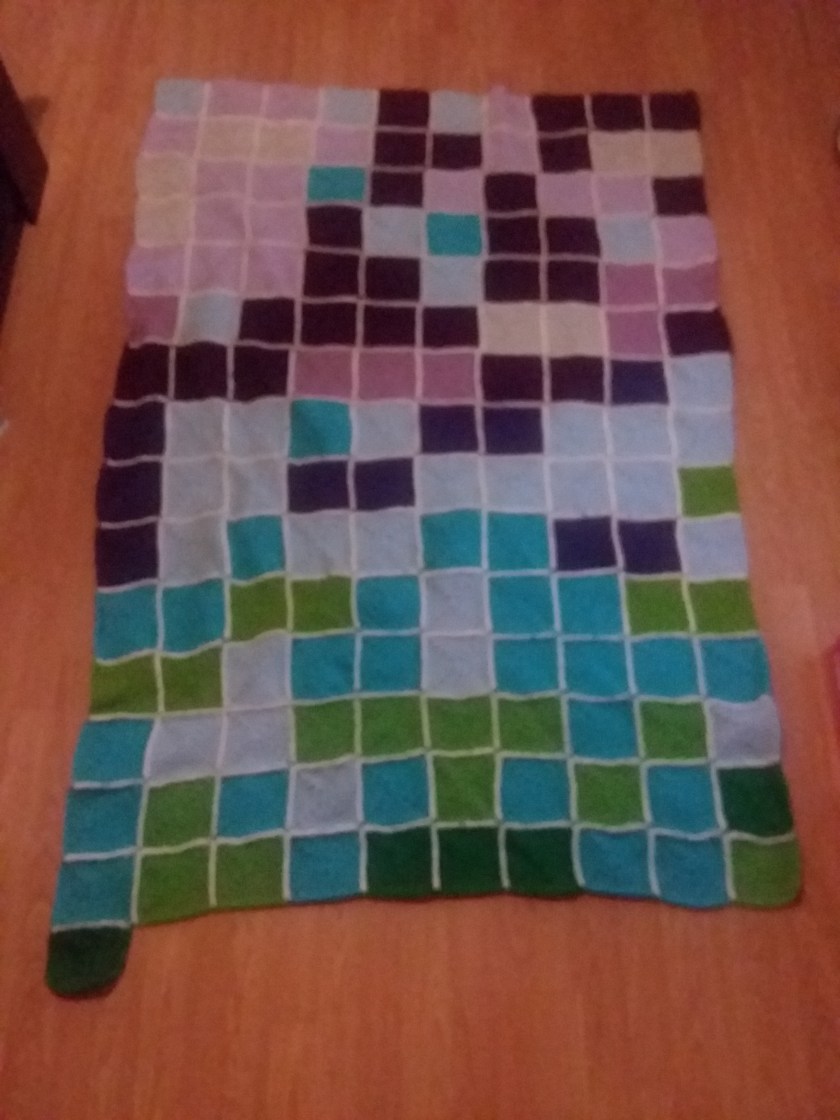
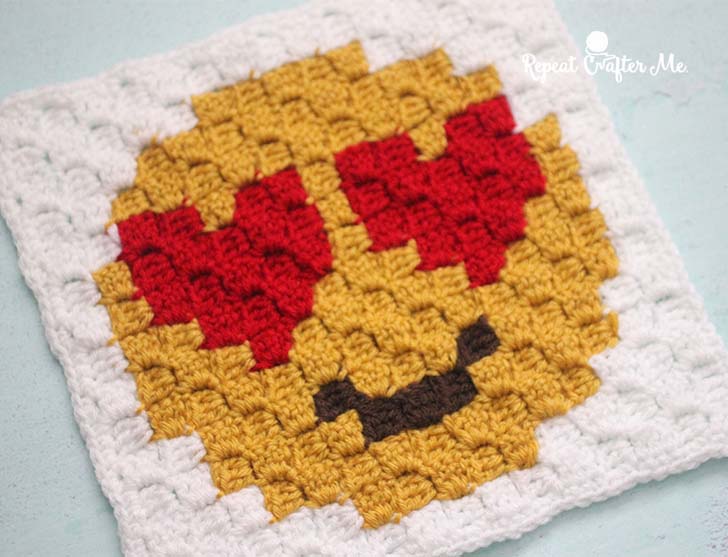
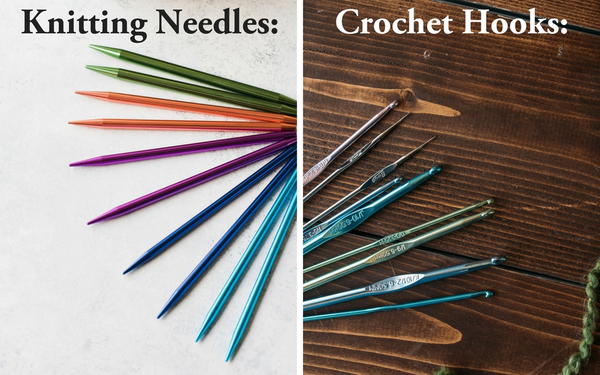
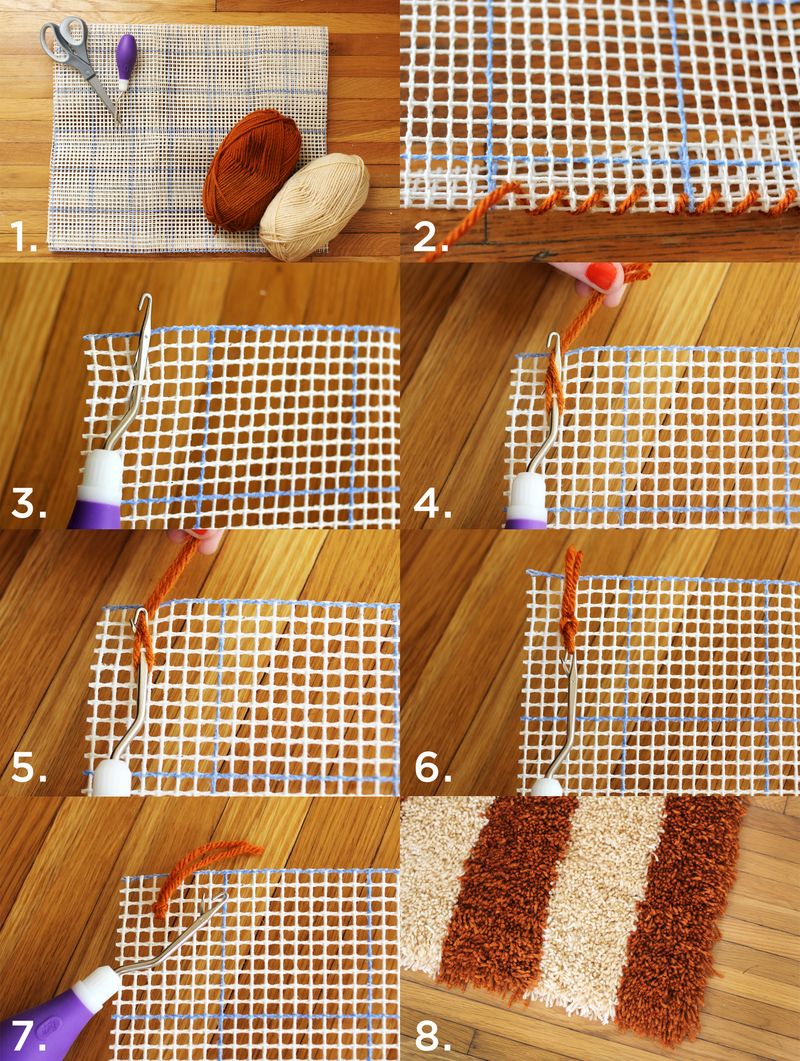
ripping it, I decided to just rip it and got granny square small instead. Which is why I suggest to really pay attention when it comes to C2C and learn as much as you can!

With that being said, I am currently, been making a bunch of tiny granny squares. You are also probably thinking that I’m crazy for doing so, but in the end, it will look awesome!


However, you don’t need to make a bunch of small ones, as I did. Anyway, let’s get down to what you need for this pattern:

  • Medium Yarn or Size 4
    • I’ve been using Red Heart Super Saver since it’s what I’ve been using for the project itself.
  • 5.0mm hook
    • You can use any size, depending on the size yarn you are using.
  • Marker
    • These are a must when it comes to doing this the first time! Especially if you plan on making these squares bigger!
  • Sewing needle

The pattern is pretty simple, but it can get confusing, let’s begin!

You can either start with a magic circle or a chain 4. The difference between the two is that the chain 4, you have to make a slip stitch to start. Which

Row 1 ( If you used a Magic Circle to start): Chain 2.(counts as your first stitch) Make 2 double crochets in the circle. *1 treble crochet. 3 double crochets.* Repeat from * until you have 4 corners. Join with a slip stitch at the top of the chain 2. Place a marker at the top of each of your treble crochets.  

Row 1 (If you chained 4 to start): Make 2 double crochets in the last chain from your hook (You’ll be working in this chain). *Make 1 treble crochet. 3 Double crochet.* Repeat from * until you have 4 corners. Join with a slip stitch at the top of the chain. Place a marker at the top of each of your treble crochets. 

The next row is the same for both the magic circle and chain 4.

Row 2: Chain 2. *Double crochet in the next stitches, until you reach your stitch marker or first corner, remove it and remember to put it back for each treble crochet stitch. Make 2 double crochets where your stit marker was. Make treble crochet in that same stitch and another 2 double crochets in that same stitch.* Repeat from *. Join with a slip stitch in the top of your chain 2.

Repeat Row 2 until you have reached the desired size. Fasten off and weave ends in. 

There you have it! I will also make sure that I update you on my current project that I’m working on for my mom!

Make sure you are following my Facebook page! I do free giveaways on some stuff that I have made! Here’s the link: https://www.facebook.com/katiesblog96971617/


Posted in Crochet Blanket 2019

Temperature Blanket Update 2019: March

Hey Dearies! If you have been following me on my Facebook page, you would’ve noticed that I was behind on my daily squares, due to running out of yarn, which can happen when doing a temperature blanket!

Anyway, let’s talk about how this month went, we are FINALLY getting some warmer days and we also had our very first 60-degree day, which was also on the last day of the month.

20190401_125126.jpg

January, February, and March!

So, if you are wondering how big this blanket is going to get, well, it’s going to get pretty big! This blanket is also being laid on a King size bed, so by the time this blanket will be finished, it will most likely go over the sides and fit perfectly on the bed.

We already have about 90 squares on this blanket. In the upcoming month of April, we will be able to start seeing different colors since it is beginning to warm up and make it feel like spring!

Also, you might have noticed a slight color change for my dark purple, this one also one of the colors that I did up end up running out of and had to substitute it with a different type of purple.

It’s still the same Red Heart brand, but a different line of yarn, so I will add that to the list of colors, as well. Hopefully, I won’t have to make any more color changes to this temperature blanket, but it is my first one, so mistakes are bound to happen.

Just in case you want to see what the colors will start to look like, as the temperatures get warmer:

20181222_124142
100 degrees – Fire Red (I Love This Yarn)
90 degrees – Pumpkin (Red Heart Super Saver)
80 degrees – Bright Yellow (Red Heart Super Saver)
70 degrees – Jelly Bean (I Love This Yarn)
60 degrees – Green (Main Stays Basic Yarn)
50 degrees – Turqia (Red Heart Super Saver)
40 degrees – Soft Blue (I Love This Yarn)
30 degrees – Dark Orchid (Red Heart Super Saver) *Changed to the following – Violet (Red Heart With Love)
20 degrees – Orchid (I Love This Yarn) *Changed to the following – Orchid (Red Heart Super Saver)
10 and below – Light Gray (I Love This Yarn)


How do you tell which color to use?

I, personally, go with the overall temperature. So, let’s go by today, for example.

Today in Maine, the overall temperature is 17 degrees. I would choose the light gray.

Let’s say that it was an overall temperature of 22 degrees, I would choose the Orchid color. All my temperatures, for my colored yarn, has to have the same number first number. If that makes any sense, I’m sorry if it doesn’t!

What was the highest temperature for this month?

Well on the last day of March, we got a 60-degree day! So, the light green is just the beginning of what temperatures will start to look like in the upcoming weeks!

What was the lowest temperature for this month?

So, our lowest temperature was actually 20-degrees, but on those days, it felt a lot colder than that!

Do you post daily updates?

Yes, I do. On my Facebook page, I post a picture of the square for each day. I also tried to post every week’s worth, but it was hard to keep track of, so I’ll be posting monthly and daily instead.

If you haven’t liked my Facebook Page, here is the link below! It keeps you posted and updated on my temperature blanket and any updates for my blog and YouTube channel, as well!

https://www.facebook.com/katiesblog96971617/?ref=bookmarks

Posted in Crochet Blanket 2019

Temperature Blanket Update 2019: February

Hey Dearies! So, if you have been following my daily squares on Facebook, you will know that I was going to do the update yesterday, but I totally forgot about it, so I’m doing it now!

February has come and left us and I wanted to show you guys what the blanket looks now!


20190301_085856.jpg
What my temperature blanket looks now! This is both January and February together!

As you can see, this blanket is going to get pretty big and I didn’t realize it until now. My granny squares are 5 rows, tall and wide, so this blanket is going to get super big! It might actually be too big, but it will definitely warm me up on a cold winters day!

If you haven’t already noticed, there has been a new color in the mix, so let me explain. Due to not being able to get the store to go get the color yarn, I had to end up changing it. Plus, I didn’t want to put the blanket on hold when it came time to crochet the squares together.

This light purple that I switched it to will still represent as a 20 degrees color, it just isn’t as light as the color before it.

Hopefully, this will be the only color change that I will end up doing. I’ve planned it out, so if I start getting really low on a particular color, I am going to grab or order another roll the next time I go to the store.

Anyway, here is the colors and what they will represent:

20181222_124142
100 degrees – Fire Red (I Love This Yarn)
90 degrees – Pumpkin (Red Heart Super Saver)
80 degrees – Bright Yellow (Red Heart Super Saver)
70 degrees – Jelly Bean (I Love This Yarn)
60 degrees – Green (Main Stays Basic Yarn)
50 degrees – Turqia (Red Heart Super Saver)
40 degrees – Soft Blue (I Love This Yarn)
30 degrees – Dark Orchid (Red Heart Super Saver)
20 degrees – Orchid (I Love This Yarn) *Changed to the following – Orchid (Red Heart Super Saver)
10 and below – Light Gray (I Love This Yarn)         *Note: Due to one of the color changes, I won’t be updating this picture, the only one that has changed is the 20 degrees one and there is a note, with the new color I’ll be using.*


How do you tell which color to use?

I, personally, go with the overall temperature. So, let’s go by today, for example.

Today in Maine, the overall temperature is 17 degrees. I would choose the light gray.

Let’s say that it was an overall temperature of 22 degrees, I would choose the Orchid color. All my temperatures, for my colored yarn, has to have the same number first number. If that makes any sense, I’m sorry if it doesn’t!

What was the highest temperature for this month?

We actually reached another 50-degree day, but as usual, it doesn’t last long. Hopefully, in March we will start to see more days starting to warm up!

What was the lowest temperature for this month?

Well, we reach single digits, but the way my temperature blanket is set up, we can’t really tell, other than it would be a light gray square!

Do you post daily updates?

Yes, I do. On my Facebook page, I post a picture of the square for each day. I also tried to post every week’s worth, but it was hard to keep track of, so I’ll be posting monthly and daily instead.

If you haven’t liked my Facebook Page, here is the link below! It keeps you posted and updated on my temperature blanket and any updates for my blog and YouTube channel, as well!

https://www.facebook.com/katiesblog96971617/?ref=bookmarks


Posted in Arts and Crafts, Crochet, Easy Patterns

Crafty Sassy: Crochet Stuffed Easter Egg (Easy)

Good Morning Dearies! So, I am going to shake it up a bit and we are doing something for Easter! I know it is a little early, but with my crocheted Easter Baskets up for orders, I wanted to show everyone how to make these cute little eggs, just in time for Easter!

20190226_112506.jpg

These are great for babies for their first Easter or for toddlers if you want them to find something other than jelly beans and candy! These eggs don’t take long to make, but they add the perfect touch to a crocheted Easter Basket!

So, before I begin, I want to talk to you about this pattern. I’ve made about 3 of these eggs, 4 if you include the tutorial I’ll be doing for you all. I’ve used a different brand type of yarn, just to see if there is a difference, and I believe it was my tension, but I’m still unsure.

20190226_112352.jpg

The pattern recommends Red Heart Yarn, so I would just use Red Heart, you can try it with different brands and if you do, and they turn out great, feel free to let me know in the comments!

Anyway, let’s talk about all that you will need:

  • 5.0 mm hook
  • Red Heart Yarn
    • I will be using the color aqua. I’m just guessing because I lost the yarn label for it, but I know it’s Red Heart.
  • Stitch Marker
  • Stuffing of your choice
    • I’m using the stuffing that you get from Walmart in the craft section. Basic stuffing for stuffed animals.
  • Sewing Needle
  • Row Counter (optional)
    • I wrote down the numbers of rows and crossed them off as I go. You don’t need a row counter, but if you are a beginner, I highly recommend that you use one.

Let’s begin!

Round 1: Chain 2. Make 6 single crochets in the second chain from your hook. Don’t connect. (6 stitches)

20190226_100235.jpg

Round 2: Make a single crochet in the next stitch and place a stitch marker(You’ll be moving this stitch marker for every row), then make another single crochet in that same stitch. In the next stitches, make 2 single crochets in each until you reach the stitch marker. (12 stitches)

Round 3: Single crochet in each stitch.

Round 4: Make *2 single crochet in the next stitch, single crochet in the next.* Repeat (18 stitches)

Note: The * are for repeating an amount of different stitches for a round or row.

Round 5: Rep Rnd 3.

Round 6: Work *2 single crochets in the next stitch, single crochet in the next 2 stitches.* Repeat. (24 stitches)

Round 7: Rep Rnd 3.

Round 8: Work *2 single crochets in the next stitch, single crochet in the next 3 stitches.* Repeat. (30 stitches)

Round 9-11: Rep Rnd 3.

Round 12: *Single crochet decrease in the next stitch, single crochet in the next 3 stitches.* Repeat. (24 stitches)

Round 13: Repeat Rnd 3.

Round 14: Single crochet decrease 12 times. (12 stitches)

Round 15: Rep Rnd 3. Stuff the egg. (I used the other side of my crochet hook to help stuff the egg because the hole is really small.)

Round 16: Single crochet decrease 6 times. (6 stitches)

Finish off, leaving a long tail to weave through the remaining 6 stitches. Pull tight and secure the end and make sure to weave it in, as well.

20190226_112520.jpg

There you have it! Perfect pretty Easter eggs for the kiddos!

Posted in Arts and Crafts, Beginner Patterns, Crochet

Crafty Sassy: Crochet Coin/Gift Card Purse (Beginner)

Today, we are going to learn how to make these cute little coin/gift card holders! They are very simple and easy to make, plus they are quick to put out if you are in a jam on finding a gift for someone. You can even make one for the kids use for dress up!

You can make them in all styles, but I’m going to show you how to make a quick and simple one.

What you will need?

  • 4.0 crochet hook
  • Medium Size Yarn
  • Sewing needle
  • Scissors
  • Small Button

If you are a beginner and haven’t worked with a smaller hook, don’t worry! This hook seems small and difficult to work with, but it is not. There are a lot of smaller sizes that are much difficult to work with.

The size we are going to be making is going to be about 4 1/2 inches to maybe 5 inches across. It will be small enough to have in your purse or to hold a few cards or gift cards perfectly.

Now, the way we are making these in pieces and then sewing them together. The other opinion is to single crochet them together, which I will do in this tutorial.

Start by chaining 18.

Row 1-12: Single crochet across. Chain 1 and turn.


Keep singl20190205_203631.jpg
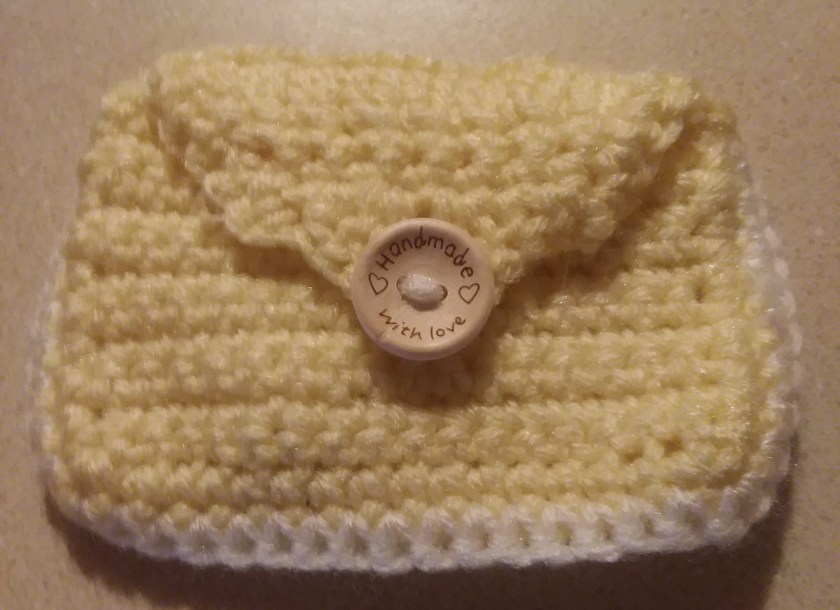
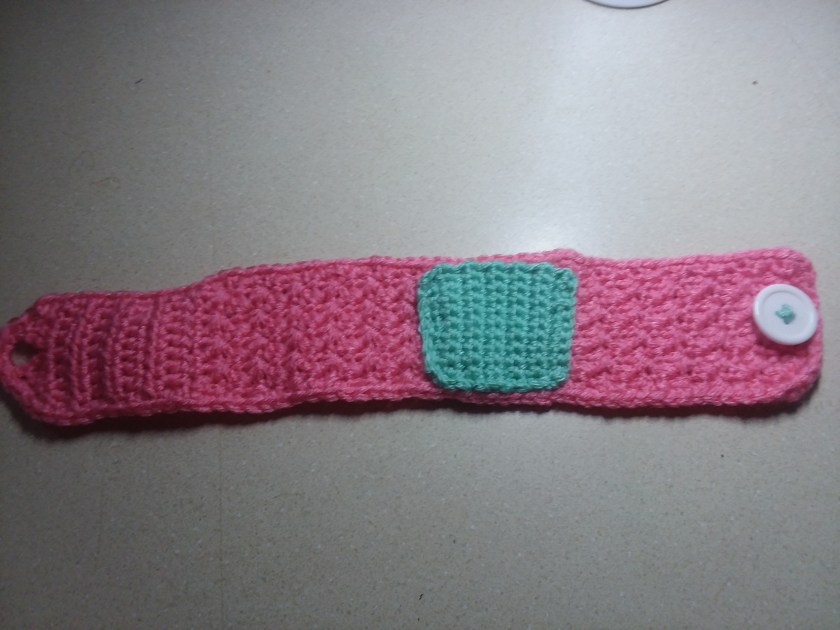
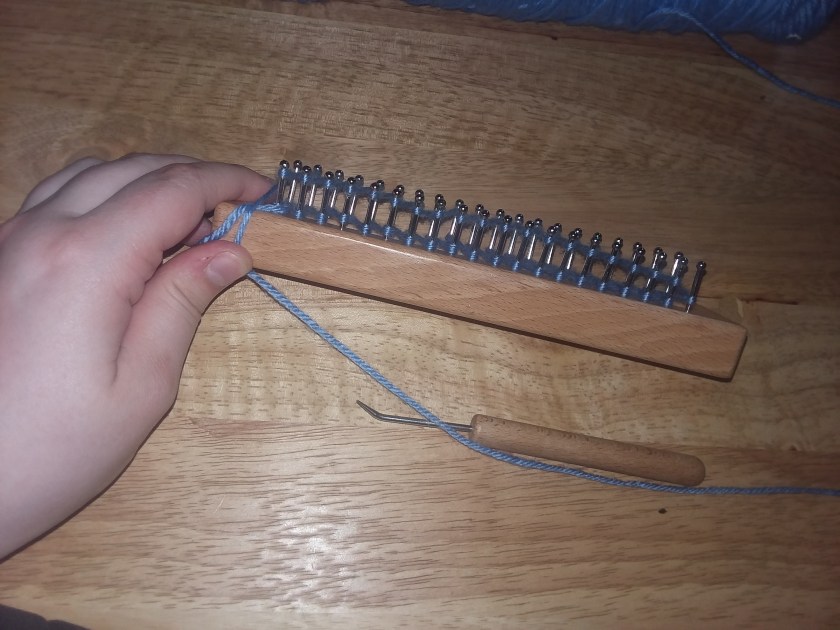
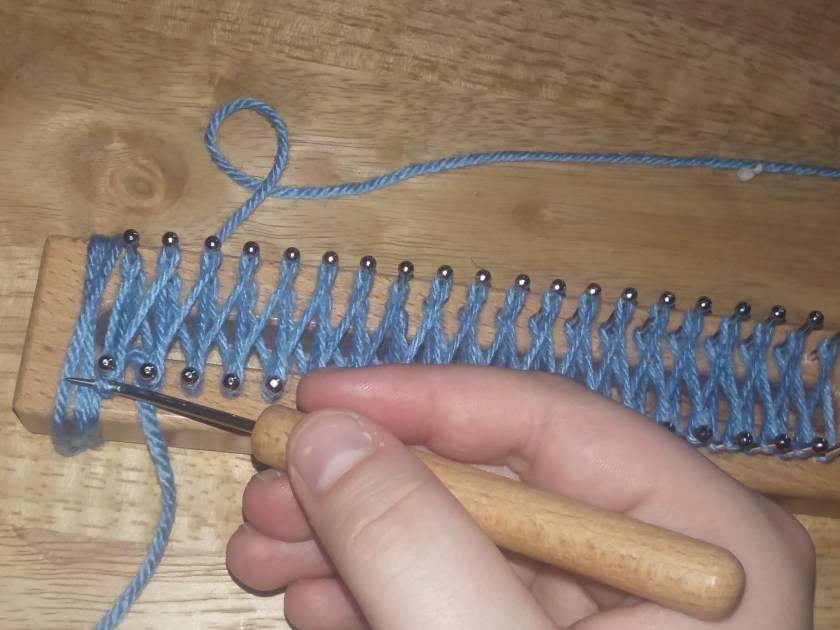
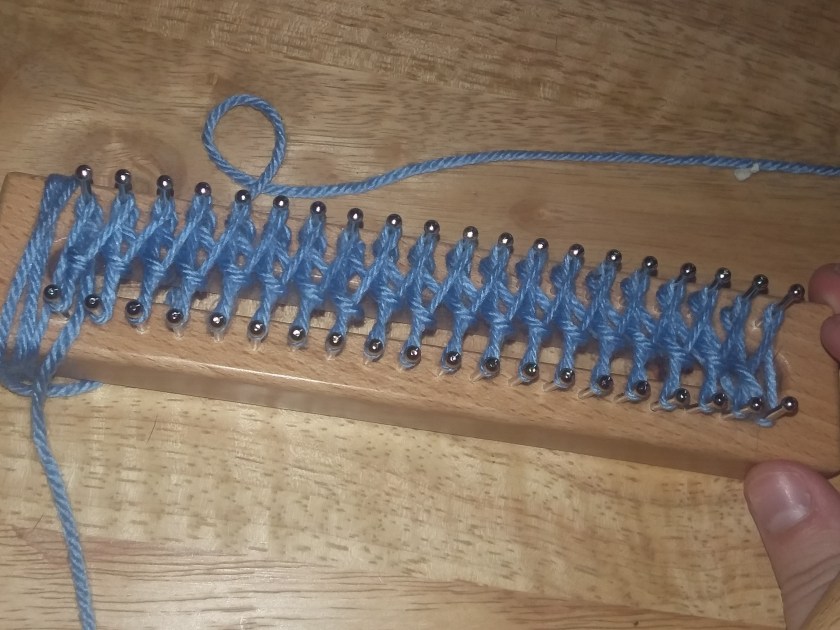
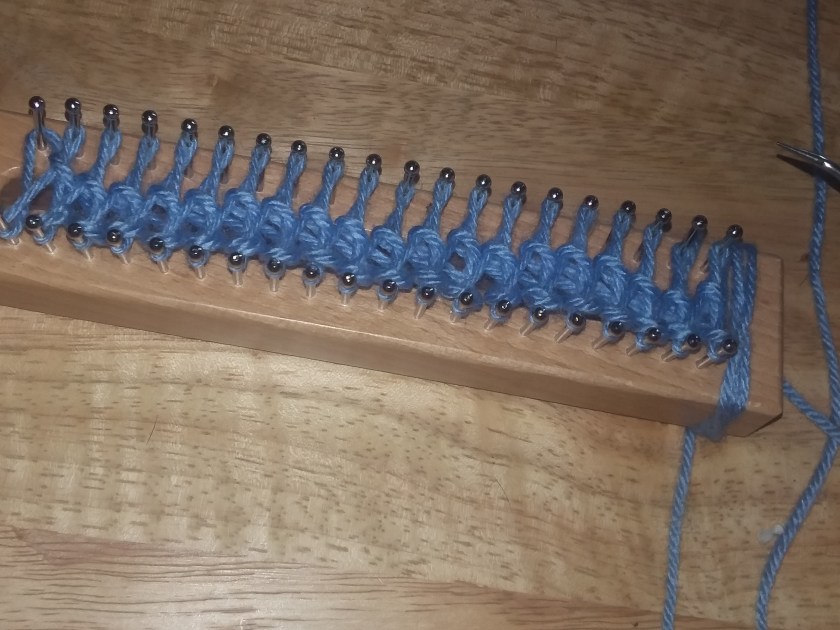
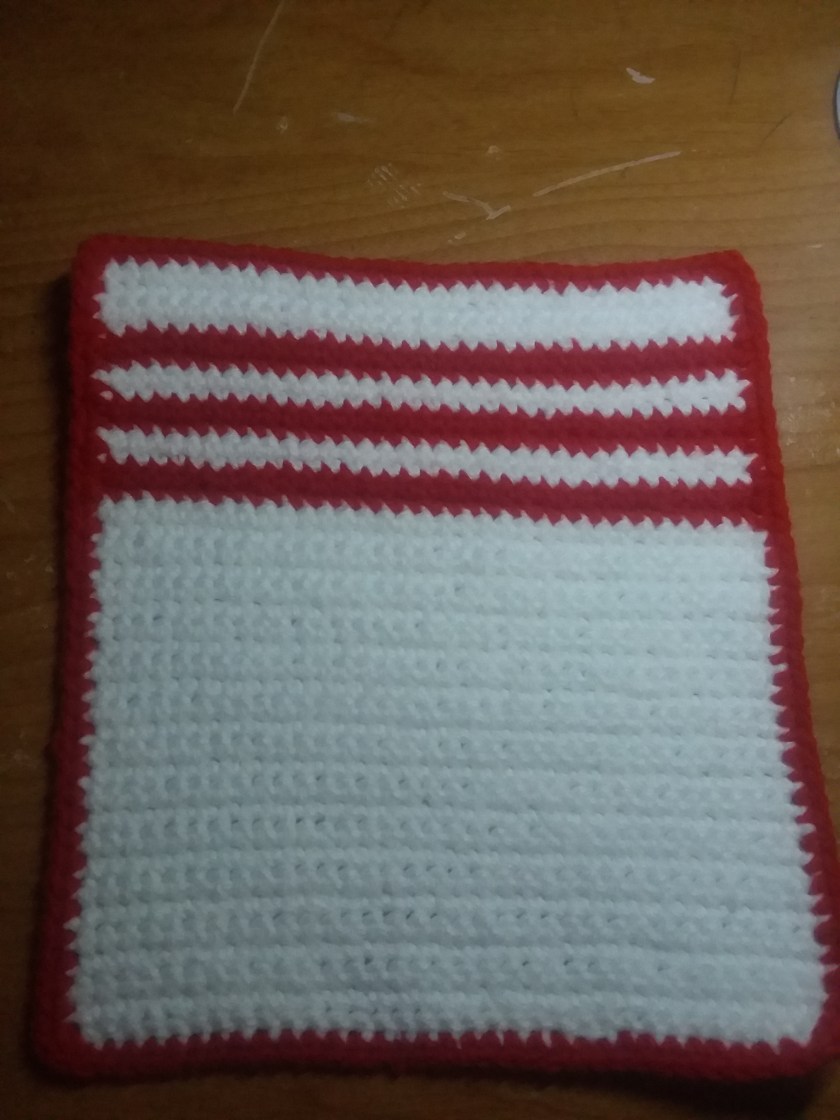
e crocheting until it reaches the length you want it to be. If you are making a gift card holder, keep in mind that cards are about 2 1/5 inches long.

So, what I am doing, I am crocheting 3 inches, placing a marker, and then crocheting another 3 inches. About 12 rows or so.

Row 13: Double crochet across. Chain 1 and turn.

Row 14: Double crochet together across. Chain 1 and turn.

Row 15: Single crochet across and make sure that you have 8 stitches, this is needed to make the buttonhole for the next row. Chain 1 and turn.

Row 16: Single crochet together in the first two stitches. Half double crochet in the next. Double crochet in the next and in that same stitch, make a treble crochet. Chain 3. In the next stitch, make a treble crochet. In that same stitch, make a double crochet. In the next stitch, a half double crochet. Single crochet together in the last two stitches.

Then, single crochet around the entire piece, making two extra single crochet stitches in the corners. This isn’t necessary, but it makes the project look neater. 

Fasten off.

Repeat the first step and fasten off.

20190205_203638.jpg

Place both parts and lay them over each other. Grab the same crochet hook and start to single crochet the three sides together. If you aren’t sure how to do this, you can always just hand-sew the three sides together. Whatever you are comfortable! I will be doing this in a different color.

There you have it! Don’t forget to check out my Facebook page to watch me on how to single crochet this all together!


Posted in Crochet Blanket 2019

Temperature Blanket Update 2019: January

Hey Dearies! We have finally come to the end of our first month for our temperature blanket! I know you all have been waiting to see what it has started to look like, but if you are on my Facebook page, I post daily updates of what square was for each day!

Anyway, since I live in Maine, the temperature hasn’t been very high, the only high temp we were lucky to get was in the 50’s, and that was only for one day! I will also add the yarn and color of what I am using for each temperature, just in case you didn’t remember what colors I am currently going to be using!

Also, the way I am sewing them together is with a single crochet stitch. I wanted to give it a try, but this month wasn’t completely perfect, although, February should be a little better!

Now, for each month, I will be taking a picture by itself,  and then connecting it to the previous month, but since this is the first month of our temperature blanket, we don’t have to worry about that until next month.

Temperature Key:

20181222_124142
100 degrees – Fire Red (I Love This Yarn)
90 degrees – Pumpkin (Red Heart Super Saver)
80 degrees – Bright Yellow (Red Heart Super Saver)
70 degrees – Jelly Bean (I Love This Yarn)
60 degrees – Green (Main Stays Basic Yarn)
50 degrees – Turqia (Red Hear Super Saver)
40 degrees – Soft Blue (I Love This Yarn)
30 degrees – Dark Orchid (Red Heart Super Saver)
20 degrees – Orchid (I Love This Yarn)
10 and below – Light Gray (I Love This Yarn)

Here is the month for January:


20190131_104603.jpg
First month of the 2019 temperature blanket. The entire month of January. 


How do you tell which color to use?

I, personally, go with the overall temperature. So, let’s go by today, for example.

Today in Maine, the overall temperature is 17 degrees. I would chose the light gray.

Let’s say that it was an overall temperature of 22 degrees, I would chose the Orchid color. All my temperatures, for my colored yarn, has to have the same number first number. If that makes any sense, I’m sorry if it doesn’t!

What was the highest temperature for this month?

We actually reached 50 degrees! For Mainers, such as myself, days like that is considered Spring, but sadly, it didn’t last long. That is why you will see another color that stands out from the rest, that was when we had that one say of nice weather.

What was the lowest temperature for this month?

Well, we reach single digits, but the way my temperature blanket is set up, we can’t really tell, other than it would be a light gray square!

Do you post daily updates?

Yes, I do. On my Facebook page, I post a picture of the square for each day. I also tried to post every week’s worth, but it was hard to keep track of, so I’ll be posting monthly and daily instead.

If you haven’t liked my Facebook Page, here is the link below! It keeps you posted and updated on my temperature blanket and any updates for my blog and YouTube channel, as well!

https://www.facebook.com/katiesblog96971617/?ref=bookmarks


Posted in Arts and Crafts

Crafty Sassy: What Are C2C?

When you first get into crocheting, the first thing you do, before you even get into it, is figuring out what you want to learn how to make. For me, other than my great-grandmother’s crocheted towel toppers, was the C2C. C2C is a ‘corner to corner’ type of stitch that you would find in blankets.

A corner to corner is something that you would usually see for a blanket, but I have seen many for scarfs and rugs as well. They are perfect for testing the limits to see what you can do with your crocheting skills. Here are a few examples that other’s have made:

Image result for c2c crochet

Image result for c2c crochet

You can get really creative with these types of projects! I will say, these are a lot easier to understand than graphgans. If this is something that you have saved in your Pinterest folder, or you are waiting for all your projects are done before starting something new, sit back and relax! I’m going to answer a few questions and give some tips, I have picked up, on C2C!

What will you need?

Depending on the pattern or idea you have in mind, you will need to start out on graph paper. If you are going for the basic C2C, having a graph will help you keep track of where you are, but graphs are used for more characters or lettering. For example, I am going to use this pixel picture:

Related image

Since we are going to be using this heart, as an example, we need to figure out how many bobbins and colors we will need. I also want to note that you can always change the colors for any of these types of projects. It won’t change how you make the C2C, only the colors.

For this project we need 4 different colors:

  • White
  • Black
  • Dark Red
  • Red

Now, let’s talk about bobbins, if you don’t know what they are, here is a picture of what they look like, you will need these, unless, you are using multiple skiens, which I don’t recommend because you have to turn the project back and forth, when you are done with a row.

Image result for crochet bobbins
These ones aren’t exactly for ‘crocheting’, but the reason why I like these, is because you can clip them onto your work as you are working.

From looking back at the graph, I see that we will need about 9 bobbins, but like i said, every project will be different and you will have to determined what you will need for each project.

How do you start one?

After you have figured out what you need, you can then start. A lot of people start by chaining 6, but I prefer chaining 5. The reason for this is because I am one of those picky people that doesn’t like giant gaps or holes in my projects and I like to keep it that way.

Chaining 6, is what people normally do, but it doesn’t change the C2C. The only other difference is that, when you connect the squares together, they won’t be the same. For now, here is the video I followed:

*Note: This is not my video, this is to show what type of C2C I am currently using. All credit goes to Heart Hook Home.*

Is it easy?

Once you get the hang of it, it isn’t that hard to do! The only parts that I struggle with is changing color, but there are so many videos on YouTube that have helped me out with that!

What videos do you recommend?

I can recommend a few, but you’ll have to find someone that you can follow. Everyone is different, especially, when it comes to crocheting. I am also one of those people that likes to get right down to the point, especially, when it comes to tutorials.

Keep in mind, that some people can give you way too much information, to the point where you aren’t sure what you are doing. Heart Hook Home, did an awesome job explaining a C2C, I highly recommend you watching her tutorial.

If you want to learn, almost everything that is to know about a C2C, then the Crochet Crowd is your best option, although, I personally, don’t recommend him to anyone who is a beginner. I honestly found his video, on C2C, very confusing and especially as a beginner.


This was just a little more information, not a lot, but enough, to possibly get you going in the right direction of C2C. Once you learn how to do it, you won’t want to stop!

If you haven’t liked my Facebook page, I will be going live, tonight, with a surprise, that I am making for this month of January! Make sure to like my page and check it out!


Posted in Writing Works

The Black Widow’s Partner In Crime (Friday’s Short Stories)

*Just letting all of you know that I really don’t know where this idea came from. I started the beginning of this story when I was tipsy (thanks to the bud lite strawberrita’s I had the night before), and I ended up finishing this story the next morning. I’m sorry if this is a weird story, but hey, a weird story is an interesting story.*

By: Katie Night

Andrea sat at the bar, with a drink in hand. She had been siting at the bar for about 20 minutes, nothing had sparked her attention. Her last husband had been gone for about a month, before she started to crave for another man’s affection.

He had a heart attack and thought that he was the one for her. She thought that she was going to spend the rest of her life with him. Making memories, having children, and growing old together.

She just wanted someone to love her for her. She looked up at the bartender, as he poured her another shot. It burned in the back of her throat, but made it so she could hold back the tears she wan’t to let loose. She checked her phone, once more, looking at her flip phone that had a picture of her and her late husband.

Another 5 minutes had passed and she was getting tired of sitting, waiting for someone to approach her. It was like they knew she had lost her husband and that they were avoiding her like the plague. She struggled her shoulders and downed the rest of her drink, when she felt someone sit down next to her.

“Can I by you a drink?” The man wearing a business suit asked, as she looked at him in shock. She turned and looked around to see if he had might off meant to talk to someone else, but it was only them sitting at the bar.

She moved her hair behind her ear and smiled. “Sure.” He then turned to the bartender and he quickly made a drink.

“So, what is a beautiful lady like you doing in a bar alone?” He asked. She took a slip, waiting him to say more, but she was speak less. She didn’t think anyone would come and approached her tonight.

“It’s better than being home alone.” She responded. He moved his grey-black hair back and placed his hand on hers. She froze, not knowing what he would do.

“You are still alone, aren’t you?” He asked once more. She wondered if he was trying to hit on her, but she couldn’t tell. Although, he noticed that him asking questions about her, bothered her, he pulled his hand away. “I’m sorry, I shouldn’t be so demanding on questioning you.”

She shrugged her shoulders. She started to feel the alcohol hitting her, making her more relaxed and able to more flirty. “I was really waiting for you to ask me what my name was.” She smirked as his lips formed a small smile. “Andrea.”

She held her hand out as did he, shaking hands. “Kevin.” She felt something different about Kevin. She couldn’t tell what it was, but his aurora said something else. He had a dark soul, but with little room for love. She still wanted to know what was different about him that made him approach her?

The rest of the night, they talked. Nothing, but talked. She told him about her college days, as he told her about the late nights he was doing surgery. By the time they noticed what time it was, the bar was about to close up for the night. Kevin walked Andrea to her car and gave her a kiss on the cheek.

Andrea heart had warmed up with excitement and passion. She didn’t want to stop seeing him again. Kevin was all she could think about. The only question she had for him was why her? There were a few other ladies at the bar, but he chose her. She tossed and turned all night long, over thinking about Kevin.


The next night, Kevin, met up with her at her house. They could resist themselves and had to have themselves, right on her kitchen table, the one that her and Jeff had picked out after they got married.

She was lost in the moment, forgot about that table, her late husband, and everything else. The only thing she could think of was how much thrill she was having. making love to a stranger on her husband’s table. The look in Kevin’s eyes during the act of affection. It burned in her mind.

Once they were done, a small idea popped in her head. She gave Kevin a smirk, but he had no idea what she was thinking, or so she thought. Kevin picked up her clothes and threw them at her.

“Don’t even think about playing me, sweetheart.” He spoke and Andrea’s eye’s widened. How could he know what she was thinking? She threw her dress over her head, forgetting about her undergarments.

“How did you-” She tired to speak, but he interrupted her.

“I can read your thoughts and I know what you were thinking.” Kevin spoke as he slowly walked towards her. The only thing she noticed, was his eyes, even though, he was half-naked in front of her, his eyes scared her the most. “I love how your mind thinks, Andrea. I bet if we stick together, we can do exactly what you are thinking, to a couple of rich suckers.”


After that night, Andrea and Kevin worked hand in hand, roping in rich idiots that married Andrea, but they wouldn’t last a week in that house. Kevin grew angry whenever anyone else touched Andrea and would kill the new husband, before the end of the week.

The would make love to each other, with the money that the late husband had left for her the night before. No one noticed what was going on. Kevin would admit the late husbands in for surgery, but they would never make it.

Andrea loved to do it for the thrills. She loved the fact that another man touched her, Kevin would rip him apart. She wanted some to want her so bad, that he would kill any man that touched. her.

Once another one of her husbands had passed, she tried to wait as long as she could, but her cravings for affection always came back. She would go out to wealthy bars, sit and wait, until another sucker wanted to give her the world. She would play off sweet and simple, before getting them so drunk, she would mention to get married.

Those late husbands of Andrea, would fall so hard for her, they always said yes and then married her that same night. Once they would come home for their ‘honeymoon’, Kevin would be waiting.

Andrea and Kevin thought that this was something they would keep on doing forever until, people started to notice the pattern, they were leaving behind. The head of the police department, Steve Jones, had started to look into the case. He watched, from his car for weeks, as multiple men would enter that house alive, but would leave in a body bag.

There was only one man that came and go as he pleased. The head of the surgery department Kevin Rosevelt. He was one of the very known surgeons in the department, that even received an award for donating money to big charity events. It puzzled Jones’ to why he was doing this or what he was getting out of this?

“Dr. Rosevelt, good to see you again.” Jones said as he approached Kevin in the hospital, after the last husband of Andrea Whites’ had died. They shook hands and Kevin gave him a smile.

“You too, Steve. What brings you here?” Kevin asked as he was questionable about the reasoning to why he was here. He figured it was for another award or another patient was a officer.

They both sat down as Jones’ laid them down a few files on his desk. “I wanted to ask you a few questions on these missing men. Some of them you operated on and I just wanted to know how those surgeries went.”

Kevin looked through the files, there were about 6 different men in each of the files, 4 of them, he operated on. He stayed calm, as he had a feeling Jones’ was onto him.

“I only operated on 4 of these men, Jones’, why are these two in the same pile? I’ve never had them for patients either.” Kevin said, giving the files back to Jones’, hoping Jones’ would by them and move on.

“Do you have any relations with Mrs. Andrea White?” Jones asked. Kevin stood puzzled to him, wondering how he knew.

“She is one of my friends. Why are you questioning me about her?” Jones knew right away that if he told Kevin about the investigation, they would either flee the town or kill him.

“We are just asking because she has gotten married to these men and they happened to all of died within the week of them getting married. You operated on 4 of them and called time of death on the other 2. We just making sure that they have been dying of natural causes and not being murdered.” Jones explained. He didn’t wished he didn’t give so much information to him, but he hoped that maybe, he would confess or prove that he didn’t kill these women.

Kevin threw a hand in his face and then took the filed back. Looking through each of them again. He pulled the first man, Lance Drotter, he was a wealthy business man, but he only lasted three days when he was with Andrea.

“Mr. Lance Drotter, he came in, not breathing, we tried to bring him back, but nothing worked, so we called time of death at 15:23. Further look into his death, he had a stroke. Mrs. White had no idea of his medical history until she brought him to the hospital.”

Kevin threw that file down in front of Jones’, as his pager was going off. ” I wish I could go into detail even more, but I have to head down to the ER, so I’ll make it quick with the other cases.” He spoke. “Carl Jenson, alcohol poisoning. Gregory John, blood clot stopped his heart. Mattew Carter, came in unresponsive due to suicide attempt. Donald Heath, liver failure. Last but not least, Parker Adams, brain dead on the table. Happy now?”

Kevin rushed out of his office and Jones’ sensed that talking about these men upset him. Not only did he have the ER to worry about, but something about these deaths, Jones’ could tell it bothered him very much.

Jones’ wondered if he would get Andrea to talk some more, since Kevin didn’t give out too much information. He left the hospital, with the files of the dead 6 men. He figured he would look back into the files to see if he missed any more information.


Kevin knew Jones’ was onto him, he quickly got out of his office and went to one of the empty on call rooms. He dialed Andrea’s number, as quick as he could. “When do you want me at the hospital?” Andrea answered with, he would usually call her for her to spend some time with him in the on call room.

“Get out of the house with your stuff, the cops are on to us.” Kevin snapped as Andrea stayed silent. “We need to get out of here as soon as we can because Jones’ is going to be headed to your house now.”

“I already have the bag packed. You want me to take the SUV?” She replied as that car wouldn’t be detected by the cops right away.

“Yes, then go to the bank, take everything out of the accounts. I’ll meet you at the bank and we will leave.” Kevin said as he feared that she wouldn’t be able to take everything out of the bank right off.

“I’ll come and get you first. If I go to the bank first, they will figured it out. We need to go to the bank in the next town over.” Andrea paused for a second. “I’ll be there in 5 minutes. I’m going to throw my phone in the lake on the way to get you. I love you.”

They bother hung up and Kevin rushed to grab other stuff from his desk.


Andrea quickly got into the SUV and then opened the garage, there was Jones, waiting for her. He wouldn’t move, so she ran him over. After, that she just kept driving, hoping that no one noticed she did a hit an run. Once she reached to the hospital, Kevin quickly jumped into the car and planted a kiss on her lips.

“Go, I just got a call from the hospital that they are doing a locked down.” Kevin said as Andrea stepped on the gas. The drove and drove for hours, Andrea felt that nothing could stop them, once they left town and reached the other bank.

They quickly went in and out of the bank, cashing out their accounts and cards, making it so the cops couldn’t trace their whereabouts. Kevin took over driving. They kept driving and driving, as they heard the sirens on their tail. Andrea never felt so much thrill in her entire life.

She was wanted. So, wasn’t Kevin. She was called the ‘Black Widow’. Kevin and her stayed low, but when they arrived in a new town, the craving for a wealthy man passed her mind and she couldn’t help herself.

She would sit at the bar, and waited patiently for their next victim.


Posted in Arts and Crafts, Crochet, Easy Patterns

Crafty Sassy: Crochet Mug/Coffee Cup Cozy w/ a Pocket (Easy)

Good morning dearies! Today is it snowing, in Maine, and I wanted to tell you about a pattern that I have found, on Pinterest, the other day, that is actually perfect for today, because of the cold weather we got going on.

As you all know, if you don’t already like my Facebook page, I show two different patterns and which ever one wins, I go live, showing you how to make them! This week, it was the coin purse vs. the mug cozy. So, I guess you can already think what won, by the title of this blog post!

Here is the link for the pattern itself:

https://www.thestitchinmommy.com/2014/09/give-sugar-coffee-cozy.html

I want to shout out to the Stitchin Mommy for making this pattern available for us today! I’ll be making her pattern later tonight on my Facebook Page, when I go live!

You all know that I just love making mug cozies, they are perfect for the cold or chilly weather and they prevent you from burning your hand, when you are craving that hot cup of coffee, tea, or hot coco.

This pattern just showed up, out of no where, but I’m glad it did! I have always wonder if someone had came up with pockets for their mug cozy. This pattern is simple and very easy to make, perfect for holiday gifts, but since the holidays are over, I will be making one of these for myself, or for someone in the family.

Best part of this pattern, is that you get to try out different colors, or mix and match the colors for the pocket and the mug base.

The only downfall of this pattern, is that it isn’t for all mug types. This ‘mug cozy’ is technology a ‘coffee cup cozy’. So, chances are, this won’t find on your favorite coffee mug at home.

HOWEVER! I have came up with another pattern idea, that is based off a simple mug cozy, and all I did was add the pocket on the side! Which is what this pattern is really for.

If you just started to follow me, I made a mug cozy pattern way back when I first started to blog (which wasn’t that long ago). I will be basing it off of that pattern, but making it bigger and adding a pocket.

Things you will need:

  • Medium Size Yarn
    • If you want to feel creative, like myself, grab another color and mix it up!
    • I’m using the I Love This Yarn brand for this project.
  • 4.5 mm hook
  • A button
  • Yarn needle
    • As always! Got to make sure to sew in your loose ends!


Mug Cozy Base

20190108_120843.jpg

Chain 10.

Row 1: Find the second chain from your hook (Not counting the chain that is already on your hook). Make a single crochet and a double crochet, in that same chain.

Skip the next chain and in the next chain, make a single crochet and a double crochet. Repeat til you reach the end of the row. Chain 1 and turn.

Row 2: Skip the next stitch. Make a single crochet and a double crochet in the next stitch. Repeat until you reach the end of the row. Chain 1 and turn.

Repeat Row 2, until you reach about 8 inches. If you wish to make it longer, you make do so. Also, keep in mind that the next step, we are making the buttonhole.

I would measure your mug first, and debating on adding more or less rows. Not all mugs are the same! You also don’t want your mug cozy to be too loose, otherwise it will fall off, and you don’t want it too tight either!

Don’t be afraid to ‘frog it’. Rippit, rippit!

Buttonhole

Next Row: In the first two stitches, single crochet together (sc2tog). Single crochet across, until you reach the last two stitches, single crochet together (sc2tog) in those last two stitches. Chain 1 and turn.

Next Row: Half double crochet into each stitch, making sure that you still have 8 stitches. Keep going for another 2 inches, starting where you started your half double crochets. (This is for bases that have the 8 inches crocheted. If you made it bigger, see the * for more info.)

*Depending on how long you made your mug cozy base, measure it, if your mug cozy base is over lapping itself, then you don’t need to keep crochet for another two inches. These will vary for different mugs. Make sure to measure it around your cup, before crocheting!*

Next Row: Now, we are going to make the actual buttonhole. If you haven’t chained one from the last step, do so now and turn your work.

In the first 2 stitches, make a single crochet together (sc2tog). In the next stitch, make a half double crochet. In the next stitch, make a double crochet and a treble crochet, in that same stitch. Chain 3. In the next stitch, make a treble crochet and a double crochet, in that same stitch. In the next stitch, make a half double crochet. In the last 2 stitches, single crochet together (sc2tog).

You can fasten off, or single crochet all around the mug cozy. This is something you don’t have to do, but if you are like me and like stuff to look neat and even, this is something you would want to do!

Making the pocket:

Using the same size hook, that you used for the base of the mug cozy, we are now going to make the pocket.

Chain 11

Row 1:  Find the second chain from the hook and single crochet across. You should have 10 stitches. Chain 1 and turn.

Row 2 – 12: Repeat row 1. Or until it has reached the length you would like. Make sure to leave a long tail, as you will use this to sew it onto the mug cozy itself.

Weave in any ends.

Sew on your button and you are done!

20190108_121100.jpg

I will be posting a video on how to make this mug cozy with pocket on my YouTube channel. I’ll add the video on here, once it is posted.

If you want to see me go live, on making the coffee mug with pocket, make sure you like my Facebook page and keep an eye out on my weekly polls, where you guys get to choose between two items and pick which one you want to see me make live!


Posted in Arts and Crafts

Basic Stitches & Terms Should Know For Crocheting

I was a beginner to crocheting, in the beginning of the year, but I got hooked into it the moment I first learned how to crochet. I thought it was going to be very difficult to pick up, unlike knitting, which my grandmother taught me to do.

If you are interested in learning how to crochet, please keep reading! There were a lot to learn and a lot of different terms. I do consider myself still a ‘beginner’, but I do know most of the stitches and terms, which I have learned over time.

First thing is first, if you are a true beginner, I suggest getting a set of crochet hooks. The first set I ever bought was on Wish, but if you don’t want to wait weeks on end for stuff, you can find a set on Amazon for about $10-$15. Some sets will even come with markers, tape measures, plastic needles, scissors, and some other stuff as well!

Image result for crochet hooks

If you don’t have the extra money to buy a set, you can always go to your local craft store or Walmart, and get the following:

  • Crochet Hook
    • Start with a 5.0mm hook. Most projects require this size and it is also the size I am going to use to show you each stitch.
  • Yarn Size 4 (Medium)
    • If you are unsure what size the yarn is, you can always check on the back of the yarn label, and it will tell you what size it is. It also tells you what hook it ‘recommends’ to use, but most crocheting projects use this type of yarn.
    • Image result for yarn size
    • Image result for yarn size on the yarn label
  • Markers
    • Markers aren’t really needed, but are very helpful for marking when your stitches begin and end.
    • You don’t necessary need the actually crocheting stitch markers, you can use a paper clip, bobby pin, or anything that is small enough for you to use for crocheting. You can check out the picture and see what I mean.
    • Image result for crochet markers
  • Sewing Needle
    • You will always need a sewing needle for every project you do. When a project is finished, you use them to sew in the ‘unwanted’ strands from the beginning, middle and end of your project.
    • Doesn’t matter what size you use for a yarn needle, a basic size works for most projects and you can also find a pack of needles that has different sizes on Amazon or your local craft store.
  • Scissors
    • You will also always need scissors, for all your projects, to cut off any loose ends. I suggest getting embroidery scissors because they are small and easy to travel with.
    • Image result for embroidery scissors
    • Normal pair of scissors works fine as well.

Now that you have an idea of what you are going to need, let’s talk about some stitch and abbreviation terms, before starting to crochet. I have created a mini ‘cheat sheet’, for you beginners, which will also be posted on all of my social medias. If you were to look at the entire list of crochet abbreviations, your head might spin, so that is why I’m breaking it down for the new comers. Crochet Beginner Cheat Sheet.jpg

The reason why we use ‘abbreviations’ for crocheting, is that some of the terms, that are used, are very long and it would make the pattern, we are reading, very difficult to understand. Most crochet books have a page or two, on what the abbreviations mean and how to do that particular type of stitch.

There are other terms that aren’t listed in crochet books. If you join a crochet group on Facebook, some of them, in the group, will use different terms that aren’t really in the crochet books, or the ones that I have.

Here are a list of ‘slang’ crochet terms, that some people might use, that aren’t necessary in the crochet books:

  • Ami – Short for Amingurumi.
    • Amingurumi are the stuffed animals that you can crochet and make, they just aren’t called ‘stuffed animals’.
  • BiStitchtual – Someone who crochets and knits.
    • I’ve never heard this term before, I don’t think anyone has really used this term, but then again, I haven’t come across someone saying it or calling themselves it.
  • C2C – Corner to Corner.
    • C2C are blankets that you make, using a grid or graph.
  • CAL – Crochet Along,
  • De-stash – Selling or giving away yarn you stash.
    • Most people who do this are ones that might have a lot of yarn just sitting around. Since some brands of yarn are very pricey, you might get them cheaper from someone else who isn’t using them.
  • FO – Finished object.
  • FOTH – Fresh off the hook.
  • Freehand – Making a project without following a pattern.
    • Lots of experience people make these, while writing the pattern as they go. When you become more advance, this is something a lot of people do to make money from crocheting, by selling their patterns.
  • Frogging – Ripping out rows or rounds of crochet (Ribbit, Ribbit)
    • I have done this so many times. Especially if I find I missed a stitch or it doesn’t look ‘neat’ and ‘pretty’. You’ll be doing it too!
  • HOTH – Hot off the hook.
  • Hooker – A proud and happy crocheter.
  • HSPY – Haven’t started project yet.
  • ISO – In search of.
    • If you are in search of a pattern, particular yarn brand, stitch, or any supplies that have to do with crocheting, most groups on Facebook, can be helpful to help you find what you are looking for.
  • JOTH – Just off the hook.
  • LYS – Local or little yarn store.
  • MAM – Mile a minute afghan.
  • MGBTC – Must get back to crocheting.
  • OCD – Obsessive crocheting disorder.
    • Once you get the hang of it, you’ll want to keep going and try different patterns and projects.
  • PABLE – Pattern accumulation beyond life expectancy.
  • PHD – Projects half done.
  • PIGS – Projects in grocery sacks.
  • PTP – Permission to post.
    • Some use these word for posting on social media or sharing it on their personal social media, or blogging sites.
    • This is VERY important to know because if you buy a pattern, most creators do NOT want you to post it on another website or share it with anyone, unless they bought it.
  • SABLE – Stash accumulation beyond life expectancy.
  • STASH – Special treasures all secretly hidden meant to be discovered unexpectedly.
  • TALC – Take along crochet.
  • TIA – Thank you in advance.
  • TOAD – Trashed object abandoned in disgust.
  • UFO – Unfinished object.
  • USO – Unstarted object.
  • Yarn Cakes – The small skeins of yarn that result from using a yarn winder.
  • WIM – Work in mind.
  • WIP – Work in progress.
    • A lot of crocheters will use this term.
  • WIVSP – Work in very slow progress.
  • YAP – Yet another project.
  • Yarn Barf – The tangled mess of yarn from the center of a skein.
    • This happens to me, because I usually use the center string for when I crochet. I love using it because I know have to unravel yarn, but it can be a pain in the ass to unravel, when you use the middle string.
  • Yarn Bomb – A decorative piece of crocheted or knitted art that is strung up in a public place.
  • YART – Yarn acquisition road trip.

Make sure to follow my blog for more beginner posts on crocheting! I will be breaking down everything in little parts and I will also have videos for you to view, if you find it easier to understand and learn!

I also go live on my Facebook page on Tuesdays! Check it out and don’t forget to like it, so you can stay in the loop for whenever I post a blog post or go live!
https://www.facebook.com/katiesblog96971617/


Posted in Uncategorized

What’s Going On For My Blog, YouTube Channel, and Facebook Page?

Hey Dearies! It has been awhile since I’ve posted a blog post and I wanted to chat up with you about what has been happening in my life and the future of my blog, YouTube channel, and Facebook page.

I’m NOT done! Making this very clear! I ain’t quitting any time soon!

I’ve had a lot going on in my personal life and we also had a death in the family. I’m doing my best to mourn over our family’s lost, it’s a lot easier said than done. So, if I’m not able to post stuff on here or any of my social media platforms, please be patient with me.

Another thing that is happening is that there is a lot going on in my mind. The holidays can be very difficult for me because of the lost of my son. It can be difficult to do some stuff with my daughter and realize I won’t ever be able to do it with my son.

Image result for changes

Anyway, that’s what has been going on, but let’s talk about what the future is going to be like for the following platforms of mine.

My Facebook Page/Online Business (Katie’s Craft Studio):

I’m very active, when it comes to my Facebook page, so if you are ever looking for an update, check it out! It is where I will mostly post any updates or when blog posts are going to be out.

The online business, I am trying to get some more stuff together, working on a logo and business card. If you want to order anything that I offer, you can send me an e-mail or message me on my Facebook page for the time being.

I am currently working on a online order form for my small business, but it is still in the works. I’ll update the status of that on my Facebook page. I have thought about Etsy, but I want to offer more products, but I need to have the clients to order them first. Again, I’ll be posting an update on it.

My Blog: 

Yes, I will still be doing my blog. I have a couple new ideas, just to make sure that I am active everyday. I am also still working on Unclear 2, which I will explain that in a second.

Starting January 1st, I will be doing the 365 blog posts, it’s like a writing prompt which can help be become a better blogger and writer, so that will be public for your viewing pleasure.

Unclear 2 is in the works, it is out on Wattpad and I have been updating it, very slowly, but I will be doing a ‘short story’ of the month where I have a set theme and I have to write a short story on that theme or topic.

I’ll start doing reviews about anything. From books, TV shows, movies, or products! I’ve always wanted to do this, so for next year, I’m going to try my best to make it happen, at least once a month!

As for Crafty Sassy, I am going to have a plan on what items I would like to show every Tuesday. I can go live on my Facebook page, but I feel it would be better to give you guys an actually video on how to make some of the stuff, but more edited and clear to understand. Which will be posted on my blog and on my YouTube page, but we will get to that.

For wrestling and WWE stuff, I’m going to try and figure something out with that because I still love watching it, but it might just be for the pay-per-views and what I thought about the matches. I have thought about doing just a Superstar of the month and not every week because I feel like I have rushed most of them and I want to take the time to make them better.

The gaming part of my blog will be more active! I have a few ideas and I am actually going to try and live stream for my YouTube channel. I will also record myself showing how to’s- for Minecraft, Sims, etc.

YouTube Channel (KatiePurrPurr):

Nope, I’m also not done for this either. Although, I am working on getting a better camera because the one I have isn’t the best, when it comes to going live. So for now, I’ll try my best to ‘work with it’, but it isn’t going to be the best thing ever. I also need to get some better lighting as well.

The Sims series, I am working on it, right now, I do have a problem with the Sims because I need them to get to the weekend days, so that I can film. I will also have different idea for the series, I’m going to ‘free film’, basically filming without having a script. I’ve never done that before, but it will be new to me!

The second episode is in the works, I just need to film it and then I will go from there.

Image result for patience quotes

So, a few things are changing for my platforms, but I’m not done! I’m not giving up! I just need to get back on track, which I will be on January 1st of 2019. For the time being, I will do my best to post stuff, but it might just be Crafty Sassy stuff.

Thank you for all that have supported me and have stayed with me through this progress!


Posted in Arts and Crafts, Crochet, Easy Patterns

Crafty Sassy: Crochet Towel Topper (Easy)

44664318_1911676305807353_5391009887280955392_n

Hey dearies! I wanted to give you guys an updated pattern on the towel topper! I finally mastered it to my liking and I wanted to share it with you guys. If you didn’t know, my great-grandmother has been making these towels since I was really little and I’ve always wanted to know how.

Now that I have more knowledge on how to make them, I created a pattern that is, to me, perfect. Not too much yarn, but just enough to complete the towel itself. As you can see in the picture above, one of them is very long, that was one of my trial ones that I practiced on.

We are going to be making these ones:

20181024_121320.jpg

What you will need:

  • Medium Yarn
    • Find a color that you would think, would go good with the towel.
  • 2 different sizes of crochet hooks. You don’t have to use just one size, you can use whatever size you would like, these are what I prefer to use.
    • 5.0mm – This one, we will use to crochet the actual towel.
    • 3.0mm – This one, we will use to start off the towel.
  • Towel
  • A button, color of your choice
    • The size can be whatever size you would like, but nothing smaller than an inch.
  • Sewing needle
  • Ruler (Optional)
  • Black Marker (Optional)

Let’s begin!

Part 1: Starting the towel –

The first thing we need to do it cut the towel in half, like this:43592885_483374518835072_2761795955673006080_n

As you can see, mine, isn’t completely even, which in normal because of the brand of towel I am using. It doesn’t have to be perfect!

Take one of the sides, of the towel, that you want to work with and lay it flat in front of you. If this is your very first time making this towel, I suggest grabbing a fine point black marker, it will make this next part easier.

Starting from the right side, take a ruler and measure 1/4 of an inch, place a dot with your marker and do that all across the towel. Make sure you are also 1/4 of an inch away from the top of your towel.

Untitled.png
If you aren’t good with measurements, here is 1/4 of an inch on a ruler.

Once you are done making the dots, you can begin! Take the smaller crochet hook (3.0mm) and some yarn. Poke your crochet hook in the very first dot, where you started on the right, pull some yarn threw that first hole and slip stitch (sl st) to lock in the yarn.

You are going to do this all across the towel, until you reach the end. Be careful that you don’t snag any of the towel strings, it can happen for some towel, especially for thin ones.

20181024_130853.jpg
This is what it should look like after you finish the first part.

When you reach the end, turn your work and switch the crochet hook to a bigger hook (5.0mm), and chain 1.

Part 2: Crocheting the towel –

Row 1 – Single crochet (sc) in between each stitch. Chain (ch) 1.

*Note – I am considering this as the first row because this is when we are actually starting to crochet.

Row 2 – Double crochet together (dc2tog) for the entire row. If you end up with an extra stitch that you can’t double crochet together, just do a simple double crochet (dc). Turn your work and chain (ch) 1.

Row 3 – Double crochet (dc) across. Turn your work and chain (ch) 1.

Row 4 – Single crochet (sc) across. Turn your work and chain (ch) 1.

Row 5 – Double crochet together (dc2tog) across. Turn your work and chain (ch) 1.

Row 6 – Single crochet (sc) across. Turn your work and chain (ch) 1.

Row 7 – Double crochet together (dc2tog) across. Turn your work and chain (ch) 1.

Row 8 – Single crochet (ch) across. You should end up with 8 stitches. This is needed for the button hole!

  • If you have 1 extra: Make a single crochet together (sc2tog) in the last two stitches.
  • If you are missing a stitch: Add another single crochet (sc) in that last stitch.

Turn your work and chain (ch) 1.

Row 9-13 – Double crochet (dc) across. Make sure that each row still ends with 8 stitches. Turn your work and chain (ch) 1.

Row 14 – For the last row, I’m going to break it down:

  • Single crochet together (sc2tog) in the first 2 stitches.
  • Half double crochet (hdc) in the next stitch.
  • Double crochet (dc) in the next stitch.
  • In the same stitch you just made the double crochet (dc), treble crochet (tr) in that same stitch. Chain (ch) 3.
  • In the next stitch, make a treble crochet (tr) and in that same stitch, make a double crochet (dc).
  • Half double crochet (hdc) in the next.
  • Single crochet together (sc2tog) in the last 2 stitches.

Fasten off and weave in any extra strands.

Part 3 – Button

Sew on the button in between the middle of the 8th row. Make sure that it is in the middle.

And you are finished!

These are a perfect gift to make for anyone! Especially, for craft fairs and such. Enjoy this pattern and if you make one of these towels using my pattern, please feel free to tag me on Instagram by using the hash tag #KatiePurrPurr.

*I created this pattern to my own liking, I do own it and you are more than welcome to use it or share it, but please do not take this pattern to sell as your own. When sharing this pattern, please make sure that you link it back to my blog. Any questions on the pattern, feel free to contact me*

Posted in Arts and Crafts, Crochet, Intermediate Patterns

Crafty Sassy: Halloween Jar Cozies (Intermediate)

Hey dearies! So, the Halloween Jar Cozies won for me to make on tonight’s live on my Facebook page! If you would like more information about that, scroll all the way to the end.

This is probably going to be on the the most challenging projects that I have tried, so bare with me! I want to shout out to Red Heart for this free pattern! Here is the link of the actually pattern:

Click to access LW4910.pdf

*Note: I don’t own this pattern, all rights go to the owner of the pattern. I make the pattern easier to understand, in my own words, but I DO NOT own this pattern!*

Here’s what you will need:

  • Medium Yarn
    • Red Heart Pumpkin, is what I’ll be using when I go live.
  • Crochet hook sizes 5.0mm and 3.75mm.
    • The smaller crochet hook is used to make some of the faces, you don’t have to do that.
  • Black Fabric
    • This is an option if you are a beginner.
  • Stitch marker
  • Sewing Needle
  • Row Counter
    • You can use a piece of paper, but I recommend using a counter, whether you use one on your phone or have a digital one like myself.

Let’s begin!

Grab your 5.0mm crochet hook and some yarn. Make a magic circle or an adjustable ring.

Round 1: Make 6 single crochets in the magic circle. Make sure that you don’t join this round! Place a stitch marker at the beginning of the round.

*Note: As we keep working up, move the marker up after the end of every round. It will make it easier to keep track of where we are at for each round. 

Round 2: Make 2 single crochets in each of the stitches, until you reach where the marker is.

Round 3: Single crochet in each of the next 2 stitches. Make 2 single crochets in the next stitch. Repeat until your reach the marker.

Round 4: Single crochet in each of the next 2 stitches. Make 2 single crochet in the next stitch. Repeat until you reach the maker.

Round 5: Single crochet in each of the next 3 stitches. Make 2 single crochet in the next stitch. Repeat until you reach the maker.

Round 6: Single crochet in each of the next 4 stitches. Make 2 single crochet in the next stitch. Repeat until you reach the maker.

Round 7: Single crochet in each of the next 5 stitches. Make 2 single crochet in the next stitch. Repeat until you reach the maker.

Round 8: Single crochet in each of the next 6 stitches. Make 2 single crochet in the next stitch. Repeat until you reach the maker.

Round 9: Single crochet in each of the next 11 stitches. Make 2 single crochet in the next stitch. Repeat until you reach the maker.

Round 10: Single crochet in the back loop only, of each stitch around.

*Note: If you don’t know how to single crochet from the back loop only, here is a link to a video that will show you how:
https://www.youtube.com/watch?v=phf7Nj0_LJg

Round 11-15: Single crochet in each stitches around.

Round 16: Single crochet together over the next 2 stitches. Single crochet in each of the next 24 stitches. Repeat once more.

Round 17-33: Single crochet in each stitch around.

Fasten off and you can remove the marker!

Now that we have completed the base, you can leave it how it is or take some black fabric and shape it to look like a pumpkin.

Best part about this pattern is that you can use whatever color you want and it would be the perfect cover for gifts, especially if you can! If you are looking to make it for a larger jar, check the pattern and look at the gauge.

I will be going live on my Facebook page tonight, showing you how to make this! If you are intersected in watching me make this, check out my Facebook page and make sure that you like my page, so that you can keep up to date on when I go live or make sure you don’t miss the polls!

Posted in Arts and Crafts, Beginner Patterns, Crochet

Crafty Sassy: How To Crochet A Flower Pin (Beginners)

20180928_123311.jpg

Hey dearies! You are probably wondering why you are getting a Crafty Sassy on a Friday, so let me tell you why! Since this coming up week will be the beginning of October, I have decided to go live twice, for the month of October!

So, I wanted to show you guys how to make this flower pin, because it also goes with the headband I showed you guys how to make on Tuesday. So, I will be going live on my Facebook Page. More information on that will be at the bottom of this!

Let’s get started! First thing, let’s talk about what you will need for this project:

  • Medium Yarn
    • Any color of your choice. Since this flower goes with the headband, you can match a color to go with it or whatever color you feel works best!
  • Crochet Hook 4.5 mm
  • Sewing needle
  • 1 Pin back
    • It doesn’t required any fancy pin, a safety pin would work find as well!

Part 1: Making the flower

  • Step 1: Chain 53
  • Step 2: Double crochet in the 3rd chain from the hook. Double crochet in every following chain across.
  • Step 3: Chain 1 and turn your work. *Single crochet in the next space. Make 5 double crochets in the next space* (The stars are to let you know that you have to repeat, until you reach the end or if they say otherwise)
  •  Step 4: Fasten off and make sure you leave a long tail because we will be using it to sew the flower altogether.

Part 2: Sewing the flower together

  • Step 1: Loosely arrange the layers to form a flower.
  • Step 2: Using a threaded yarn/sewing needle, stitch each layer of the flower together, ending on the back side.
  • Step 3: Draw the threaded needle through the pin back. Secure the pin back onto the back of your flower and cut the excess yarn to complete the flower pin. And your done!


Having a pin, on the back of your flower, can make it so you can wear it on hats, scarfs, headbands, necklace, etc. So there’s not just one use for this project.

Anyway, I will be going live tonight on my Facebook Page. If you haven’t like my Facebook Page, here is the link!
https://www.facebook.com/katiesblog96971617/

Let’s talk about the NEW plans for the month of October!

I plan on bring Crafty Sassy to you on Tuesday’s and Thursday, just for this month! Instead of the normal stuff that is for beginners and such, I’ve decided to make this month a ‘holiday special’. I will be doing the same for November and December.

If you have any projects that you want me to show you how to make, leave a comment down below, message my Facebook page, or even e-mail me at katie_farrington@aol.com!


Posted in Arts and Crafts, Beginner Patterns, Crochet

Crafty Sassy: How to Crochet a Basic Headband (Beginners)

20180925_150307.jpg

So, there was a tie on my Facebook page on whether I should make the Rose or the Headband, but since the headband has been in the last few polls, I figured I would show you how to make one.

Now, I haven’t mastered this pattern completely, but it is a very fun pattern to make! Especially, if you are a beginner. The Rose actually goes with this headband, so I figure we can make the headband and I then can show you how to make the rose and show you how to put it on, as well.

As always, let’s talk about the supplies you will need:

  • Medium Yarn (Color of your choice)
    • I decided to used the ‘I Love This Yarn’ multi-color yarn to show you guys what it should look like.
  •  5.0 mm Crochet Hook
  • And of course, a sewing needle!

20180925_150444.jpg

So let’s get started!

Step 1:  Chain 44. Now, found it easier to count out loud, while making the chains, just so I don’t lose track of how many chains I made.

Step 2: Make 2 double crochet’s in the 3rd chain from the hook(NOT counting the chain that the hook is on!). *Skip 2 chains, single crochet in the next chain. Chain 2. Make 2 double crochets in that same stitch.* Repeat until you reach the other end, then make a single crochet in that last chain.

Note: The * represent where you start and end. Basically, you are repeating the same step until you reach the end. I will be putting in * to help you know what you need to do! A lot of crochet books use them and they are very helpful! If you are stuck or need help, let me know down in the comments!

Step 3:  Chain 2 and turn your work. Make 2 double crochets in the next available stitch. *Single crochet in the chain-2 part of the work. Chain 2. Make 2 double crochets in that same space.* Repeat until you reach to the other side and then single crochet the top of the last row.

Step 4: Repeat Step 3. Twice. You should have 4 rows altogether.

Step 5: Chain 30. Then slip stitch to the opposite side of your project. Slip stitch across that small side and then chain 30. Slip stitch to the other side and slip stitch across that side. Once you are done, cut your yarn and pull your crochet hook up and pull that end piece of yarn tight.

Step 6:  Sew in any yarn that is hanging around and then you are done!

Note: If your headband does not fit, you can always 4 chains add or decrease 4 chains, to fit your size head. If you are looking for it to fit a baby or child’s head, this might not be the project for that, but you can try and make it work!

For Example: If the headband was too small, I would chain 48. If the headband was too big, I would chain 40. 

If you have any questions, feel free to ask me! I’ll try my best to help you out!

20180925_150941.jpg

Also, don’t forget to check out my Facebook page, I have a poll up every week on what project I should do next! Since Halloween is just around the corner, be prepared to be Spooked!
https://www.facebook.com/katiesblog96971617/

Posted in Arts and Crafts, Beginner Patterns, Crochet

Crafty Sassy: How To Crochet Mug Cozies (Beginners)

Hey dearies! So, today I am going to tell you how to make these super cute mug cozies! Since summer is slowly starting to change into fall, I figured I would show you how to make these cozies, which are perfect for giving away, with mugs, as a gift for the holidays!

This was also the winner for me to make on this weeks Facebook Live! If you don’t know anything about that, scroll all the way down for more information about it!

Image result for mug cozy

As always, before we begin a project, let’s talk about the stuff you’ll need:

  • Medium Yarn (a color of your choice)
  • Crochet Hook 4.5mm or a 7 in U.S
  • A button of your choice
  • As always, a sewing needle

Let’s begin!

Step 1: Make a slip knot onto your crochet hook and chain 8.

Step 2: Single crochet and double crochet in the 2nd chain from the hook. Remember, we are NOT counting the chain that is on the hook itself.

Step 3: Skip the next chain and then single crochet and double crochet in the same chain. Repeat this til you are at the end of row 1. Chain 1 and turn your work.

Step 4: Skip the next stitch and do a single crochet and a double crochet in the next stitch. Repeat til the end of the row. Chain 1 and turn your work. Repeat this step until your work measures 8 in., from the beginning of your work.

Step 5: Skip the first stitch and slip stitch in the next 2 stitches. Then do 1 half double crochet in the next 4 stitches. Chain 1 and turn your work.

Step 6: Now, we are going to work on the buttonhole strip for the next 4 stitches. Do 1 half double crochet in each stitch. Chain 1 and turn your work. Repeat this step until your buttonhole strip measures 2 in. long.

You can always put a marker, if this helps with keeping track from where the buttonhole strip starts, you don’t need to do this, but it can help with making sure it’s measured correctly.

Step 7: Do 1 half double crochet in the first stitch. Chain 2. Skip the next 2 stitches. Make 1 half double crochet in the last stitch.

Step 8: This step, is for making a boarder around the project. Work a single crochet stitch evenly around. Working 3 single crochets in the corners and 2 single crochets in the chain 2 buttonhole space. Join them all with a slip stitch in the first single crochet from where you started.

Step 9: Fasten off the extra strands into your project and sew on your button! Then you are done!

*Tip* – For attaching the button, wrap your cozy around your mug so you can see where you want to put the button. Mark it with a pin, thread your needle and sew on the button, making sure to remove the pin. You don’t have to do this, but it was very helpful for me!

I will be going LIVE on my Facebook page, showing you how to do this. If you haven’t already liked my Facebook page, please do! I give updates on my blog and YouTube channel.

I also post polls on what I should make next on my Facebook page, and which ever one wins, I go live and show you how to make them!

Check out the link!
https://www.facebook.com/katiesblog96971617/


Posted in Arts and Crafts, Beginner Patterns, Crochet

Crafty Sassy: How To Crochet A Granny Square (Beginner)

Today, we are going to talk about the most basic and easier square you can crochet. Granny square can be used to make mini squares, or one giant square! We are going to make a small, simple one.

I am going to point out that everyone has their way of crocheting the granny square. So, if you don’t think it looks right or you don’t like that pattern, then you can always search and find a pattern that works for you!

So, one of my kinda BIG crocheting projects, was the giant rasta color granny square, that I am making for my fiance. Its’ basically a giant granny square. It’s not done, but the bigger it gets, the more difficult it can be on your wrists.

Let’s talk about what you will need:

  • Medium Yarn (If you want, you can choice multiple colors, but I will be using just one solid color, to make it easier for you.)
    • Remember: If you are a beginner, try to stay away from dark colors.
  • Crochet Hook: 5.5mm
    • For the hook, it doesn’t have to be that size, but I found it was easier to work with in the video I watched.
  • Sewing Needle


Now that we having everything we need, we can get this project started!

Step 1: We are going to create a slip knot and pull tightly onto our hook. We are then going to chain 6. Then slip stitch the other end of the chain.

Step 2: Now that we have our circle, we are going to start by chaining 3 (Remember: This counts as 1 double crochet.) Then we are going to double crochet 2 times into the circle. I left a picture done below, just in case you need a refresher.

Image result for double crochet stitch

Step 3: Now, we are going to crochet 3 double crochets in the ring and then chain 3. Do that 2 more times. You should have something like this.

Image result for granny square first step

Slip stitch in the top of the chain to fasten off the base of the granny square.

Step 4: Now we are going to create the second row of the granny square. You can add on another color, if you would like, I’ll leave a picture down below showing how you can do that.

Image result for changing color stitch

Chain 3. (Remember: This will count as our first double crochet!) I always turn my work, but because this is a granny square, you don’t have to turn your work. We are going to now working in the open space with the following:
-Work 2 double crochets. Chain 3. Work 3 double crochets. Chain 1.

Step 5: 3 double crochet, chain 3, 3 double crochet, chain 1, into each space. Slit stitch to finish the second row.

Depending on how big you want your square to be, you are basically repeating steps 2-5.

I will be going live on my Facebook page, if you want to see it done. Make sure to like my page and follow me for more updates on when I post any posts on my blog or for when I go live! Here is the link:
https://www.facebook.com/katiesblog96971617/

I will be working on a video tutorial and create another blog post for those who aren’t beginners and just want the simple pattern.

I’m going to leave this link down below, if you would like to see a slowed down version of the granny square that helped me when I first started to learn how to make one. The Nervous Knitter is amazing and you should check out her other videos:


Posted in Arts and Crafts, Beginner Patterns, Crochet

Crafty Sassy: How To Make A Towel Topper (For Beginners)

20180828_080830.jpg

Today, I’m going to try to teach you guys how to make these simple towel toppers. My great-grandmother has been making these for years and we always had a few of these hanging around the house. To this day, she still makes them, but not as much as she used to.

I am basing this pattern off of what I have seen on YouTube, other free patterns that they have on the internet, and going by one of her towels. I have NOT perfected this pattern. My great-grandmother never really wrote down her pattern or anything like that, she is one of those ‘make it as you go’ type of crocheters.

I will make a better blog post on the towel topper, but for now, I’m gonna show you how I managed to make my first one.

So, first thing first, lets list off the supplies you will need for this project:

  • Kitchen Towel
    • Any type of towel you can use, but use one with more of a thickness, it makes it easier to work with, in my opinion.
  • Medium or Size 4 Yarn
    • Chose a color that would match with your towel design, if it has any. Try not to chose black, it is harder to work with, same with darker colors.
  • Button
    • I chose to get a pack of white big (not giant) buttons. White matches with mostly anything, and for this being my first towel, I figured it would be easier to work with. You can chose whatever color buttons that you think would fit for your towel, as long as they aren’t the small buttons.
  • Sewing Needle
    • Normal sewing needle, nothing really special. It can help with poking holes through the towel.
  • Crochet hooks: 2.25mm and a 4.5mm
    • These are the hooks I used, I might change the sizes, but the reason why you need two is the smaller one will be for bring the yarn through the towel itself, while the other one will be for the actual crochet part of the towel.

Now that you know what you need, let’s begin!

Step 1: Take the towel, you have chosen to use and fold it in half, hamburger fold, if that makes it easier to visualize. Cut the towel in half.

The reason for this is that if you have a long kitchen towel with the same design, on each side, you’ll be able to make two different towels.

Image result for kitchen towels

Step 2: This next step is going to be a little tricky. You can use the sewing needle to help poke holes in the top of the towel, I found that easier than taking the small crochet hook (2.25mm) and poking it through.

Once you poke your crochet hook through and pull through you yarn. Then, you are going to yarn over and pull through both loops, basically doing a slip stitch.

You repeat this step until you reach the other side of the towel.

*Remember to try not make your holes too close or too far apart. A few of the videos that I watched recommend being a quarter of an inch away from the top of the towel and from your last stitch, or hole you made. It doesn’t have to be exact, but whatever works for you.*

Step 3: Turn your work over. Now, we are going to switch our crochet hook, switch to the 4.5mm. Chain 1.

We are going to double crochet in between each of the stitches of the towel. You are going to keep doing that until you reach the other side of the towel.

*How to double crochet*

For this project, you are going to yarn over, go through or in between the stitches and then yarn over again, go through the first two loops, yarn over and go through the last two loops.

Image result for double crochet stitch

Step 4: You are going to repeat Step 3, for this next row. Instead of going in between the stitches, you are going to go in between each double crochet that we made in the first row of double crochets.

Once you reach to the other side, turn your work over and chain 1.

Step 5: For this next row, we are going to still double crochet, but we are going to skip every other one. For your first double crochet, you are going to double crochet in the first spot, but skip the one next to it.

You keep going until you reach the other side. Make sure to turn your working and chain 1.

Step 6: Repeat Step 5, making sure to skip every other one. Once you reach to the other end of the towel, turn your work and chain 1.

Step 7: As you can see, the towel topper is now starting to become smaller, which is what we want it to do. Now, we are going to repeat Step 3, making sure we double crochet into each one. When you get to the other side, turn your work and chain 1.

Step 8: Repeat Step 3. Turn work over and chain 1.

You are going to repeat Step 3, and making sure you turn your work when done that row and chaining 1. For the next 5 rows.

Step 9: Once you are done double crocheting those last 5 rows, it is now time to finish off the project and make the opening for the button to go through.

Now, everyone does this differently, but I am going to do it differently from what my great-grandmother does.

After you turned your work and chained one, you are going to do 2 double crochets. Chain 2. Skip the next 2 stitches. Then do 3 double crochets.

Step 10: This is the last row we are going to crochet. So, make sure you turn your work and chain 1. We are basically going to double crochet, for the last row.

When you get to the open space, you are going to double crochet twice in that opening.

We you get to the end, bind off by cutting the yarn you were working on and pull your crochet out, don’t remove the crochet hook from the loop, pull it up, so that the yarn is bind off.

Step 11:  The last step is simple, all you have to do is sew the button into the middle of the project, just like shown in the picture above. Then it is complete!

Like I said in the beginning, I will have a better post, when I have mastered a pattern and will update you guys on it. These towels have been a gift for any event or celebration. I love having these because you can hook in on your stove handle, especially if you have one made for the theme for your kitchen.

If you are intersected in learning how to do this, I will be going LIVE on my Facebook page, tonight! Like my Facebook page, because I do post all my blog posts on their, as well as my twitter. Click the link below:
https://facebook.com/katiesblog96971617/


Posted in Arts and Crafts, Top Projects for Crochet/Knitting

Crafty Sassy: Top 10 Crochet Projects You Can Profit From

Everyone loves hand-made crafts. Not a lot of people invest their time into them, but others, like myself, have more projects on your mind that you just don’t know where to start. Well, since I am a stay-at-home mom, I figure I would list some projects that could make you some extra cash on the side.

  1.  Towel Tops
    Image result for crochet towel toppers
    This is probably one of the most popular items you can make and they can sell pretty fast! You just buy a regular kitchen or hand towel and crochet the top so that you can hang it on your stove hanger.

    My great-grandmother always made these and they would be gone before you know it. They are very simple to make and there are a lot of videos on YouTube that can show you how to make these.

    Best part about making these is that you can use any towel, even for holidays! Which is pretty amazing! You always don’t have to do the same pattern either, there are many patterns out there that you can use. From one button to two, it’s completely up to you!

  2.  Towel Hangers
    Image result for crochet towel holder pattern
    I found this a few days ago and this would probably sell like hotcakes, just like the towel tops. The only difference between these and the towel  toppers is that you can hang whatever towel you would like.

    Instead of crocheting the towel itself, you crochet along a hair tie or an elastic band. These too, are pretty simple to make. Best part about these, is that you can make them any color you want them. Again, you can find a few great tutorials on this on YouTube.

  3.  Blankets
    Image result for crochet blanket
    These will always be on the list, but they do take up a good amount of your time, depending what kind of design you are going for. However, baby blankets might be the easiest thing to make, just because they are the smaller version of a big blanket.

    I know a lot of people will save the bigger blankets for family. Don’t get me wrong, they can make you some cash, you just have to be very detailed on how long it might take and you might have to use all of your spare time to finish it in time.

  4.  Hats
    Image result for crochet hats
    These will always be on the list. Hats are a quick and easy thing to make, especially kid hats. A lot of people would buy these with a gloves, scarf combo. Depending on how good the work is, you could make some serious cash(Not enough to pay rent, though. Unless you can supply the demands.)
  5.  Scarfs
    Image result for crochet scarf
    I loved getting scarfs, my great-grandmother would always make the fuzzy ones and get them to us, in our favorite color, for Christmas. I still  have a few from when I was little. Like I said with the hats, it would be a great combo to do together!
  6.  Place mats
    Image result for crochet placemats
    Not a lot of people have crocheted place mats, but they are something someone could sell. You could also be able to customize them for holidays, with different colors and patterns! A set of four would most-likely sell like hotcakes, too!
  7.  Coasters
    Image result for crochet coasters
    Coaster aren’t something you would see at a craft fair, but they are an amazing idea to make for one! A lot of people don’t have coaster, but they don’t want to spend too much money on them.

    These are very easy to make and they can be crocheted, but some of them can be made by hand!These would go great with place mats.

  8.  Gloves/Mittens/Arm Warmers
    Image result for crochet arm warmers
    Gloves might be a expect level project, but mittens would be a lot easier to make. Same with arm warmers, they might be easier to make as well. Arm warmers could also be part of the combo, you can either replace the gloves, or add it to the combo of hats, scarfs and gloves.
  9.  Pins
    Image result for crochet pin
    Yes, there is such a thing as crocheted pins! Although, you would have to work with smaller and finer yarn, they are very amazing to make. Especially, flower ones!
  10.  Mini Stuffed Animals/Characters
    Image result for crochet stuffed animals
    You probably seen these all over the internet or Facebook. They can be very challenging for a beginner. They have all kinds of different characters or objects that you can crochet into stuffy’s.

    Amazon has a wonderful Disney Princess Crocheting Kit, that I haven’t tried out yet. They have a booklet on how to make every princess, but they only give enough yarn to make two. I highly recommend getting it, just for the booklet!


Are there any projects that you see at craft fairs that I missed? Comment down below and comment of which one you see would be more in an high demand!

*Note*

  • These aren’t a quick way to earn millions of dollars. This would be something you would earn on the side for some quick cash. If you make them with great quality and passion, I’m sure you could make a living doing it.
  • I just wanted to make a note, so that everyone knows this isn’t something you can get rich quick and fast. A lot of people make these as a hobby of theirs and put a lot of effort into their projects.
Posted in Arts and Crafts

Crafty Sassy: Types of Yarn

Image result for different types of yarn

As a beginner, if we ever wanted to start a project, using yarn, we would just find the color we wanted and grab it, right? Then once we get home, we find out that the knitting needles or crochet hooks, aren’t for that type of yarn.

The chart that is shown above, will be your best friend while shopping for the right kind of yarn. Most of the yarn, that you can get, have one of this pictures with the yarn on it, saying the number of what kind the yarn is.

Image result for yarn weight symbols

Something like this. I will tell you what size the yarn is and even recommends what size crochet hook or knitting needles you should use with this yarn. Most of them have this on their packaging, which is very helpful for everyone.

Now, let’s get into detail with each one.

Related image

The picture that is shown about, shows the thickness of what each one looks like. I will be going through them all and explaining which one would be ideal for the project you are looking for.

0: Lace

Image result for lace yarn

This is one of the thinnest yarns that will be on this chart. If you are looking to make fashionable clothes, scarfs, hats, or hand warmers, this is what you would mostly use.

Lace yarn makes the project look more ‘perfect’ or it looks better in presentation. If you are a beginner, I would hold off on going right to the thinnest yarn.

1: Fingering/Super Fine

Image result for super fine yarn

Fingering yarn, or what the chart likes to call ‘Super Fine’ yarn, is used for making baby socks or anything clothes wise. Or, what you can find a bunch on, shawls. I’ve seen a few that have actually made a table cloth, for decoration.

2:  Sport/Fine

Image result for fine yarn

Sport, or Fine yarn can be used to make headbands, for babies, little cute stuff animals/characters. If you are looking to make some baby booties, this might be the yarn for you as well!

3: DK/ Light

Image result for dk yarn

If you are looking to make some 3D objects for your projects, such as flowers, this would be the yarn you work with. If you are looking to make a baby set, or baby blanket, this yarn will be soft enough to use to make them.

4: Worsted/Medium

Image result for medium weight yarn

This is the typical yarn that you would get for most of your projects, the possibilities are endless with this type of yarn. If you are a beginner, this is the type of yarn that you can basically make whatever you want with it.

I’ve seen people make blankets, hats, gloves, scarfs, handbags, baby blankets, baby shoes, crochet flip flops, etc. I’ve been using this yarn to make the backing of my latch hooks and also used my loom knit with is as well.

5: Chunky/Bulky

Image result for bulky weight yarn

If you are looking to make some stuff for the winter time, then you would use this. The type of yarn is thick to make great blankets with, or have a hat, scarf, and mittens for yourself. Although, you might need bigger crochet hooks and knitting needles for these projects.

My son and daughter’s blankets, I used this type of yarn, of course, they didn’t come out perfect, for my first time, but they loved them both!

6: Super Bulky

Image result for super bulky weight yarn

With this type of yarn, you can Arm Knit with this type of yarn, which I have always wanted to try, but with the price of Super Bulky yarn being very pricey, it’s something that will have to wait for me.

You can even finger crochet with this as well, or just make a nice big pillow to go on your couch.

Image result for all yarn types

With all of these yarns, the projects are endless. The best part of buying yarn, is that each one comes with a pattern, so if you have been throwing them away, you have been missing out.

Next Tuesday, I WILL have a tutorial on how to make a bookmark, crocheting. I just forgot about it and haven’t had a chance to get into it, due to I am working on a blanket for my fiance, which I will blog about when I am finished! Happy Crafting Dearies!


Posted in Arts and Crafts

Crafty Sassy: How To Make A Latch Hook Pillow/Pillow Case (My Version)

Image result for latch hook pillow

Good Morning all of my dearies! So, I figured I would show you how I make my latch hook pillows. I have already done a tutorial on the latch hook, and how simple and easy it is to do.

Now, I did this all on my own, I didn’t find this online, I came up with the idea because of the fact that some of the latch hooks were too amazing to just have as a rug. So, I figured that I would make a latch hook and turn it into a pillow. Not all of my latch hook pillows are perfect, I haven’t really mastered it, but I try to be better than the last time.

These are great gifts for family or friends, I would say for everyone, but it depending on the size of the latch hook and making the backing, it can be a very long process. The quickest that I was able to do, was about 2 months, but that was a small foot by foot latch hook. If you have kids, expect the project to take longer.

So, first things first, you need to have the following supplies:

  • Latch Hook kit
    • If you are a beginner, I recommend with starting out with a small latch hook, a foot by foot one would be perfect to start on and it won’t take as long as a bigger one.
  • Yarn (Medium)
    • The backing I just basically knitting small squares together or two long parts that I end up sewing together. The color can be any color you want it to be, as long as it is medium thickness and somewhat matches your latch hook.
    • I would try and get two yarn rolls, just to start out, but do keep in mind that you will also need it to sew the pillow together.
    • *Note* Try and avoid black yarn, especially if you are a beginner, black yarn is very hard to work with. Dark colors might be okay, but try and avoid them, if you are just starting out.
  • Metal Thick Needle
    • You’ll need this to sew your pillow together, or pillow case. I recommend using a thicker needle (Not talking about knitting needles!), the reason is because it will make it easier to sew them together. Plus, with the thinner needles, you can tend to break them, believe me, I have broken a few.
  • Scissors
  • Knitting Needles
    • Make sure that you have the knitting needles suggested size, it is on the yarn roll and suggests a size.
  • Rug Binding
    • This you will used around the sides for the latch hook, making sure that it doesn’t fall apart when finished.
  • Fabric Glue
    • I found that it was easier to use fabric glue to keep the rug binding together. You can use an iron, but I have tried and It didn’t work, I’m not sure if I did it right or not.
  • Stuffing (for making a pillow)
    • You can stuff it and then close it, or if you or anyone you are giving the latch hook pillow has any pets, I would take a pillow case and fill it and then put it into the pillow. It’s totally up to you.

Once you have everything, that I have suggested to have, you can finally start! First, before we can begin our pillow, we need to complete the latch hook, first. This might be the longest part that you need to do to make this pillow.

Then, knit the backing, you can either knit a classic square, or make it longer and have different pieces that you end up sewing together. Whatever is easier for you to do, I found that the squares were easier, depending how big your latch hook is, it made it easier to see the progress versus just knitting a long part.

The reason why we should make the latch hook first, is because once we trim it down, it will be easier to measure or know how long or wide you need to go. Some latch hooks don’t have a printed picture on them, some of them are blank and give you a big blank latch hook, just to make sure that you have enough to make the latch hook.

That’s only with the bigger latch hooks, a since foot by foot is usually has a printed design on it, so that you can follow the pattern.

After both parts are completely, just sew them onto the latch hook, making sure that you cover the latch hook grid. If you are making a pillow case, only sew around it, leave the top untouched, so that you are able to place a pillow into the opening.

20180612_175756.jpg

It should, almost look like the picture above, this was a project that I made for my aunt for her birthday. Her favorite Disney princess is Belle, so I made her a small foot by foot pillow.

This latch hook, I got from Hobby Lobby, but I am pretty sure you can find it on Amazon, you might be lucky and find it at Walmart, but I wouldn’t get your hopes up. This latch hook did not have a grid, with the picture, so that you can follow it on key.

The picture was printed on the latch hook and I made the best judgement for each one. The background isn’t green, it’s purple, I changed it to my aunt’s favorite color, instead. Another note, for this latch hook, the yarn is SUPER thick and was a pain in the ass to hook on.

However, the yarn I used for the background was a simple medium yarn, what most latch hooks use, so I was glad that the background wasn’t as difficult to do.

Next Tuesday, I have a surprise! I am going to show you how to make a book mark! Not just any kind of book mark, a crochet-made bookmark!

Posted in Arts and Crafts

Crafty Sassy: How To Loom Knit A Scarf (Figure 8 Stitch)

Happy Tuesday to all my crafters! Today, I’m going to take you step-by-step on how to loom knit a basic scarf. I’m going to break it down, just in case some others go way too fast.

20180703_145052.jpg


Now, I am going to be using a solid blue color yarn, I figured using a plan color would be easier to focus on. I’m also using a medium size yarn, which is a basic yarn that you would get from the craft store.

If you don’t have a looming set or kit, you can buy them on Amazon, Walmart, or your local craft store. The one I have is the KB Tadpole Loom, I got this from either Walmart or Kmart. It comes with the loom set and a little booklet, that shows you how to 8 different thinks with the loom.

So, first thing is first, we need to create a slip knot. Now, if you don’t know what a slip knot is, that’s okay because I am going to explain it too you. A slip knot is a basic knot that is used for knitting, crocheting, looming, etc, projects. I basically holds the start of your work together.

A lot of people do a slip knot differently, you don’t have to do it my way, but I would look on how other’s make a slip knot and choose whatever makes you comfortable. Here is a quick visual on how I make a slip knot:

  1. Find the start of your yarn and hold on to it. I have used this yarn before, as you can see. If you are using a brand new yarn, you can either find the start of it by grabbing the middle string, that might be sticking out, or look around the yarn and see if you can find the other end. Personally, I rather grab from the outside, because mostly every time that I grab onto the middle and pull, sometimes it be in a knot.
    1. 20180703_145501.jpg
  2. Wrap the yarn around your finger, leaving a enough space in between them. See photo below:
    1. 20180703_145513-1.jpg
  3. Next, you are going to pull the first yarn over the second yarn, like this, see below:
    1. 20180703_145557.jpg
  4. Then, you are going to pull the end of the yarn, so that it’s tight, not too tight on your finger, though.
    1. 20180703_145616.jpg
      • And there you have your slip knot!

Now that we have a slip knot, we can begin! So, take the slip knot off of your finger and place it on one of the end pegs, and tighten it, not too tight, though. Like shown below:

20180703_145650.jpg

What we need to do next is wrap the yarn around the pegs. Pay very close attention to how we do the figure 8 stitch.

It will look tricky at first, but it’s very simple, just make sure that you are wrapping each and every peg, as shown in the picture above. Once you get to the other side, see below, go back and re-wrap all the pegs, using the same stitch that you just did.

When you finish wrapping all the pegs again, your work should look like this, if I explained it well enough. This is the top view:

20180703_150058.jpg

Here is what the side view will look like:

20180703_150113.jpg

If you haven’t already noticed, that there was one peg that was only wrapped once. That is okay! It is supposed to be like that. Every time that you wrap them a second time, there will always be one that isn’t wrapped twice.

Now, because this loom doesn’t have a end peg that you can wrap around, I wrapped the yarn around the side of my loom, because if you don’t, your work will come undone. That is the only down fall with this loom, it doesn’t have a place to wrap your yarn.

Anyway, here comes the more difficult part. You will need your hook for this step. Take your hook and grab, from the first set of yarn that we cased on, you are going to pull it over the peg and over the second yarn. Note: It doesn’t matter which side you start on, but which every one you decide to start on, finish it before moving on to the other side. 

20180703_150230.jpg


You keep doing this, on the side you are working on, it should look like this, when you finish your first side.

20180703_150345.jpg

It’s okay if they are a little loose, most of them will end up in the middle anyway, so it’s okay that they don’t, at first.

Once you have completed the other side, your work should look like this:

20180703_150500.jpg

Then, just gently push the middle of your work down and recast another figure 8 stitch, until you get it to the length you desire. I have added a chart, for the average lengths, but if you want a scarf that fits perfect, for you or whoever you are making it for. Hold you arms out side and have someone measure from fingertip to fingertip, that will give you the exact length you need.

Image result for scarf sizes

How To End Your Work

I don’t have any pictures on how to cast off, so I am going to explain the best I can. I will be making a YouTube video about this blog post and will attach, once it is uploaded. I will make sure to have pictures, as well.

Basically, you’ll be transforming one side to the other and then binding off. So, grab your hook and take one of your yarn, from your first peg, and wrap it around the peg across from that peg. Note: I’m pretty sure you can start from either side, when you bind off. But don’t quote me on it. 

 Once you have finished that, and got to the final hook, your work should just come off and you should be all set.

There you have it! I’m sorry if I didn’t explain it a little better. I will be making a video on how to do it, as soon as possible and I will edit at this post, once I do! If you have any ideas or want me to try out something new, let me know in a comment or send me an e-mail at katie_farrington@aol.com!


Posted in Arts and Crafts

Crafty Sassy: Crocheting VS Knitting

Happy Tuesday! I have another Crafty Sassy coming to you! I am going to talk about the difference between Crocheting versus Knitting and how they are different from each other. Let’s jump right in!

So, the major difference between the two is that you don’t use the same tools. For crocheting, you use a hook and for knitting, you use long needles. The better thing about crocheting is that you can see more progress than you can knitting, depending on what you are knitting.

Image result for knitting vs crocheting

Crochet

Now, I’m not an pro at crocheting, but I have managed to crochet a granny square and I am working on a granny square blanket for my fiance. To me, at first, crocheting looked very difficult. Even when I tried to practice a single crochet square, I always seemed to mess up, somehow.

Image result for crocheting projects

After trying for a while, I gave up. More so, I took a long break and headed to YouTube. I am one of those people that can’t just read the book and look at pictures to do something, I have to physically see them doing, what I am trying to learn.

I figured I would start simple and look for a video to make a granny square. I found the best tutorial by the Nervous Knitter. Link for the video – https://www.youtube.com/watch?v=vDdXrZB1FOE

Since crocheting can be very fast, she slowed it down every step and it was much easier to follow. I watched the entire thing, twice, just to make sure I did it right and know, I know it almost by heart.

Image result for crocheting projects

With crocheting, once you get the pattern down, it’s like riding a bike, you don’t forget it very easily. Crocheting, you can do so much, the best part is that you can see your progress, so working on a granny square blanket, I see the progress, which makes me excited to keep on going!

Once I am finished on my fiances blanket, I will post a picture on here and show you how to do a granny square tutorial, as well!

Knitting

Knitting was the first thing that I ever did, or tried out. I knitted my son’s first blanket. It was very simple to do and, at that time, I preferred to knit versus crochet. The only problem with knitting, it felt like my project was never going to be finished.

Image result for knitting projects

Don’t get me wrong, knitting was very basic and was easier to start out, but once your project gets bigger, you don’t have very much, to me, encouragement to keep going. Plus, I also seemed to lose a stitch or two and my project would come out all uneven, and with me trying to make things perfect, I would restart multiple times.

But there is also another way to knit, without using the needles. You can loom knit as well. I just got a giant set of different looming sizes and shapes. (Next Tuesday, I will be going a tutorial on how to loom knit a scarf!)

Image result for loom knitting

Knitting was something that I did for my latch hook pillows, the backings of them. I knitted them like I was making a blanket, but the needles can only hold on so much, unless you have the needles with the wires, which I don’t currently have.

Image result for knitting needles

Although, knitting was a easier way to have my projects looking a little neater, not perfectly neat, but neat as a way, there was not unwanted holes, just a solid pattern. Knitting, to me, is more for making a really great scarf or, if you have the knitting needles with the wire, a hat or even a blanket.

Which one would be better for beginners?

I would trying out knitting first, just because the concept is more simple and easier to follow versus crocheting. Try something simple, such as knitting a scarf or a square, just to get some practice.

Image result for knitting needles

Once you feel like you know the basics for knitting a simple scarf, try challenging yourself and try to crochet a granny square. If you are like me and need to physical see what is going on, I am going to try my best and make little tutorial videos to help you guys out.

If you get really frustrated with any of it, take a break. Taking a break from your work is okay to do! Especially, if you have children and they are making it difficult to work on anything. Your work will still be there when you want to go back to it.

Another tip that really helped me out, before jumping in on crocheting or knitting, or any project, take a step back and just watch videos of people doing those things. Watch how they do their work and whatever tips or things they do, that you feel or know that would help you out, use them!

Watching other people crochet and knit, I’ll pick up the little things that they do, so that I can used to my advantage or help better myself into crocheting or knitting different things.

Also, if you aren’t sure what kind of knitting needles or hooks you should get, try some out. I prefer metal ones, just because it’s easier, although, I haven’t tried out the wooden or ones with handles. I literally, just bought a set off of wish and have stuck with them ever since, although, because they don’t have a handle, my hands can get sweaty and it makes it harder to work the yarn.

I do recommend trying them out and seeing with ones you think, for yourself, make it easier to crochet or knit.

Image result for knitting needles

One thing that I highly recommend, is to work with bigger yarn! I know a lot of people say not to because it will make it harder to work with the less thicker yarn, but it will let you be able to look, up closely, how it is done. So that if you feel you made a mistake, with the less thicker yarn, with the bigger yarn, you will be able to see clearly what you did to mess up.

So, next Tuesday, I will be doing a step-by-step on how to loom knit and simple figure 8 scarf.

Posted in Arts and Crafts

Crafty Sassy – Intro to Latch Hook Projects

I mentioned that I have worked with a few latch hooks, but I never went in detail on what they really are. Latch Hooks are like rugs that are made up of yarn on a grid. There are many things you can with latch hooks. I personally, like making pillows, but they are a lot of hard work.

Image result for latch hook grid

The picture above is what a latch hook looks before you start or add on anything. Also, that is the tool you use to ‘tie on’ the yarn. Now, if you are intersected in making one of these and you are just a beginner, I recommend buying a latch hook kit. It will come with everything you need: the grid, the cut up yarn, and the hook tool.

Image result for latch hook kit

Not all kits are the same! The picture above shows what you would get in a kit, but be warned, not all kits have their colored yarn organized perfectly like this! Some grid might actually have the print of the picture already on the grid, to help guide you through the process.

Also, if you haven’t noticed, most of the latch hook grids have multiple blue squared on them, that helps with knowing where to start, it you aren’t lucky enough to have a kit with the picture printed on the grid. Most of the squares are 10×10, by counting them, but some grid might be different and be like a 10×9 or 9×10.

Image result for latch hook how to

The process is very simple. I didn’t think so, at first, but it is very easy to do. The picture above with show you a little better than how I explain it.

  1. Take a piece of yarn, whatever color you need and wrap it around your hook, your latch hook tool.
  2. Take the hook, while holding on to the yarn that is wrapped around it, and insert into the grid, just the hook and make sure that the hooks open, as shown above.
  3. Next, take your end pieces of your yarn, remember, you still have it wrapped around you hook, and pull it into your hook, making sure that your latch hook tool flap, we will call it, doesn’t close. You have to make sure that stays open for this step!
  4. Then, take your latch hook and pull it through that square, where you want to place the yarn. The hook tool flap will close to keep the yarn in it’s place when you pull through the square.
  5. Last, but not least, tighten the knot and make sure it is on tight!
  6. Once that is done, you keep repeating until the project is done!

Image result for latch hook how to

Sorry, if I didn’t explain it very well. This picture above does a better job, but I figured I would give it a shot and try.

When you finish your project, you will noticed that you have extra strands of yarn leftover. Some kits will add more than enough to finish, other’s might give you enough to just barely finish the project. If you are like me and keep everything, keep the extra strands, just in case you need them for another project, you never know.

If the kit didn’t give you enough yarn, there is another way to get some more. You can always go to a craft store, or look online, and find the color yarn and cut it yourself, but using the size of what the kit gave you. Or, some craft stores will have the yarn cut up already for you, so if you are making the latch hook for someone, they have it for you to grab and go.

Latch Hooks is great for all ages, plus, if you are just starting to get into crafts and such, this would be the way to start out. You can do so much with latch hooks, they don’t just have to be a rug. They can be pillows, stuff animals, wall hangings, etc. They even have blank grids that you can freestyle.

The only downfall with the latch hooks, is that it can take up a lot of your time, sometimes. It’s nothing that you can pick up and finish all in one sitting, maybe if you are quick and did it all in one night, or had a small one to work with. This type of project is a pick up and finish later type of project.

Anyway, I will had a few pictures below of the latch hooks that I have finished. So far, I have made two pillows and two pillow cases. None of which have been for me, but all the ones I have given away, have loved them. Not because I did a great job, but it was something that I made for them and those are the best kinds of gifts!

20170416_094834.jpg

20161212_185354.jpg20180218_152714.jpg20180612_175756.jpg

If you are very intersected in wanting to make one of these, check out your local craft store. You won’t have much luck at a Walmart or Kmart, but Amazon does have a very wide selection!