Posted in Crochet, Yearly Crochet Blankets

Crafty Sassy: Crochet Yearly Project Ideas

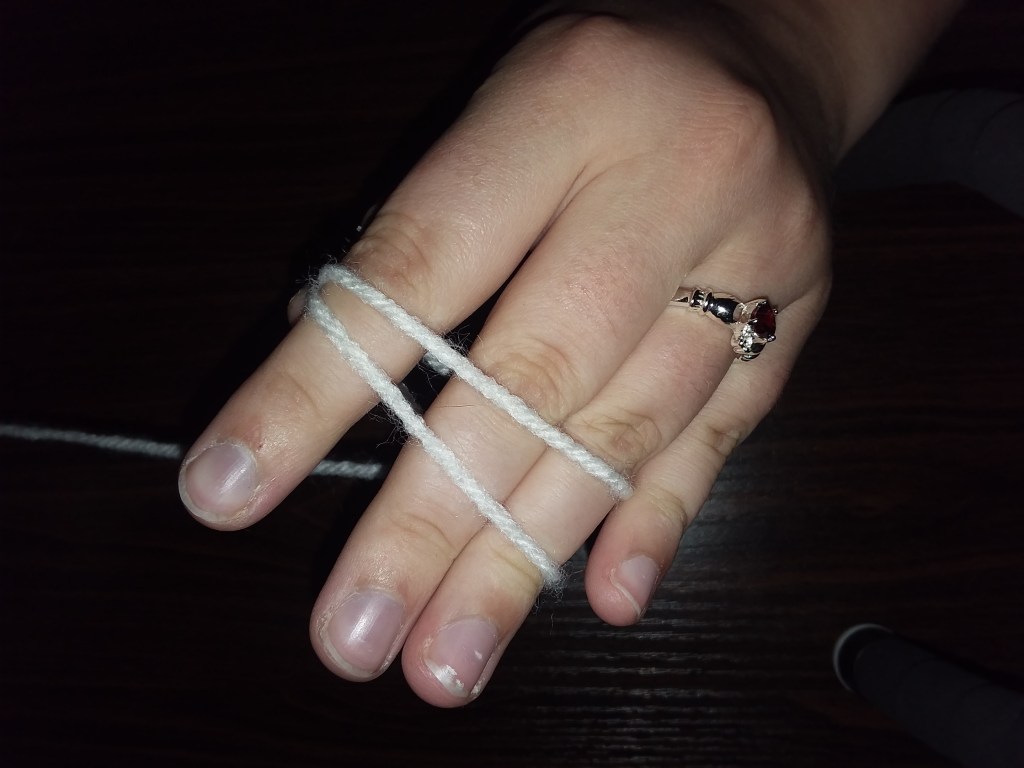
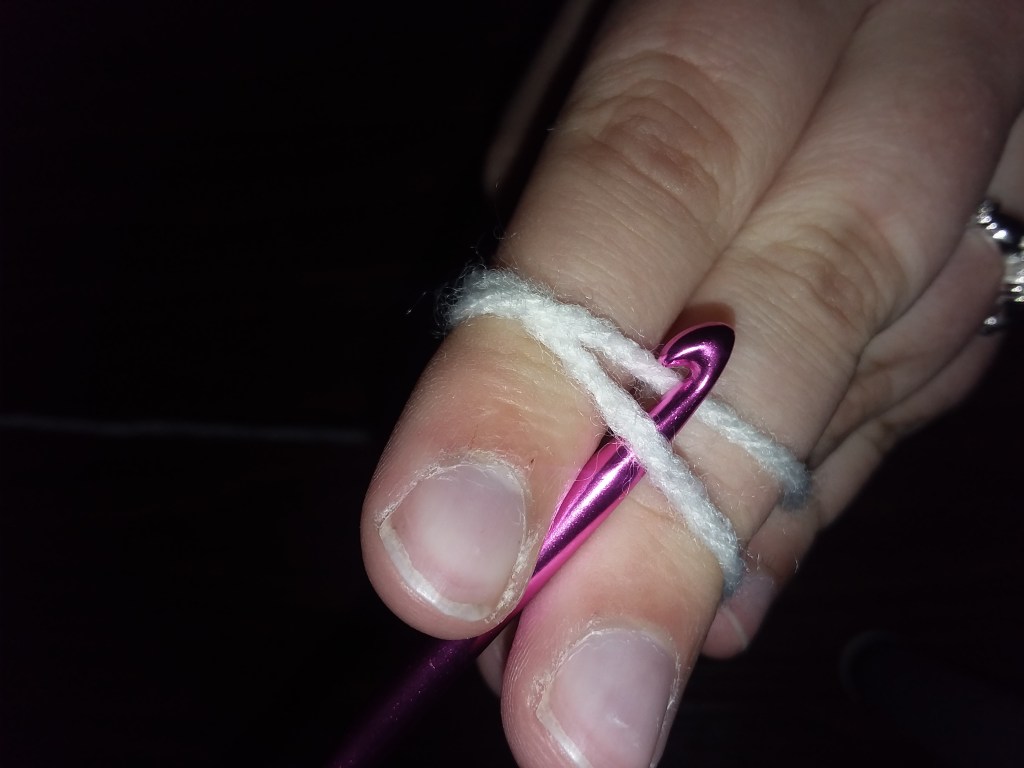
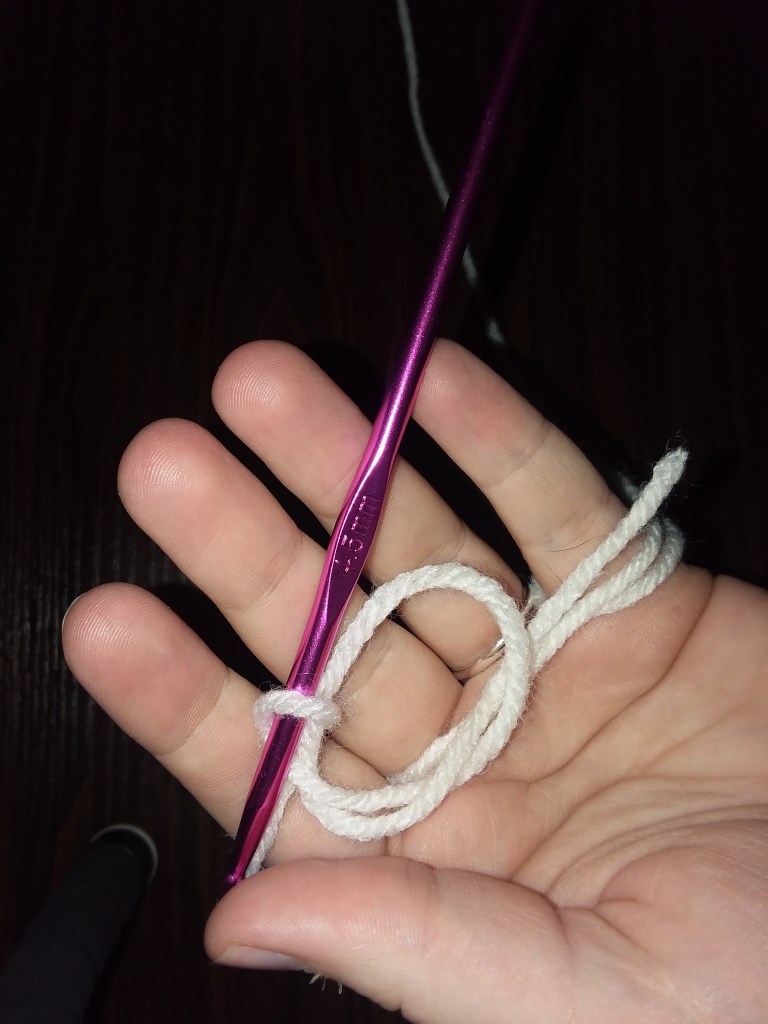
Hey Dearies! So, I am currently working on a yearly project for 2023, but I wanted to suggest if anyone was thinking about doing a yearly blanket or temperature blacket. I think they are very fun to do, but the temperature blanket can be a pain because you are crocheting a square or a line every day.

The one that I am working on currently is actually from a Youtube that I am subscribed to. Plus, she does have some other yearly blankets that she has done too and I am going to leave links to her videos too if you are interested in trying them out.

If you are going to be making a yearly blanket, you need to do a little bit of research to find out how much yarn you are going to need & how much time you would need to complete it. I have done a temperature blanket before and the one thing I didn’t think of was how much yarn I was going to need and to make sure to stick to that brand as well.

I ended up in a pickle and used a color from a different brand that sort of worked, but it’s okay because it’s just a simple trial and error. So, the next time I decide to do a temperature blanket, I am going to pre-stock some skeins of colors so that I don’t run into the same problem.

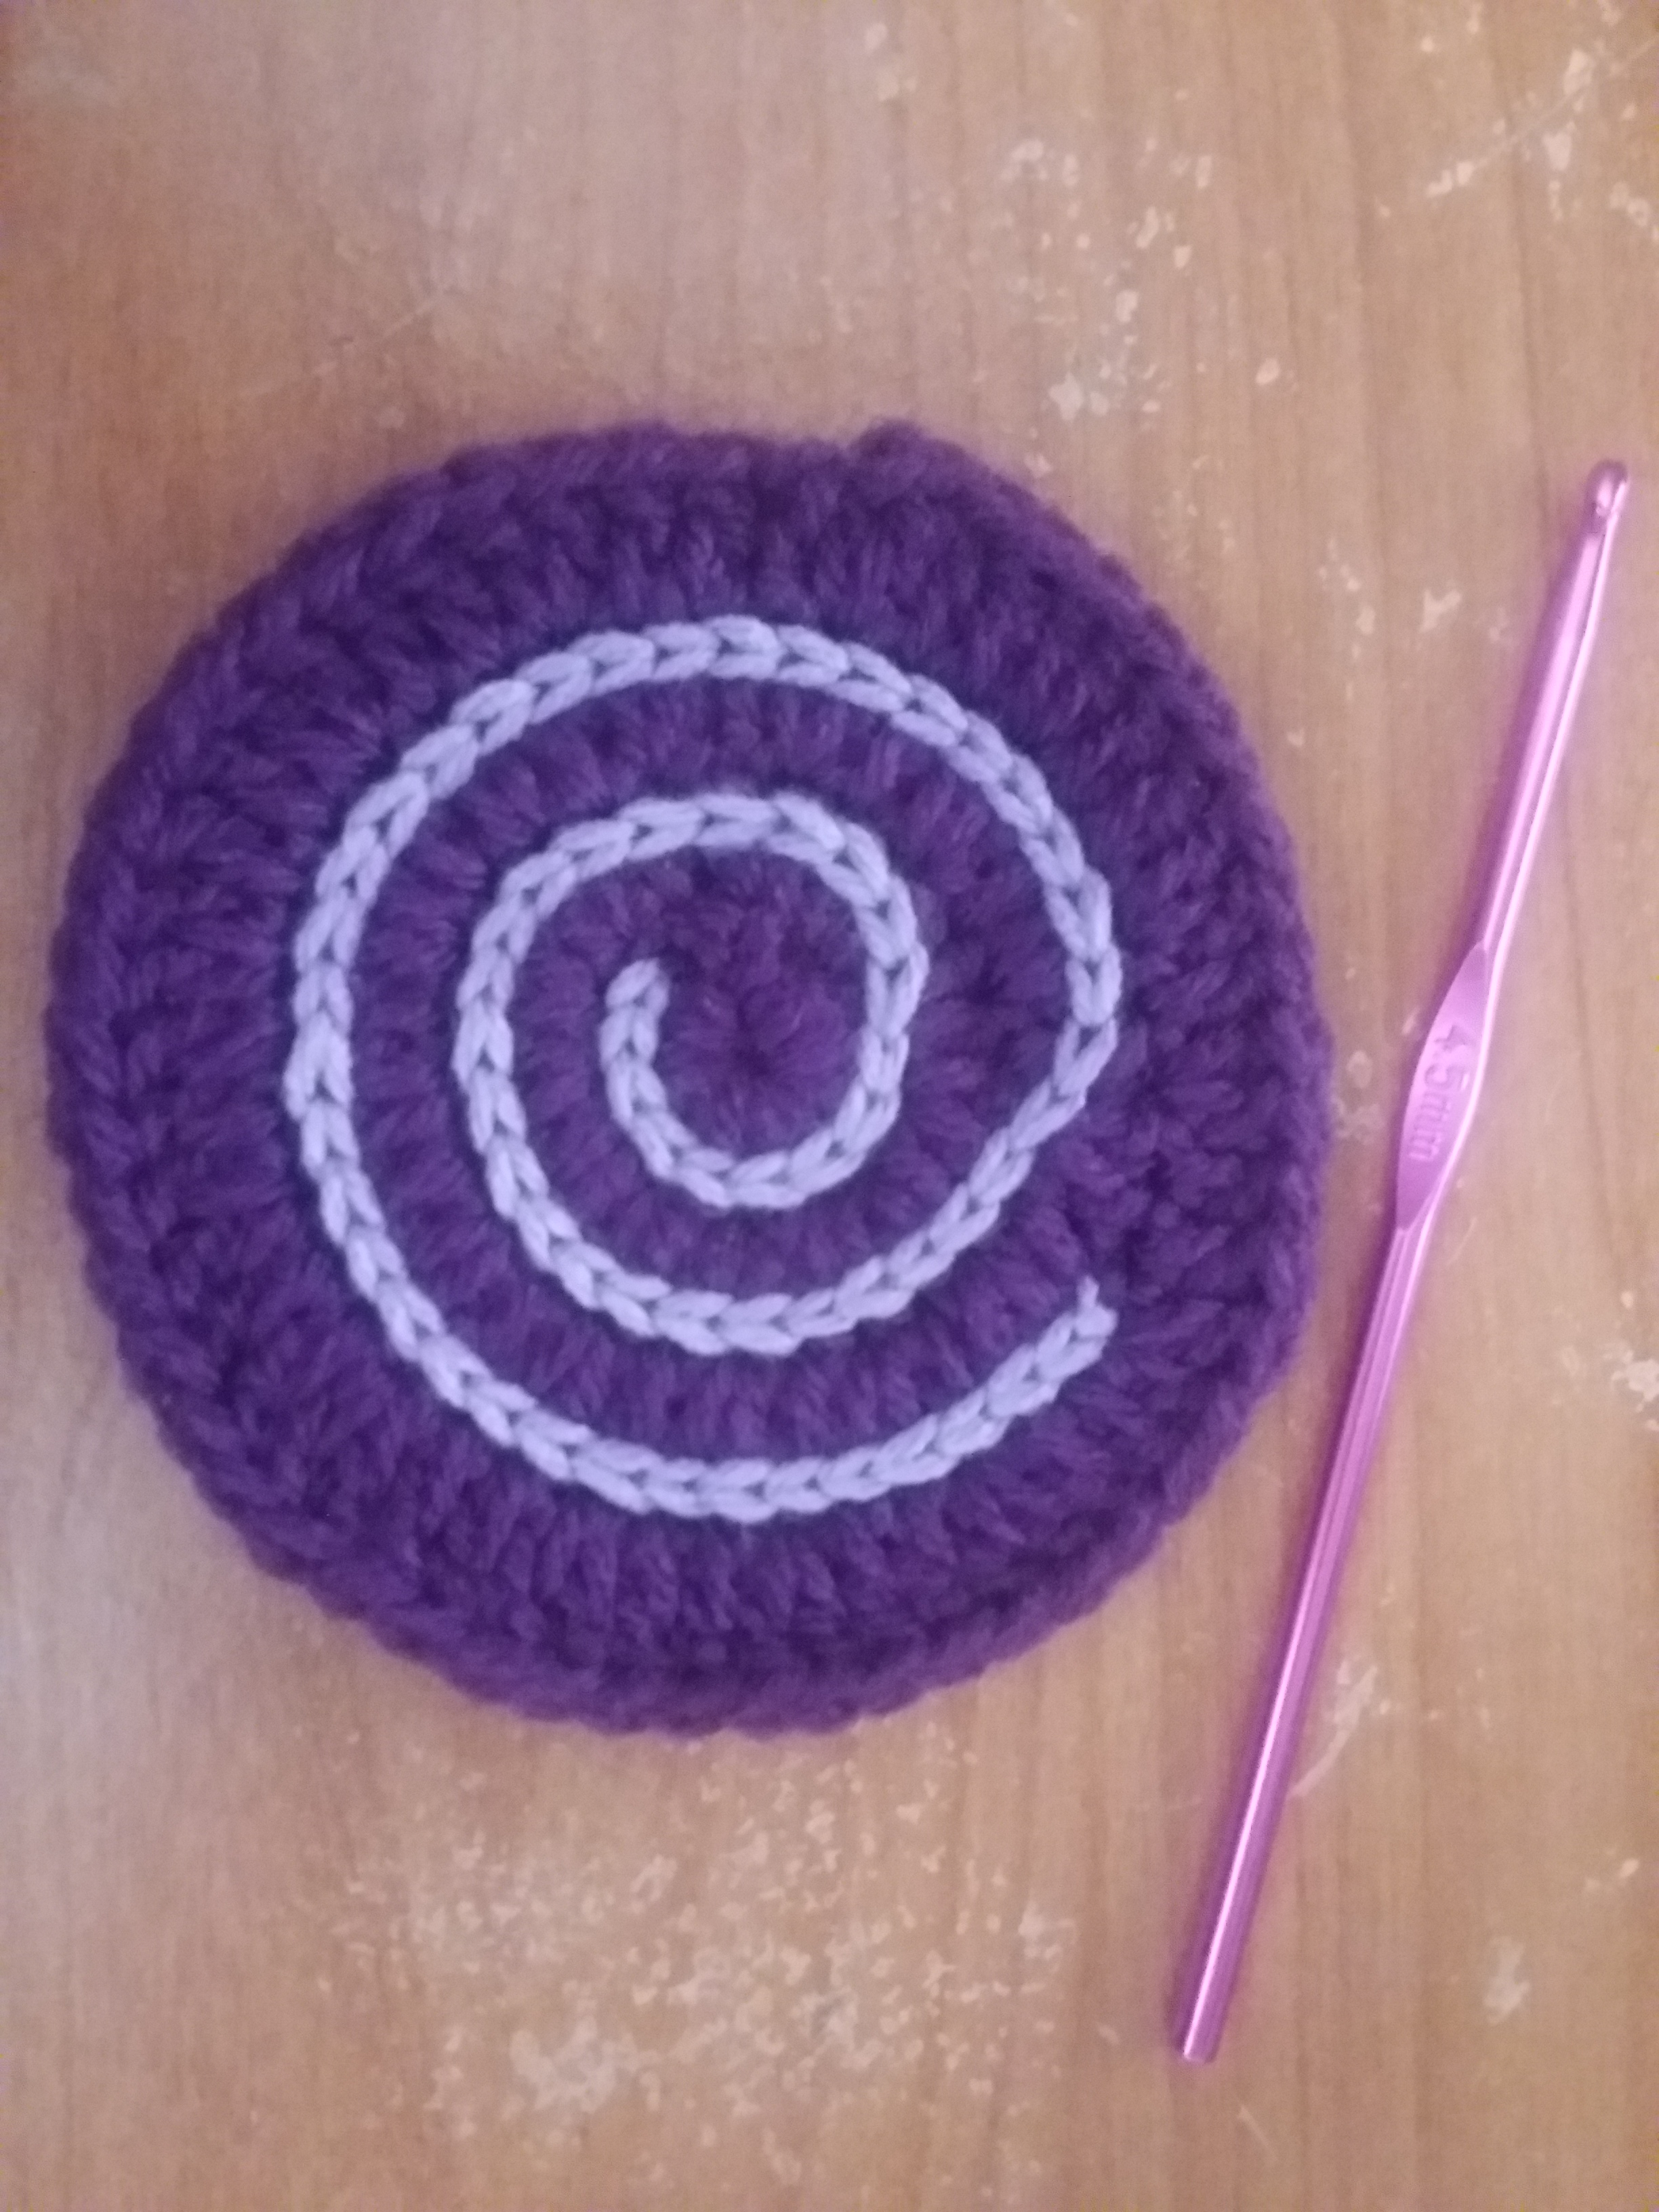
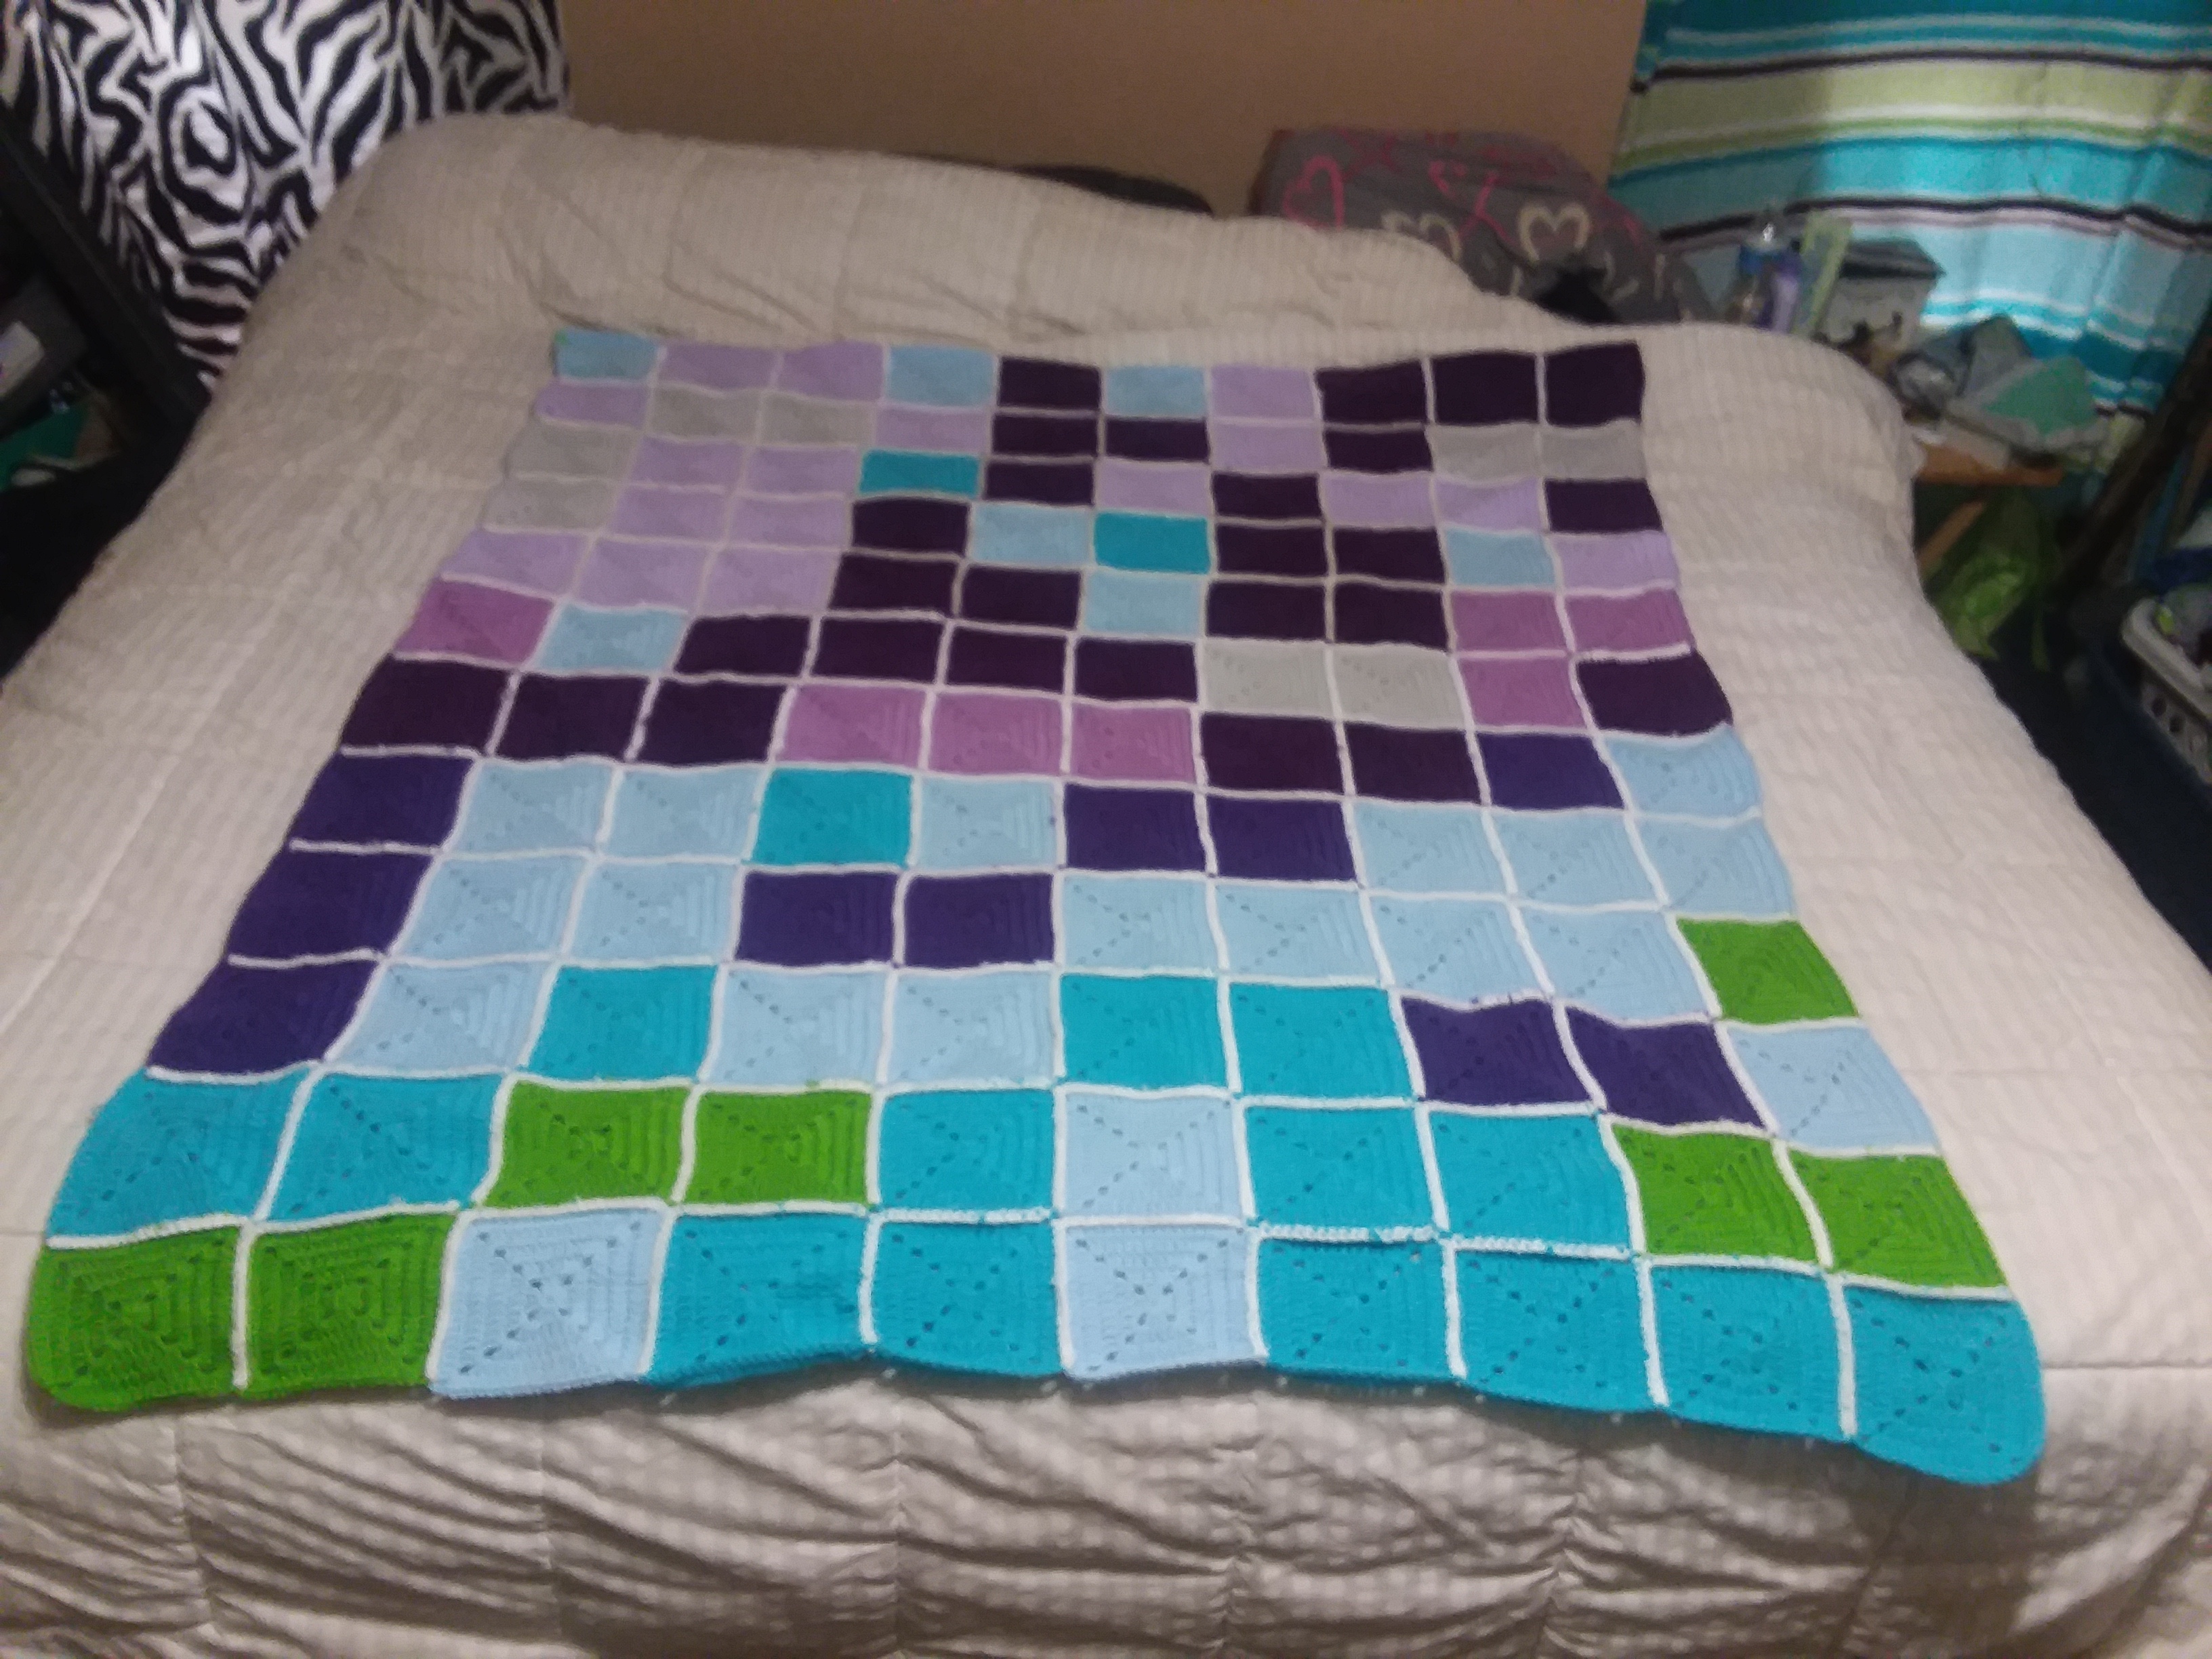
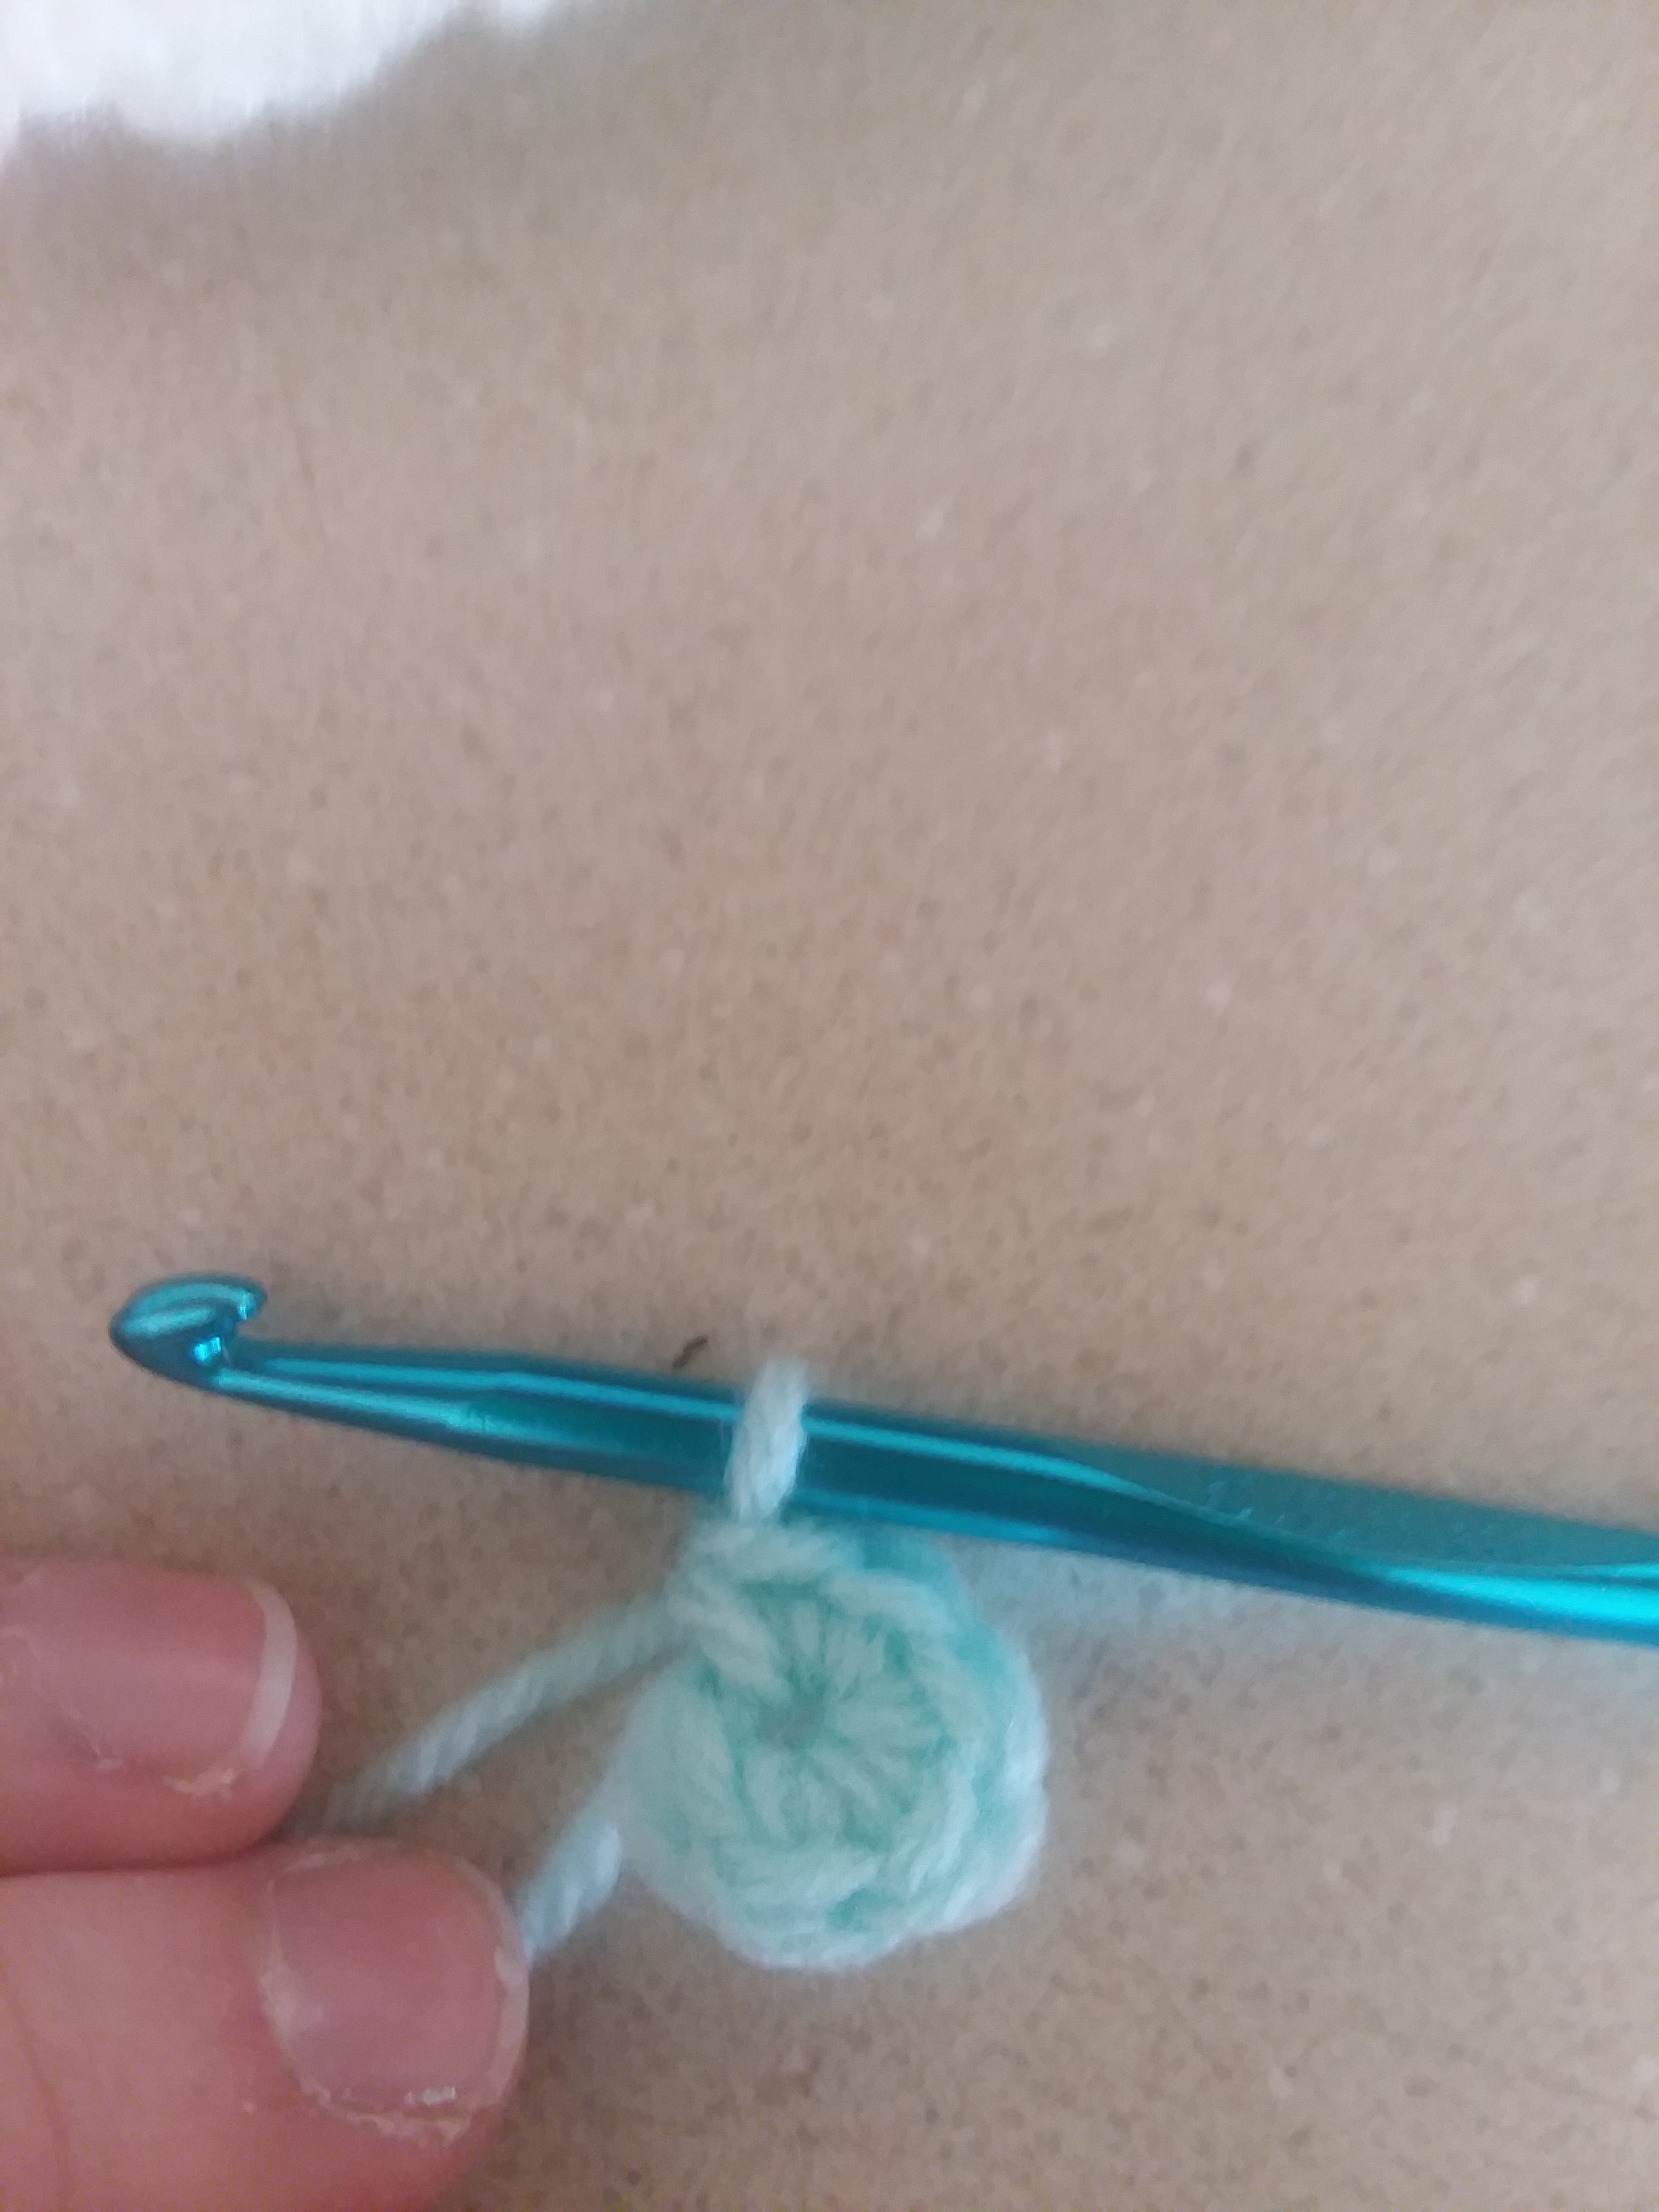
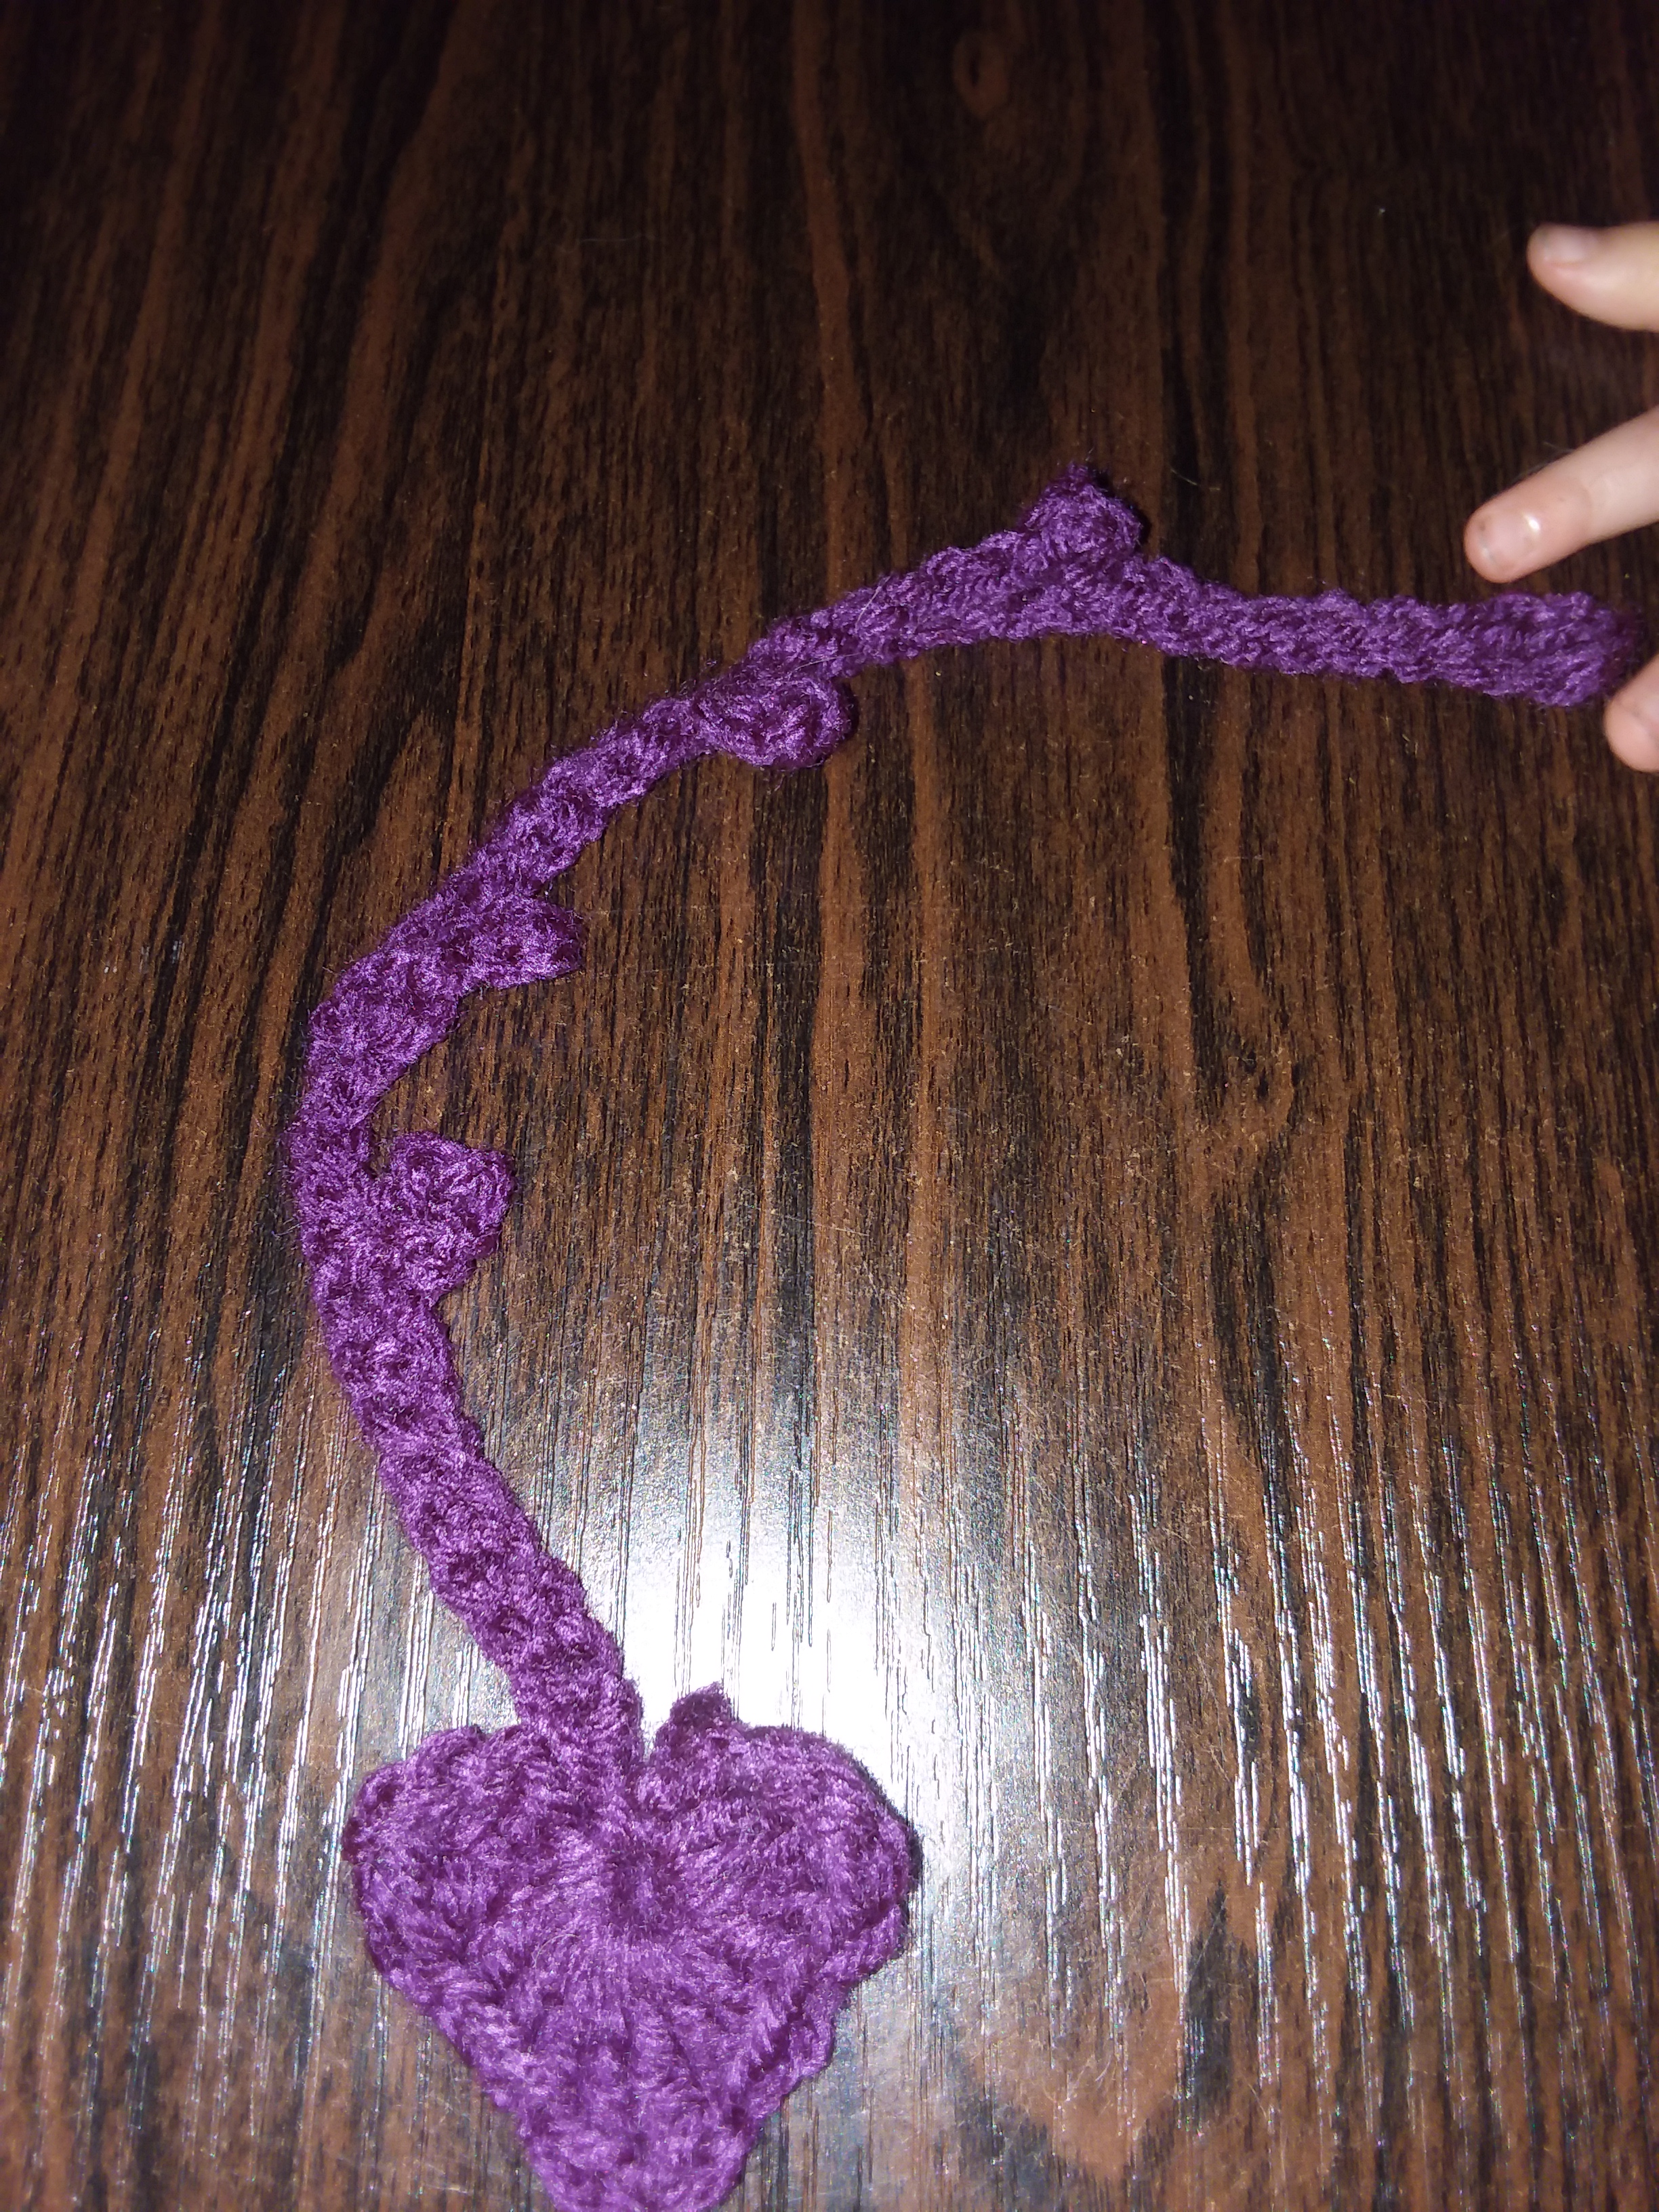
I do want to try again doing a temperature blanket, but I’m thinking I want to do one next year since I wanted to make the current yearly blanket that I’m working on. I was going to also give an update on the first square that I made, but I wanted to wait to show you guys every 2 months.

So, with that being said in mind, that update will be posted the last week of February, and last Tuesday I will show you guys how it is looking. I will also update my Instagram every month, as well. Now, here are a few other yearly blankets, if you are trying to figure out what to do for the 2023 year.


Calendar Square Blanket

This is the current yearly blanket that I will be doing. This creation is from Jayda in Stitches and she does have a series of videos to make each square. I didn’t want to show the rest of the months since I do want it to be a surprise!

Plus I really like the idea of each square representing each of the months. It is also a better option if you don’t have time to crochet a square or row a day. I really can’t wait to see how this blanket turns out. I will also include a link for the videos:

The link that I included is a link to the full playlist of all the videos for each of the months. Just in case you decide to want to make this blanket for this year too!


Temperature Blanket (Granny Square Verison)

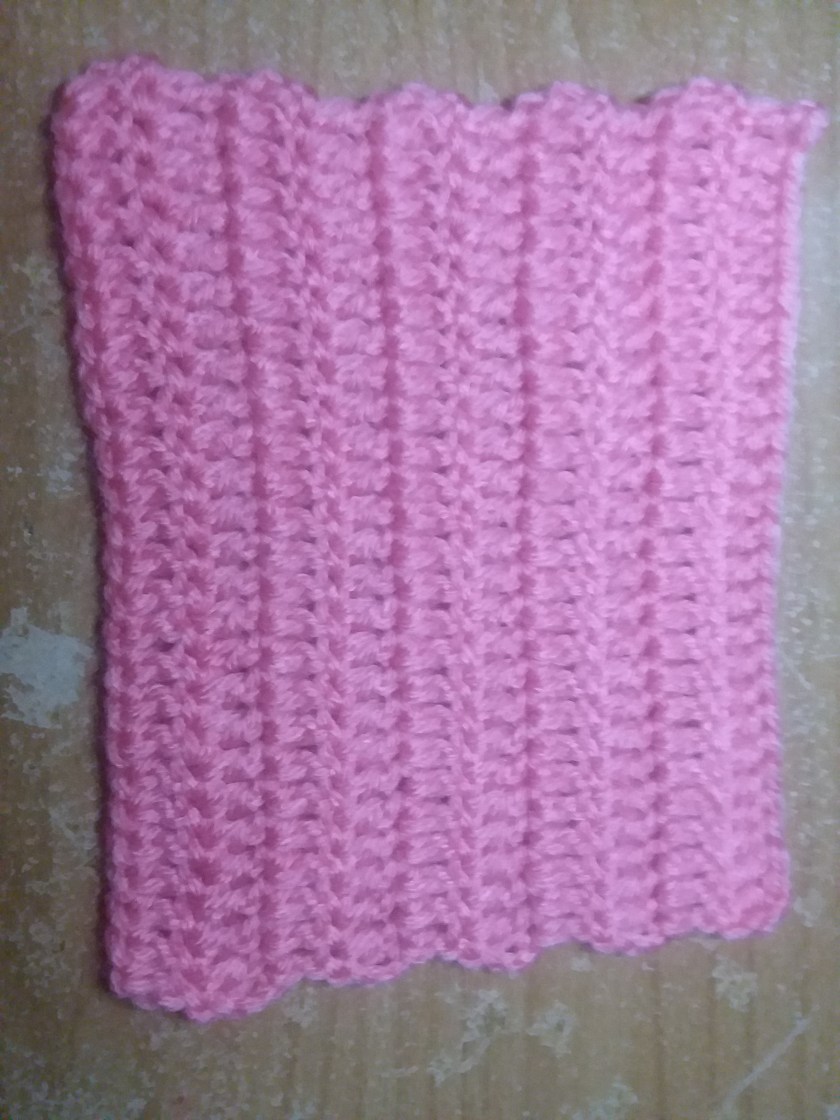
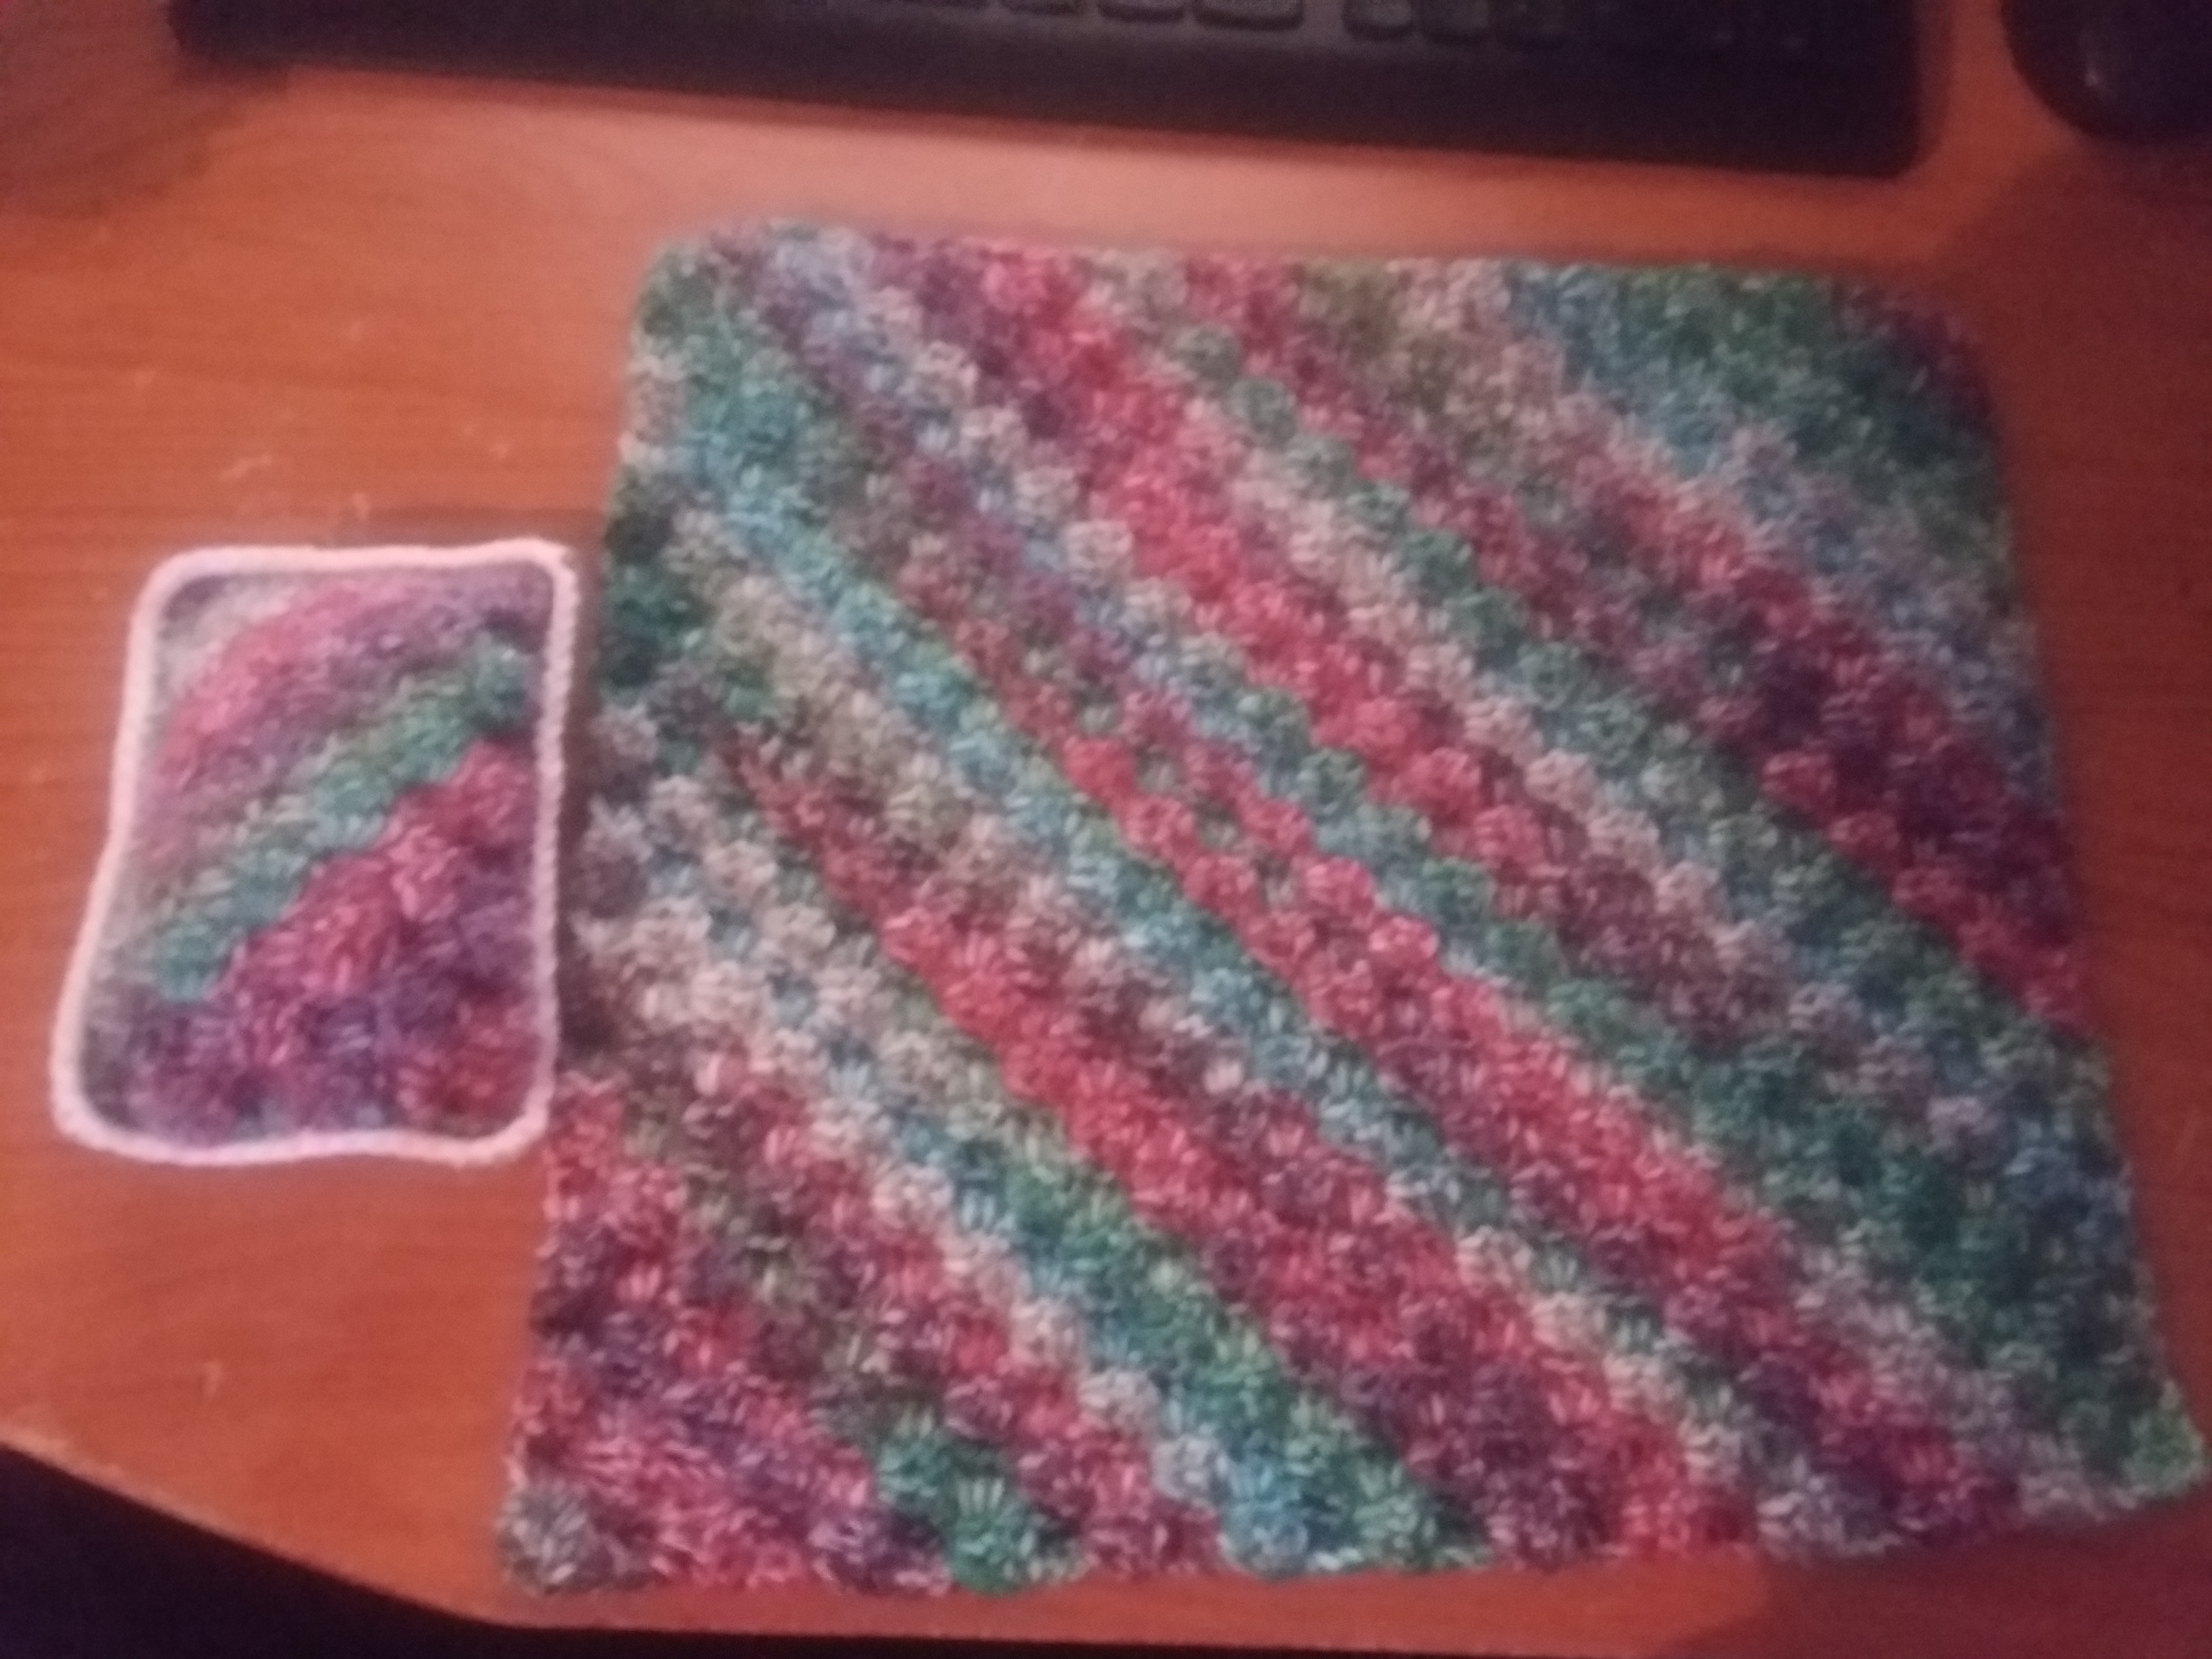
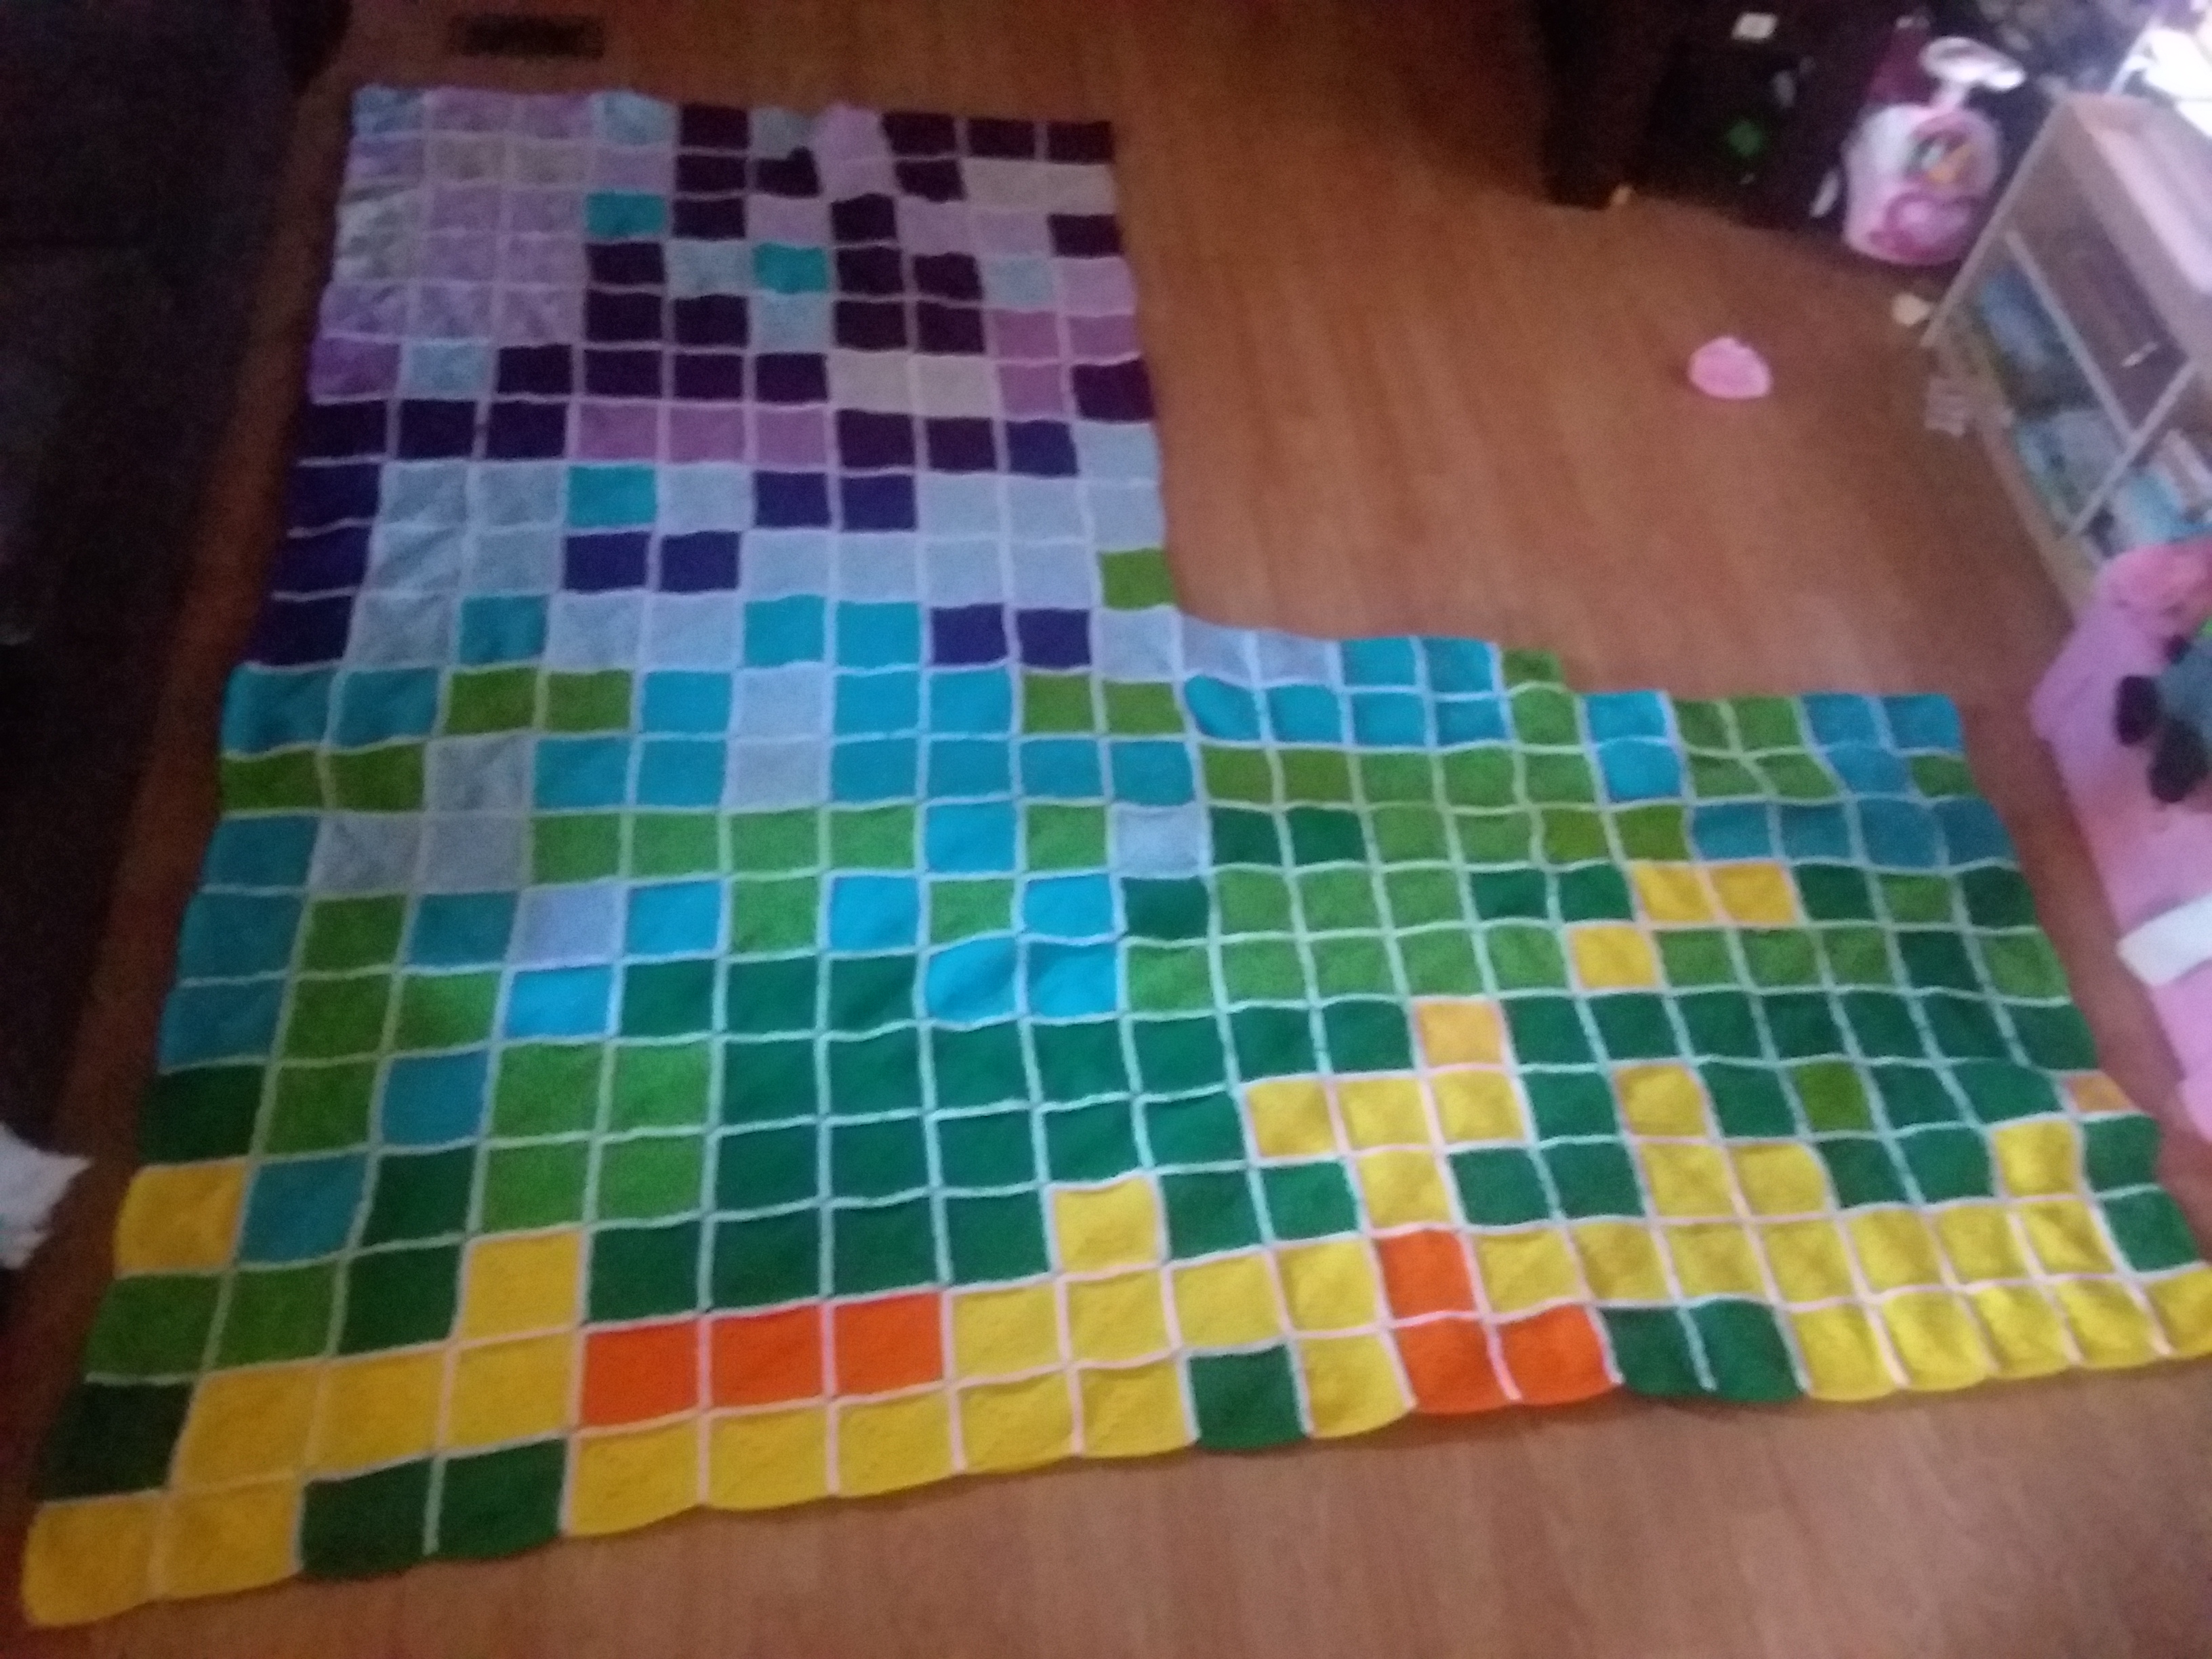
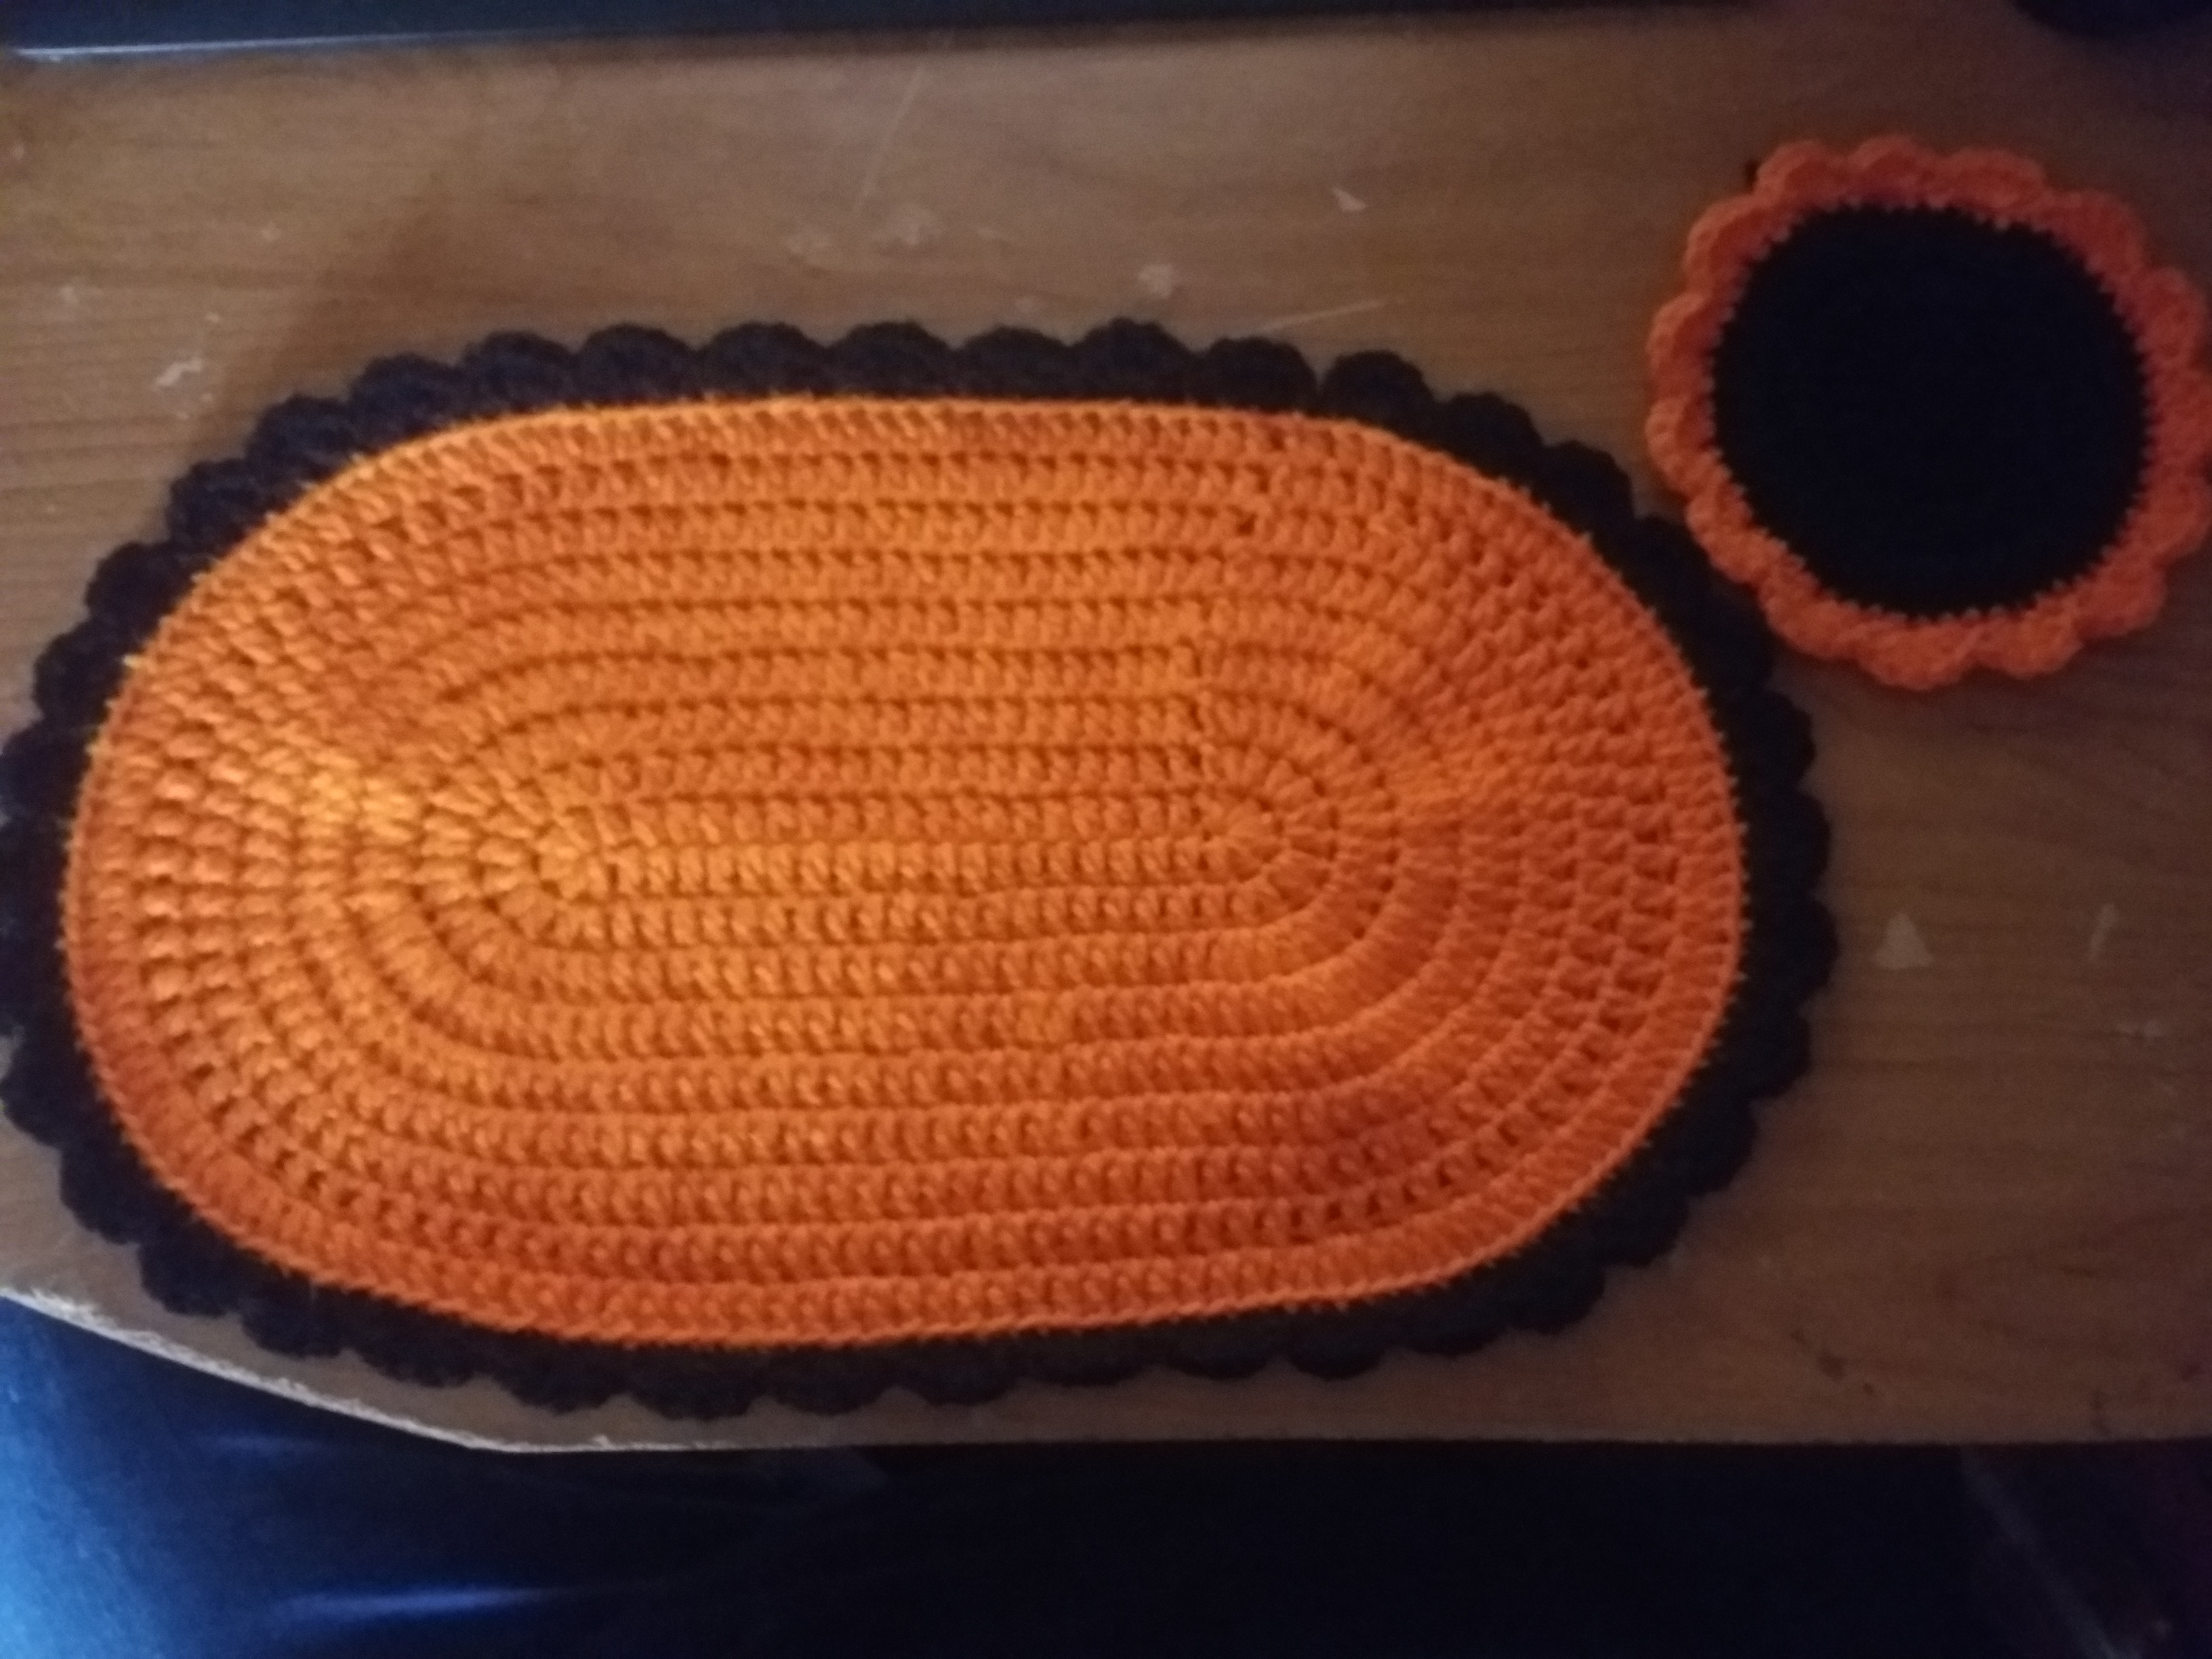
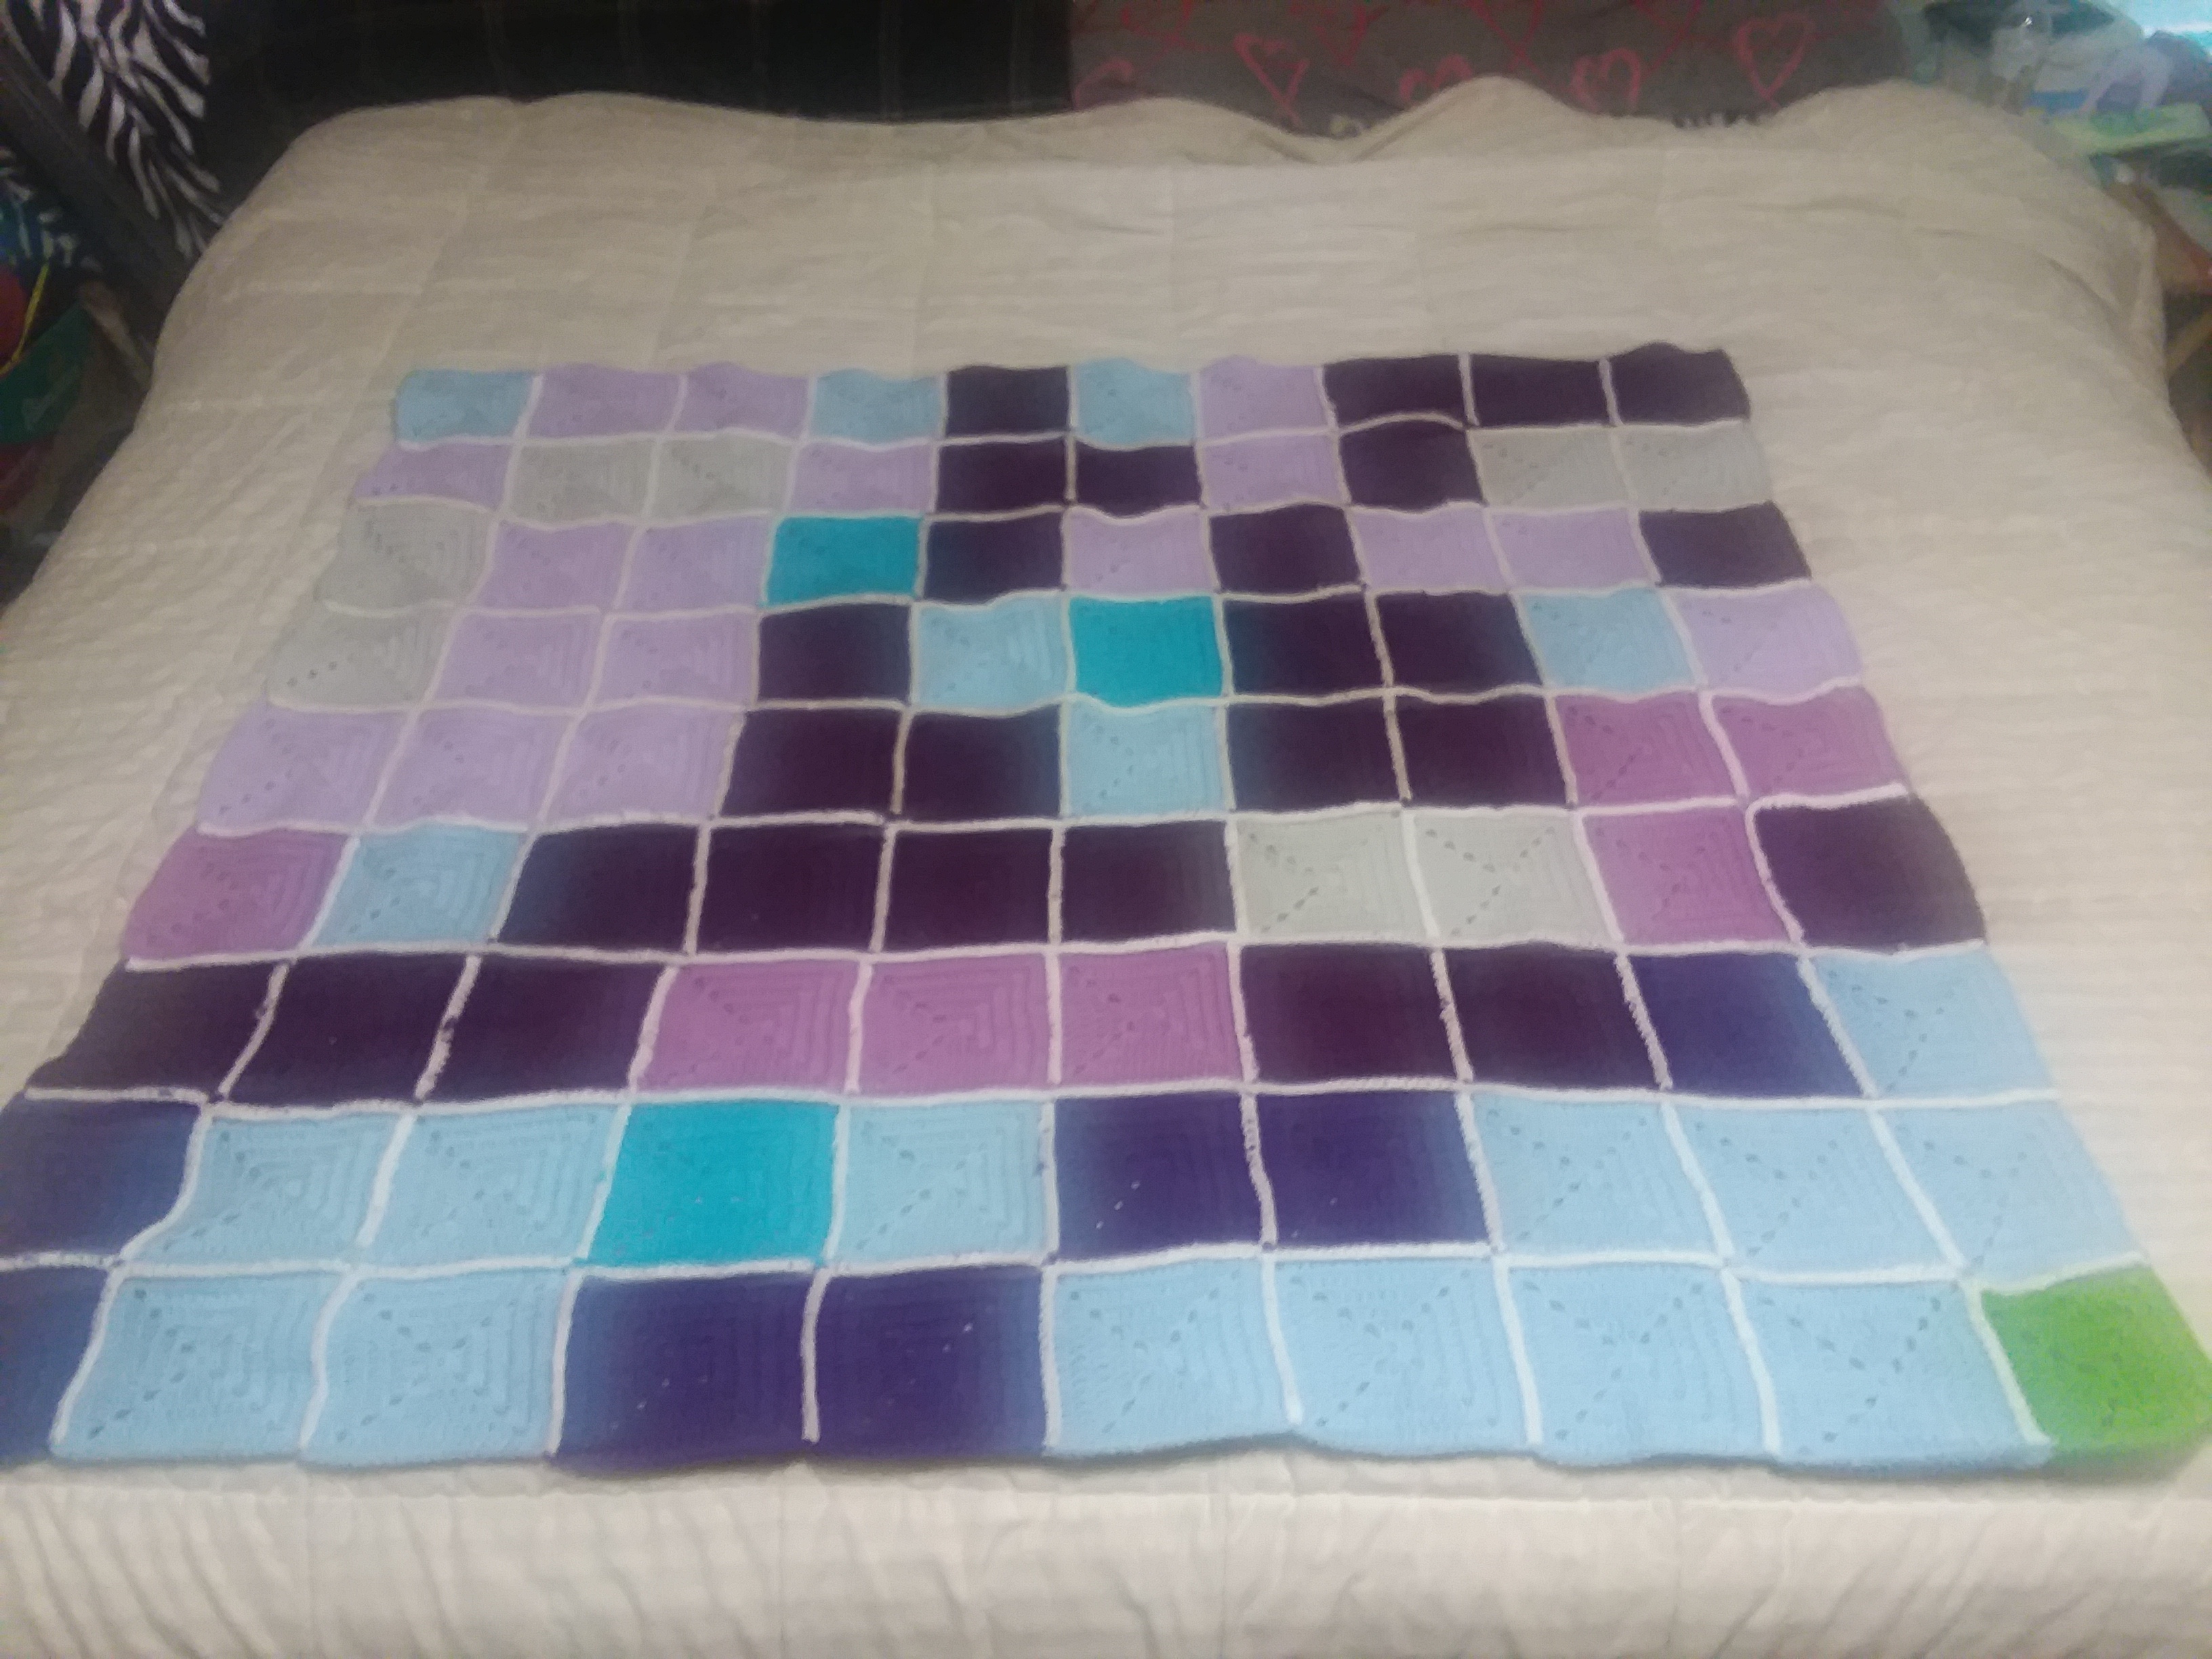
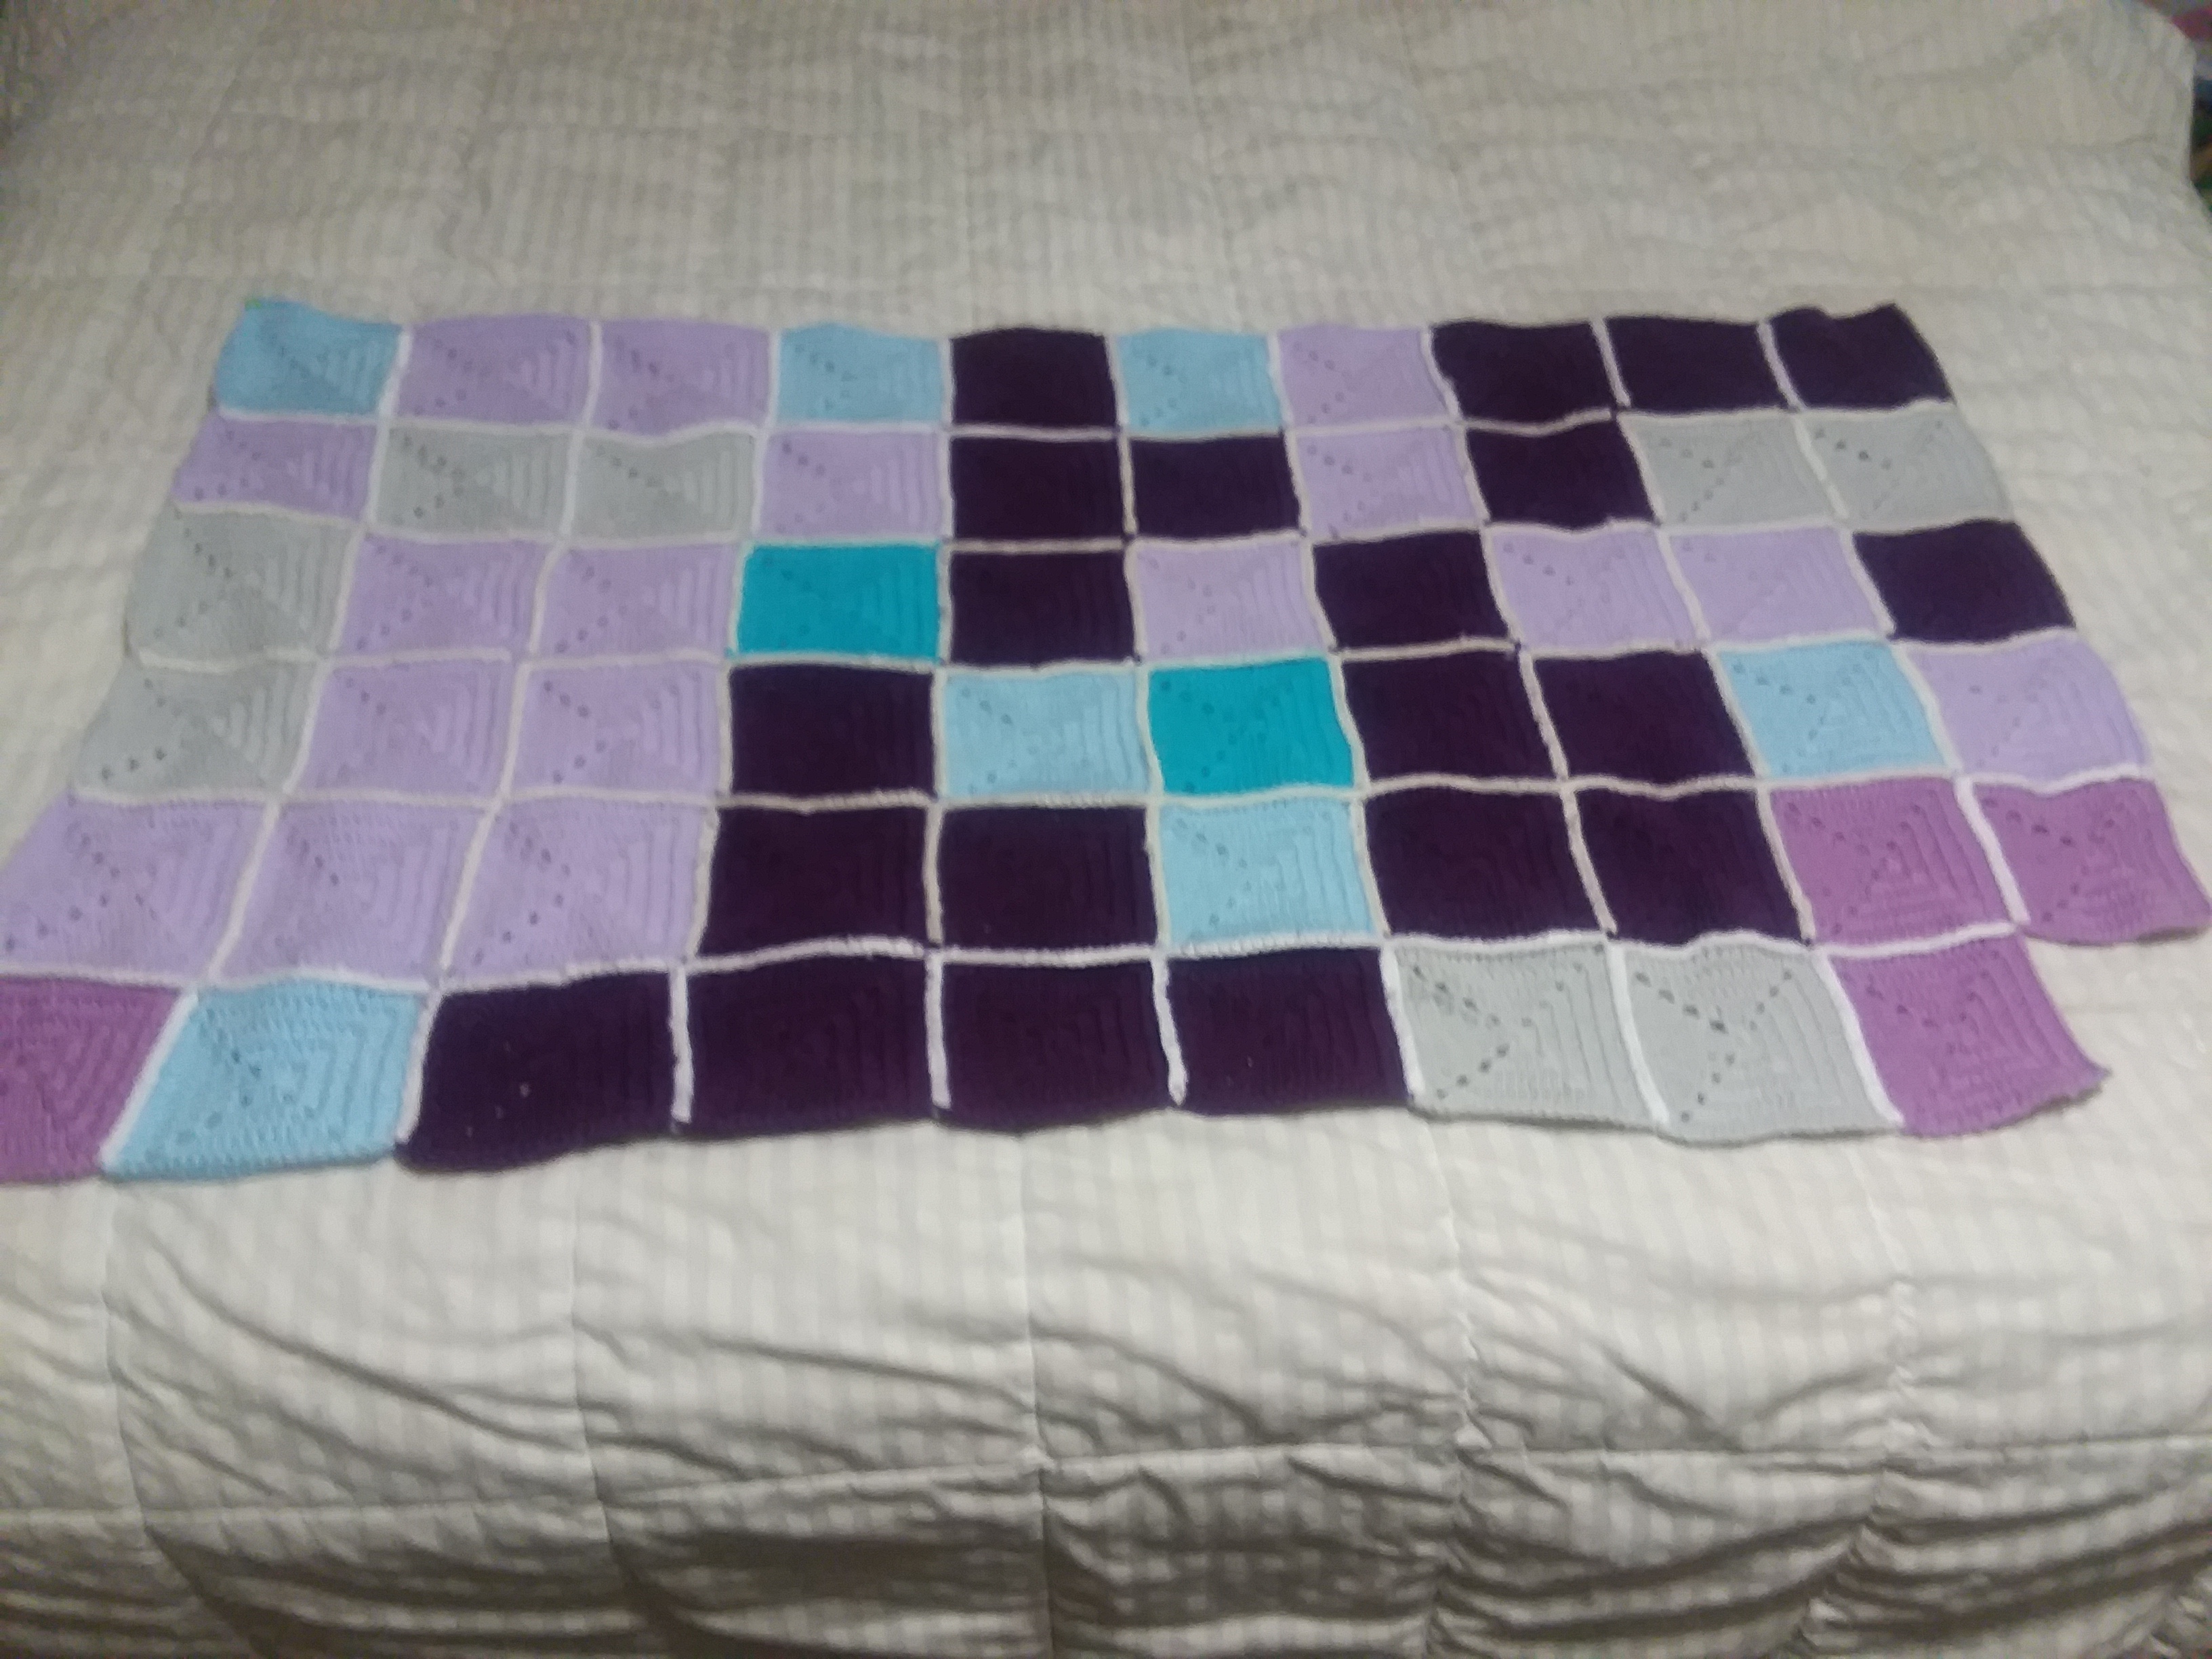
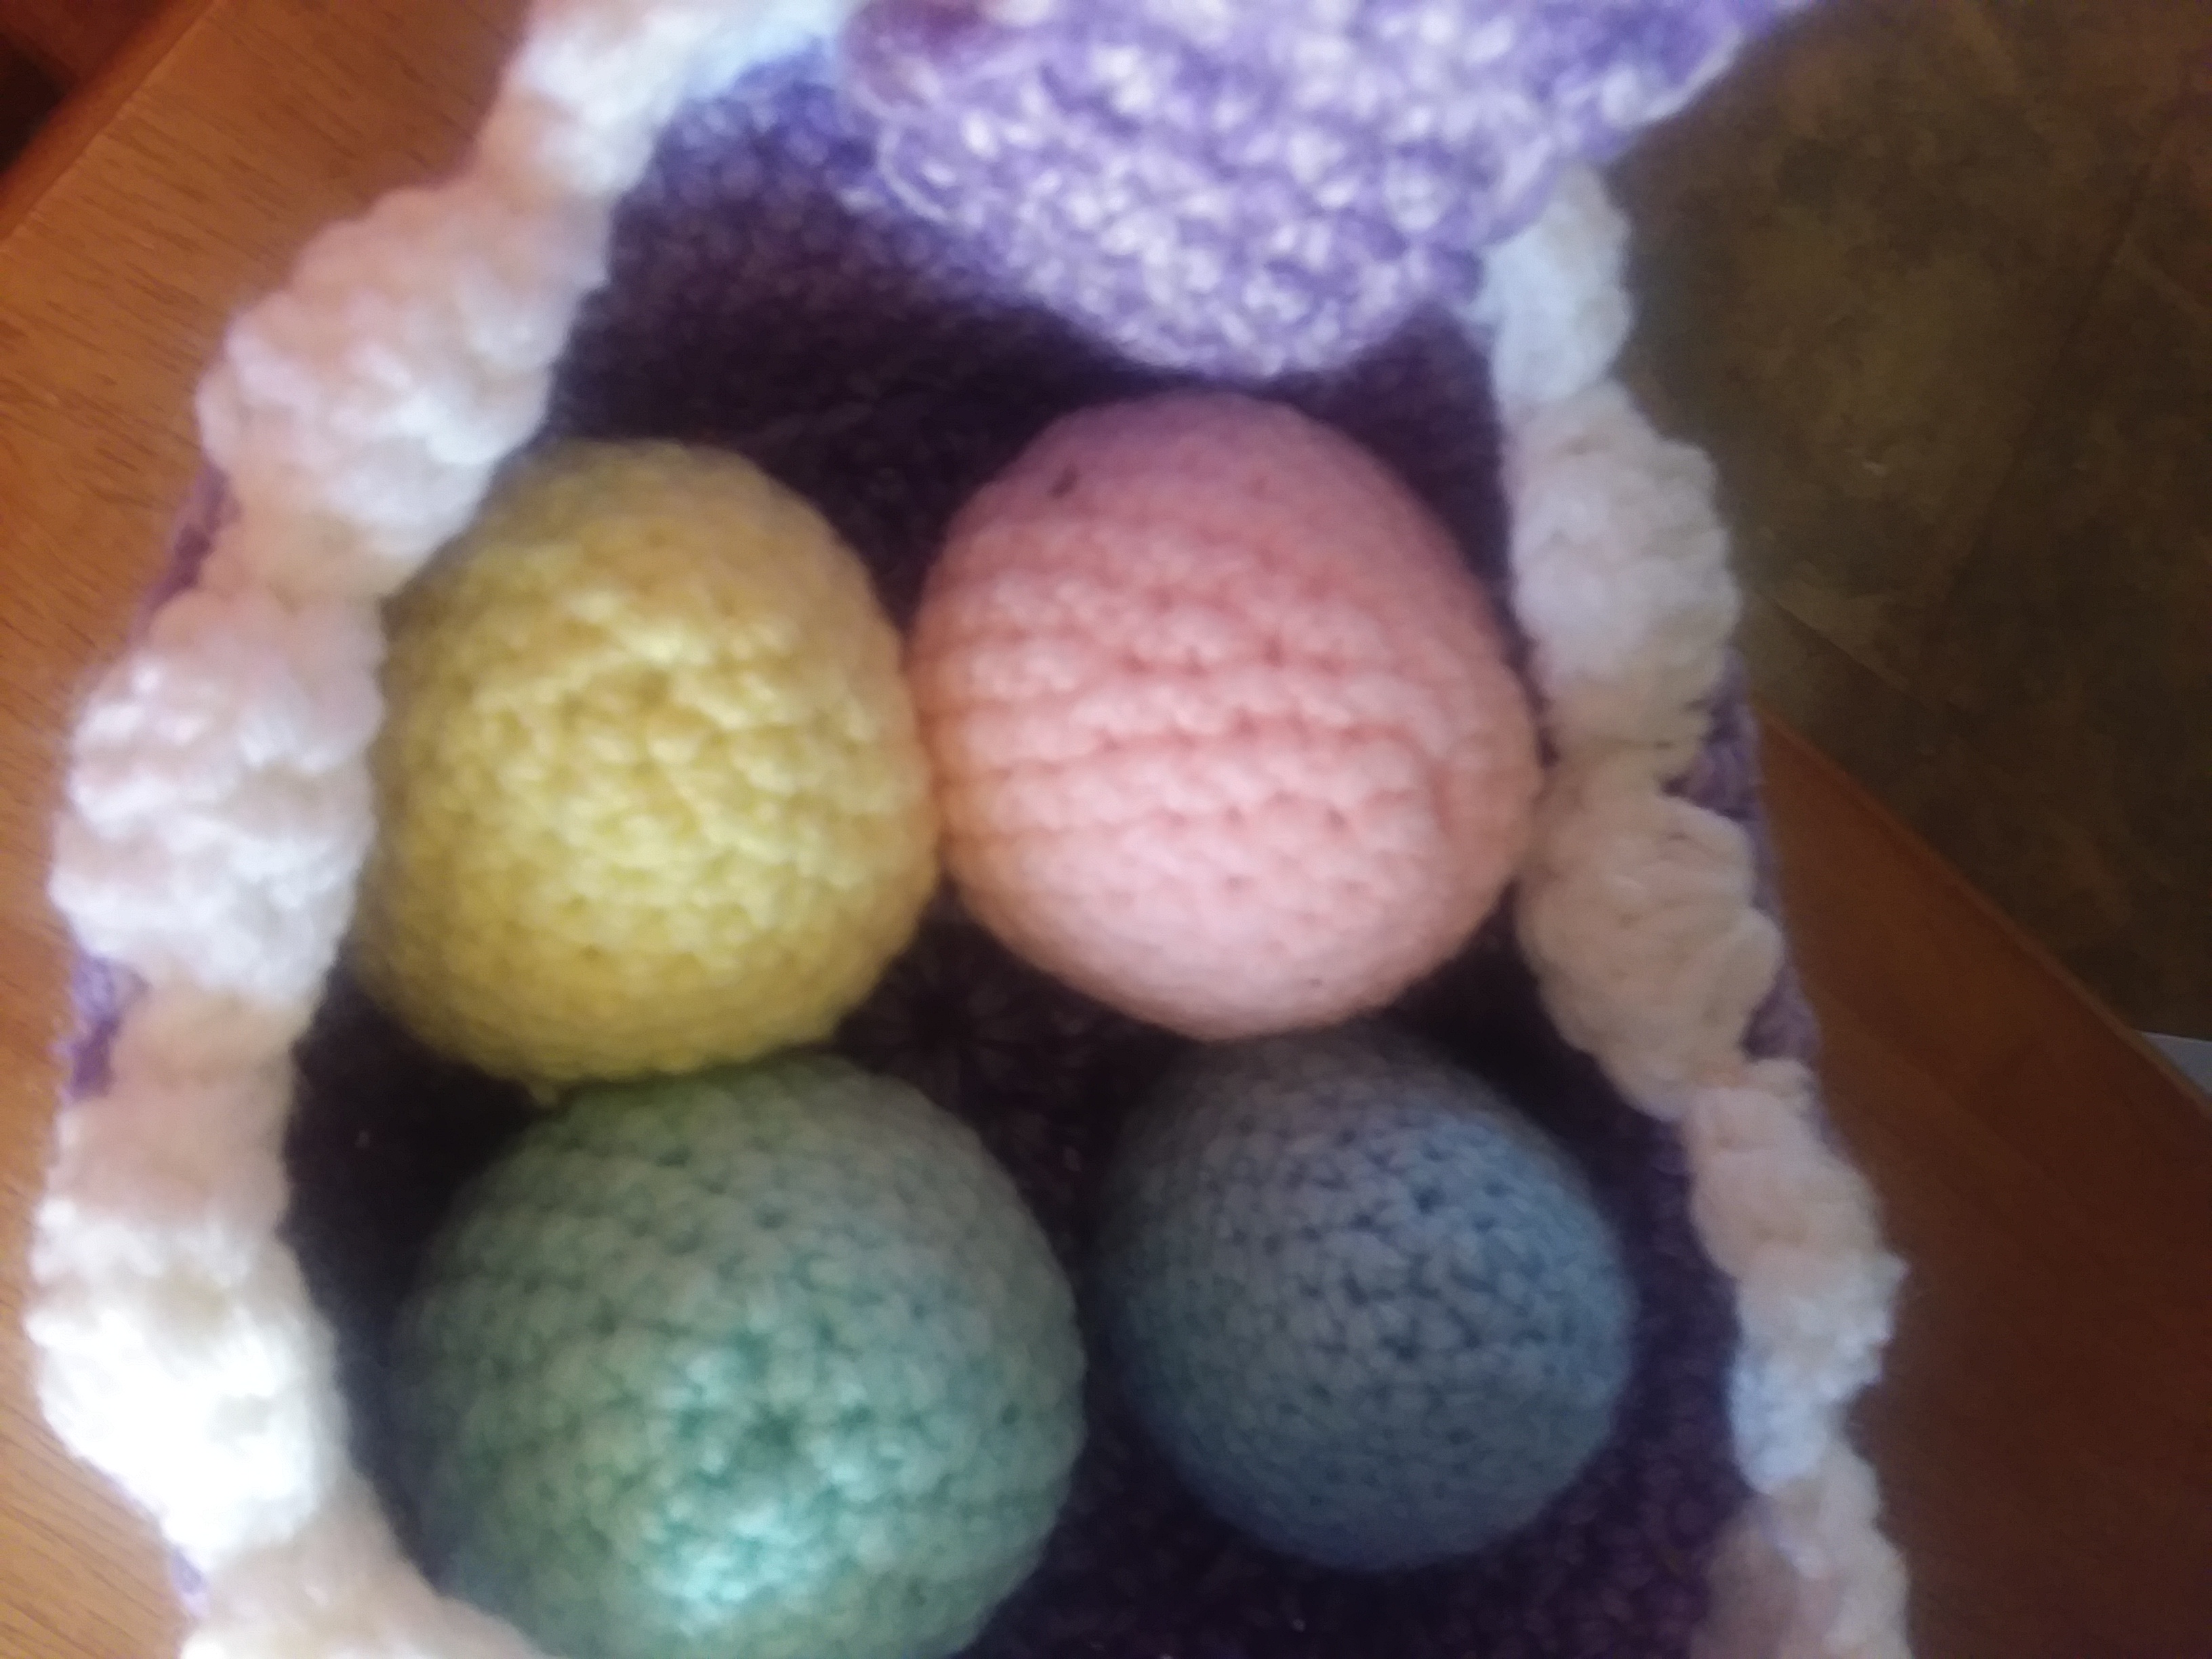
This is the temperature blanket that I made back in 2019. The one big problem that I had with this blanket was that I ended up making the squares too big and using more yarn than I expected. With the result of making the squares bigger, ended up making the blanket huge, which I didn’t mind, but trying to fold it was a pain for sure.

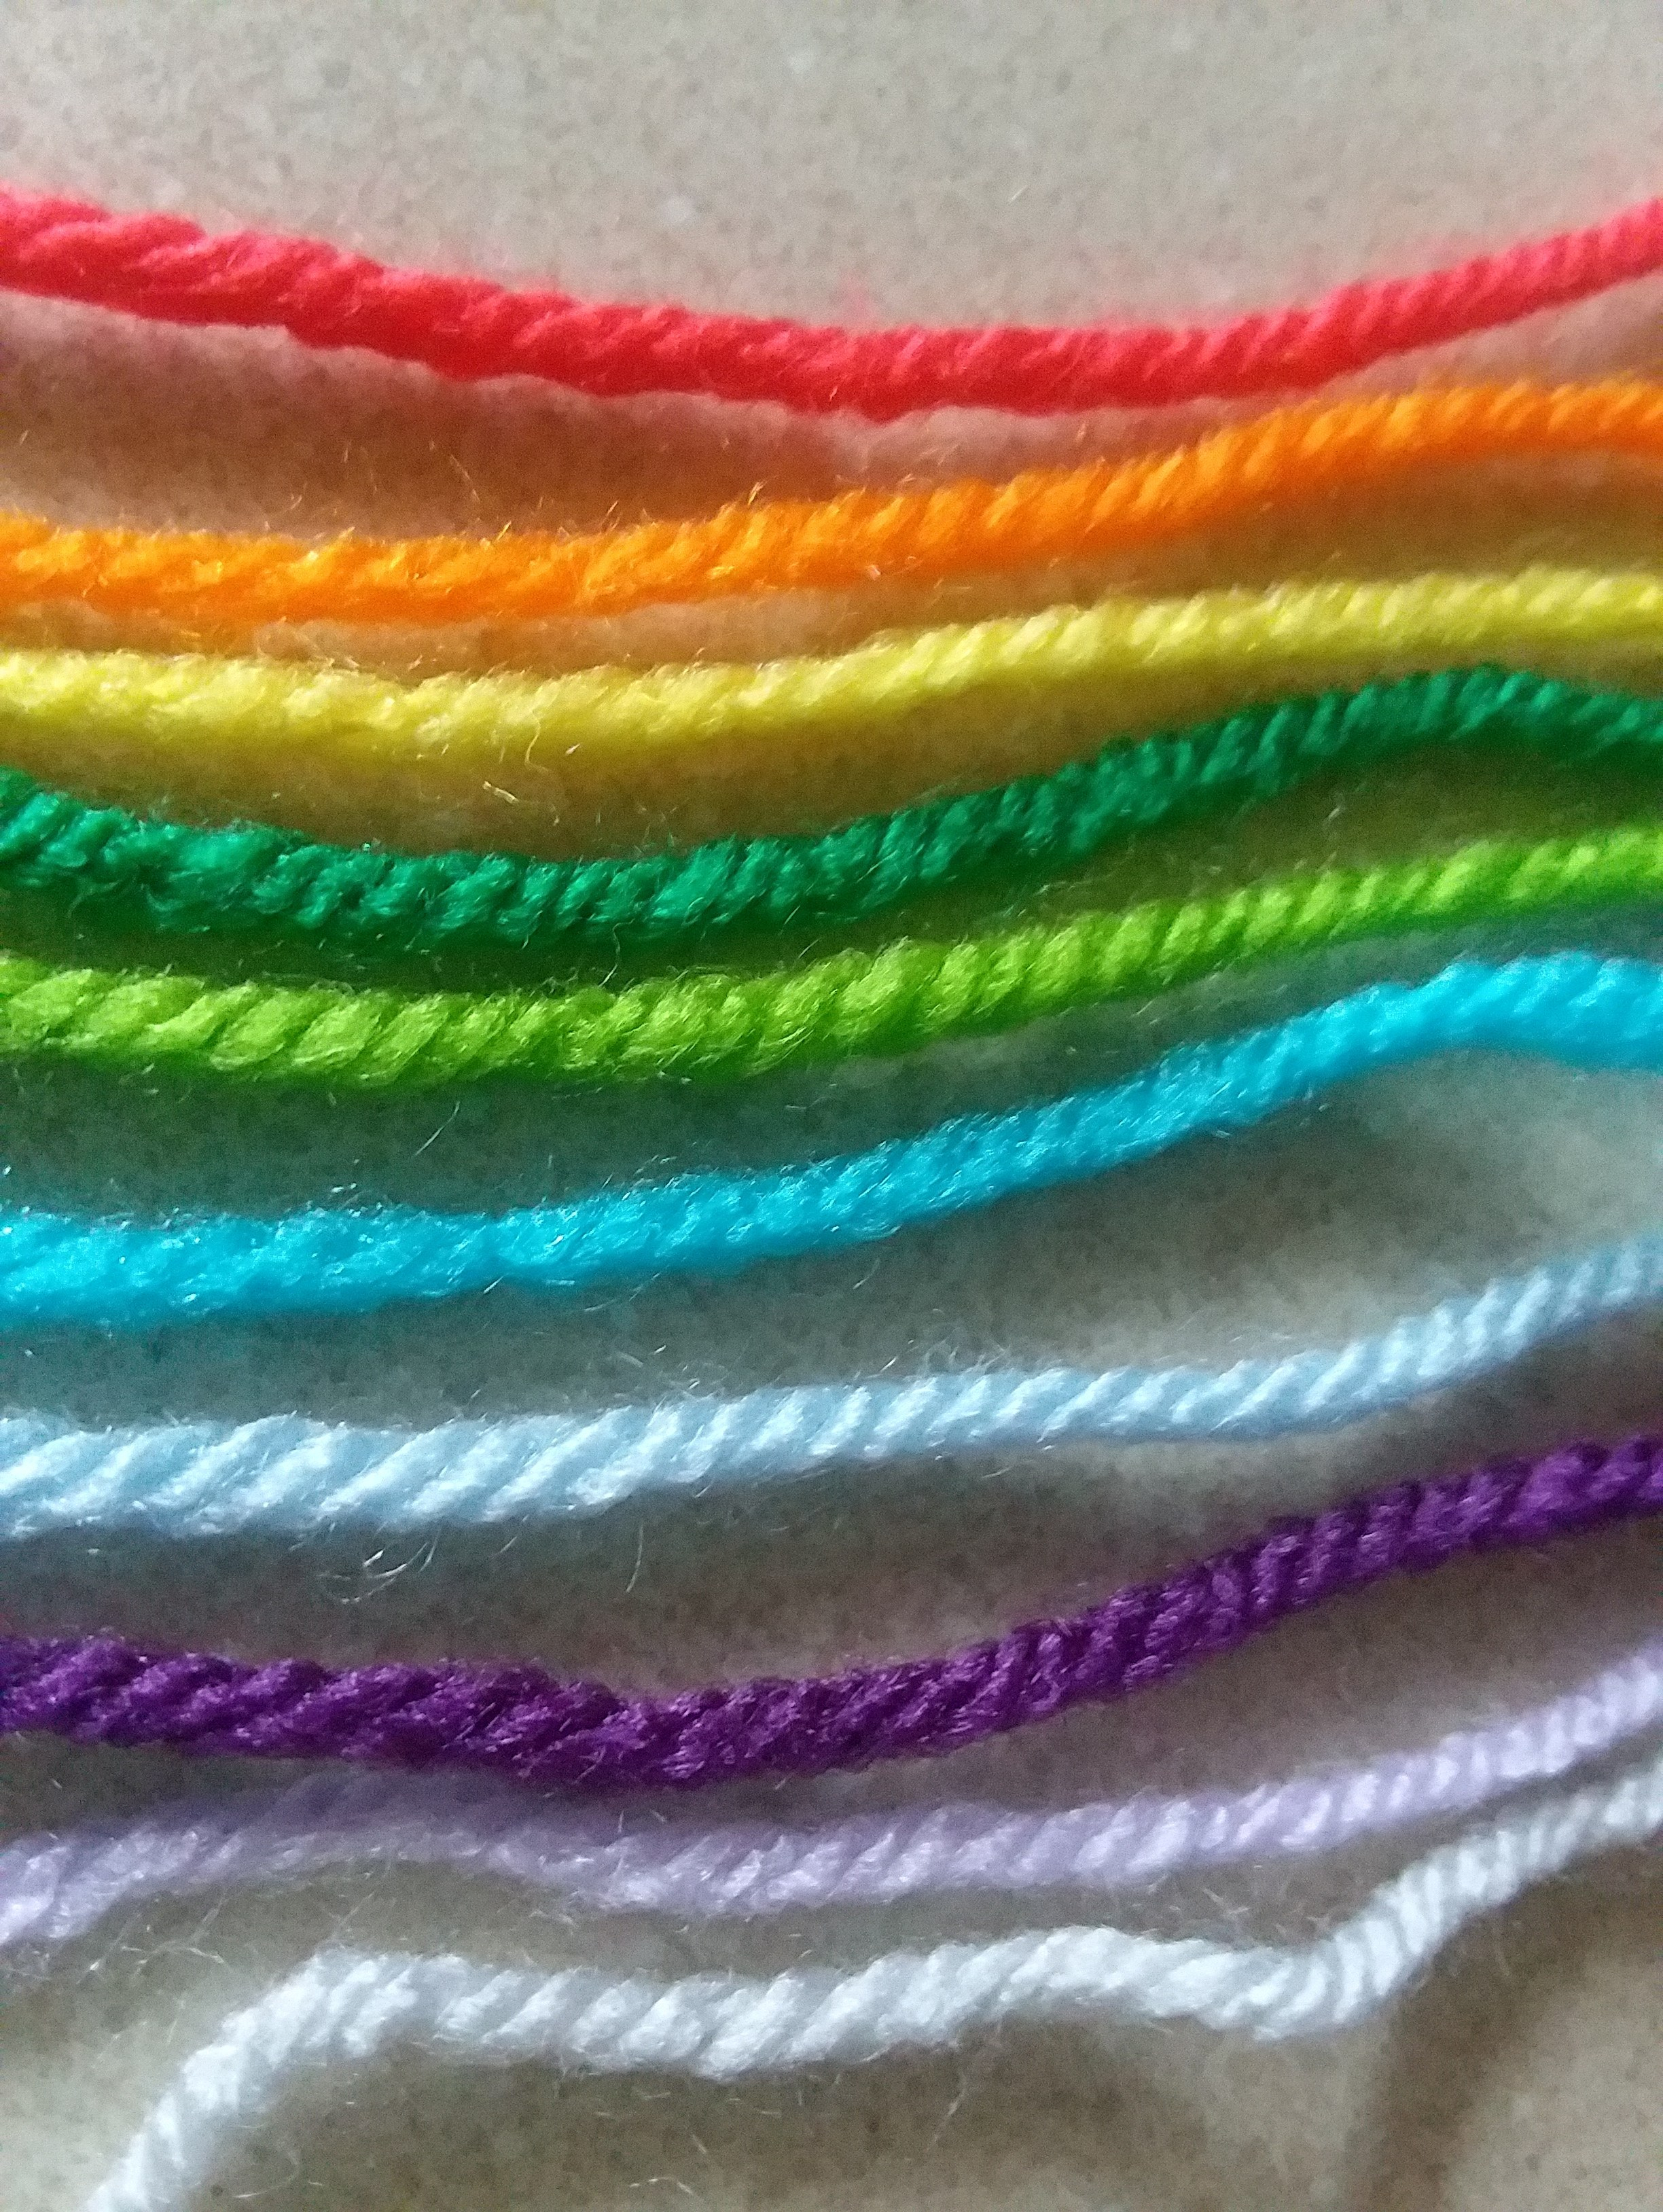
Now, the type of granny square that I did was the solid granny square, but I’ve seen people due either. You could even do different crocheted stitches as squares for each of the days or use two colors, one of the morning temperature and the afternoon temperature.


Themed Blankets

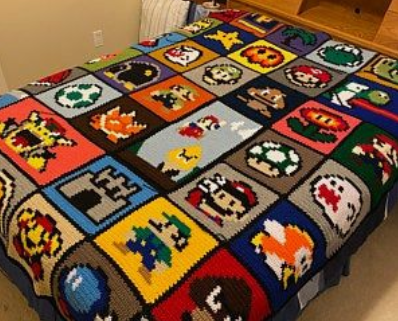
These blankets are pretty cool to make, but they can take a lot of patience and practice. They also may not have a crochet along, but there are a few out that do. You don’t really need a crochet along for yearly blankets, but you can always have one of those theme blankets that you can work on throughout the year.

If you do have any favorite TV Shows, such as Friends or the Office or Big Bang Theory, they do have blanket patterns out there that you can make. I saw someone had created a themed Friends blanket, I got so excited that I ended up looking to see what others had done.

You would be surprised how many other TV Show themed crochet blankets there are out there. The only reason why I haven’t made them yet, was because I didn’t want to make multiple themed blankets and then have no room to put them.


Those were just a few items that you can start with if you are interested in making a yearly blanket or temperature blanket. Let me know in the comments if you are working on a yearly blanket or a temperature blanket for this year. I can’t wait to see how mine comes out!

Posted in Arts and Crafts, Crochet, Top Projects for Crochet/Knitting

Crafty Sassy: Top 10 Free Crochet Phone Case Patterns

Hey Dearies! I figured I would should you fun new ways to decorate your phone or store your phone in! Since having a smartphone is something that we all have, I figured I would find some patterns to have some fun with it!

Note: None of these patterns are my, all rights go to the original creators. I will leave a link to the pattern as well.

Let’s check out some of the cute cases that you could decorate your phone with!


1.Blue Agrave Phone Pouch

I really love the colors for this case and the design, it looks like shells. Not to mention, it is also like a purse or hang bag, but instead it only holds the phone. The best part about this type of pattern, you can always add a small pouch behind it to give it extra room.

Link to the pattern: https://www.mooglyblog.com/blue-agave-phone-pouch-wristlet-cozy-free-pattern/


2.Big Bow Cell Phone Case

I think this pattern is super cute, it also in closes your phone completely, so there is no risk of it falling out. It doesn’t replace an actual case, but it gives your phone more style. Also, I love the aqua color and the fact that these types of patterns are open to trying out different color combos.

Link to the pattern: https://missnissdesigns.weebly.com/blog/free-pattern-big-bow-cell-phone-case


3.Mixin It Up With DaPerfectMix Cell Phone Case

This is a more simple phone case, that you may have to adjust because this was meant for a smaller phone. This would be perfect for my old BlackBerry, that I used to have, but his is opened for newer colors, as well. I suggest using a button, but you can try out the Velcro.

Link to the pattern: https://daperfectmix.blogspot.com/2011/01/cell-phone-case-pattern.html


4.Easy Cell Phone Case

Naztazia is one of my favorite crochet tutorial channels to look up. Not only are her patterns simply amazing, but the colors she chooses are amazing as well. She is also always has her free pattern and a video to show you how to make it. I highly recommend checking her channel out!

Link to the pattern: https://naztazia.com/easy-cell-phone-case/


5.Mobile Phone Cozy

A simple yet easy phone case to make, but there is a different style on the top part, which I love! I also like the chain loop that you can make for it, to keep the phone in place. Plus the color combos you could do for this pattern is endless!

Link to the pattern: https://crochetdreamz.com/2013/07/mobile-phone-cozy-or-case-crochet.html#.UebSs421EWc


6.Owl Cell Phone Cozy

I really like how much detail this creator put into this design, although, it might not fit the phone we have today, it’s possible to adjust it to fit whatever phone size. Not to mention, I love how the owl’s nose is the button that not only holds the phone in place, but it’s a clever idea to use that type of button.

Link to the pattern: https://woolpatterns.com/owl-cell-phone-cozy-free-crochet-pattern/


7.Stripped Mobile Phone Cozy

This is another standard phone case, but with a twist and I just love the pinkish color they used for the phone case. Not to mention, the button is super cute. I love the stripe in the middle of both of the cases.

Link to the pattern: https://crochetdreamz.com/2016/10/mobile-device-cozy-or-case-crochet.html


8.Secret Pearl Phone Cozy

This design has lots of different colors that work really well together, not to mention I really like the middle design they chose as well! This also tests your skills by using a smaller hook and finer yarn, which is always fun to try out!

Link to the pattern: https://www.lillabjorncrochet.com/2016/06/secret-pearl-phone-cozy-free-pattern.html


9.Summertime Fishy Phone Case

When I saw this one, it literally blew my mind! look at all the work that was put in to this case! not to mention, there is a hook at the end to connect it to your purse or backpack. I love how beautiful the colors are and the mix color that they used for the body of the fish!

Link to the pattern: https://coolcreativity.com/crochet/summertime-fishy-phone-case-free-crochet-pattern/


10.Toaster Pastry Mini Cell Phone Cozy

I’m a big pop tart fan and when I saw that, I am adding this on my list of stuff to make for myself for sure! Can you imagine if you had a purse that was a toaster? Now that would be an amazing idea! Anyway, I also loved how they gave one on them a little face and added the extra sprinkles as well!

Link to the pattern: http://burlapandlacecrochet.blogspot.com/2016/05/toaster-pastry-mini-tabletcell-phone.html?m=1


There you have it! New ideas for your phone! Which one of the designs do you like? Let me know down in the comments!

Posted in Arts and Crafts, Crochet, Top Projects for Crochet/Knitting

Crafty Sassy: Top 5 Free Crochet Freeze Pop Cozies

Hey Dearies! Since it is summer time, the best thing to have on a hot day is ice cream! Well, if there isn’t any ice cream, freeze pops work as a amazing treat instead! Especially for the kiddos as well!

I remember picking the colors blue and pink, but now, I don’t mind having any of them! Although, the one thing that I wished I had was something to hold my freeze pop because sometimes they were too cold or sweaty.

Instead of having these cozies, we ended up using paper towels or wash clothes, which helped for a bit, but it didn’t do much, not to mention it wasn’t fun to have a plain old paper towel.

So, let’s look at some of the freeze pop cozies that I found that are not only cute, but the patterns are free for you to try!

Note: None of these patterns are mine, all rights go out to the original creators. I’ll be leaving links to the patterns for each one.


  1. Shark Fun Pop Cozy

This freeze pop cozy is something I’ve actually made and I love this pattern! It was very easy to understand and not to mention, I love how this shark looks! The eyes might the be most difficult to do, but if you have any black puffy paint around, you can use that instead!

Link to the pattern: https://mermaidhooked.com/2018/07/21/hungry-shark-freeze-pop-cozy/


2. Monster Ice Pop Holders

These lil monsters aren’t as scary as they seem, but they are so adorable! I also love the touch of using googly eyes! Not to mention, I love the bright colors that they used for these pop cozies and the finishing touches for the mouth is amazing!

Link to the pattern: https://blackstone-designs.com/monster-ice-pop-holders/


3. Unicorn Freeze Pop Cozy

This one is especially cute for all the little ones that love unicorns! I haven’t made this one yet, but I just love how cute this is! Not to mention, this pattern actually uses puffy paint for the lashes. Plus, you can try out different colors for the horn and hair as well!

Link to the pattern: https://mermaidhooked.com/2018/08/31/unicorn-freeze-pop-cozy/


4. Light Saber Freeze Pop Holder

This one is for the inner child in us, or for those big Star Wars fans. I remember using a light saber, the plastic ones they sold that you could change the light different colors, but the next best thing was freeze pops! Even they are smaller than the normal light saber, I can finally change the colors!

Link to the pattern: http://greenfoxfarms.blogspot.com/2017/05/light-saber-freeze-pop-holder-tutorial.html


5. Mermaid Fun Pop Holder

Another cozy that I made, and it was fun to make! Although I did add a different color yarn that was around the beginning of the tail. Not to mention, this is something that is very easy to make and explore with different colors and yarns!

Link to the pattern: https://mermaidhooked.com/2018/06/23/mermazing-funpop-holder-free-pattern/


There you have it! A few freeze pop cozies that are fun for all ages during these hot months of summer months!

Once we are able to do craft fairs again, these are something that are supper easy and quick to make and sell! Not to mention, how cute it would be to have these for the kids, too?

Also, what was your favorite treat to have during the summer months? If I’m honest, it was s’mores, but if we are talking about a cold treat, I would go with a mint-chocolate chip ice cream in a sugar cone.

Let me know what yours were in the comments down below!

Posted in Arts and Crafts, Beginner Patterns, Crochet

Crafty Sassy: Double Crochet Square (Beginner)

Hey Dearies! We will be doing the double crochet square! This stitch is another stitch that is used very commonly used in most if not all projects. In fact, I use it quite a lot in my towel topper pattern.

This stitch is different from the other stitches we have learns, such as single and half-double crochet, instead, this stitch is longer, which can make your project look more completed or more farther along that it would with the other stitches.

Let’s begin!


What I used:

  • 5.0 mm hook
    • This is the most commonly used hook size for beginners, but you can use whatever size that you would like.
  • Medium Size Yarn
    • I used the ‘Red Heart Super Saver’ in the color Perfect Pink.
    • You can used any type of size yarn, but make sure that you use the right hooks that go with the size.
  • Sewing Needle

Note: You can chain any amount of chains you want, but make sure to add an addional 3 chains. For example, I want there to be 25 stitches, so I will chain 28, instead.

Make a slip knot and chain 28 chains.

Row 1: From the 3rd chain, from your hook and double crochet into the next stitch. (Remember, the chain that is already on your hook does not count!) (25)

Row 2: Turn and chain 3. Double crochet in the next stitch and across. (25)

Repeat Row 2 until you have reached the length you desire. I crocheted up until row 20. Fasten off and weave in your ends.


There you have it! The more rows you make, the more practice you gain from this! There are tons of projects you can try out with using the double crochet!

Posted in Arts and Crafts, Beginner Patterns, Crochet

Crafty Sassy: Half-Double Crochet Square (Beginners)

Hey Dearies! So, today, I wanted to show you how to make a half-double crochet square! I’ve already shown you how to make a single crochet square, but now I’m going to talk about how to make the half-double crochet!

The half-double crochet is like the single crochet, it looks like a tight stitch, but instead of just entering the stitch with your hook, you are crocheting almost like you would for a double crochet, but going through all the loops.

So, let’s start!


What I used:

  • 5.0 mm hook
    • This side hook is what normal beginners should use, but you can use any size hook.
  • Medium Size Yarn
    • I’m using ‘I Love This Yarn’ in the color Menthe, but any medium size yarn will work.
    • If you are using a smaller or bigger hook, just make sure that the yarn you choose, will be able to work.
  • Sewing Needle
    • You’ll always need this item, not matter what the crochet project!

Note: For the half-double crochet stitch, chain the amount you would like to do, but make sure you add an extra 2 chains! The extra two chains will not be crocheted!

Make a slip knot and chain 27. ( As I said before, you can chain whatever size you want, but make sure to have 2 extra chains. Example: I want 25 stitches, but I added 2 extra chains, making it 27 chains in totally.

Row 1: Skip the first 2 chains (Do not count the chain that is already on your hook!) Half-double crochet into the next stitch and across. (25)

Row 2: Chain 2. Half-double crochet in the next stitch and across. (25)

Repeat Row 2 until you have reached the number of rows you want to make, or keep going for more practice! I stopped at row 30

Once you are on your last row, fasten off and weave in any of your ends!


There you have it! Another fun stitch to practice and learn how to do! This stitch is also a very common stitch to be used in projects. I think it looks good for hats or blankets, especially!

Posted in Arts and Crafts, Beginner Patterns, Crochet

Crafty Sassy – Crochet Solid Granny Square (Beginner)

Hey Dearies! I’ve been quite busy with college since my finals are almost here, I figured I would post another free pattern for you! Now, since I’ve shown you how to do a regular granny square, I figured it was time to show you what a solid square looks like and how to make it.

So, when I first started crocheting, I didn’t like the granny square and how there were spaces in between it all, but now, I don’t mind it for some projects. Which lead me to create my temperature blanket squares with solid granny squares instead of regular granny squares.

Not only is this square is something you can play with the colors with, but it is really simple to make for those who are looking to try something new to do!

Let’s talk about what you will need for this project:

  • 5.0 mm hook
  • Medium Size Yarn (Size 4)
  • Sewing needle

Note: You don’t need to use a 5.0 mm hook or size 4 yarn, you can use whatever hook or yarn you would like, but if you are a beginner, I recommend using my suggestions.

Let’s Begin!

First, make a magic circle, however, if you don’t know how to make a magic circle, you can always chain 4 and slip stitch into the first chain to create a circle that we will be working into.

Tip: Using a magic circle will make it so that the hole will be closed tighter, however, it can be undone if you don’t leave a long tail. Chaining 4 will keep it more together. 

Round 1: Chain 3. (This counts as 1 double crochet). Working in the circle, make 2 double crochets, chain 1, make 3 double crochet, chain 1, 3 double crochet, chain 1, 3 double crochets, chain 1. Slip stitch into the top of the chain 3.

Round 2: Chain 3. In the first corner, double crochet. *Double crochet until you reach another corner. When you get to the next corner, make 2 double crochets, chain 1, 2 double crochets.* Repeat * til you get to the last corner. 2 double crochets and chain 1. Slip stitch into the top of the chain 3.

Round 3-5: Repeat round 2 until the desired length. For my temperature blanket, I went 5 rounds but only recommend 4 rounds. Fasten off and weave in your ends!

Get creative and change up each row with a different color or use a multi-colored yarn!

There you have it! A simple solid granny square that makes an incredible blanket! Not to mention, for the beginners, this gives you something different to try out.

Make sure to follow me on Facebook, that is where I am mostly active on and I also let you know whether when a post will be out or delayed!


Posted in Beginner Patterns, Crochet

Crafty Sassy: Crochet C2C Baby Doll Pillow (Beginner)

Hey Dearies! So, last week I posted a pattern on a baby doll blanket, but I wanted to take a further step and make a pillow to go with it. This pattern is simple too, working with that C2C stitch, again.

I also wanted to make sure that it matched the blanket as well. The only thing I didn’t get a chance to do for the blanket was adding a white border around it, like I did for the pillow.

20200121_075352.jpg

If you haven’t seen or want to make the complete set, check out my C2C Baby Doll Blanket pattern that goes with this pattern:

https://katiesblog96971617.com/2020/01/14/crafty-sassy-crochet-c2c-baby-doll-blanket-beginner/


Now, let’s talk about what you will need:

  • Medium Size Yarn
    • I used I Love This Yarn in the color Green, Turquoise & Red Print.
    • You’ll only need 1 skein.
    • If you would like to add another color for the border, you can, but you don’t have to.
  • 4.0 mm hook
  • Any type of stuffing
    • I used cotton stuffing.
  • Sewing needle

Now, if you aren’t familiar with the ‘C2C’ stitch, here is a wonderful video that Heart Hook Home has, that not only helped me understand how to do the stitch but also shows how to increase and decrease. Here is the video:

This pattern is great for learning and getting familiar with the ‘c2c stitch before moving on to bigger and more complicated projects.

The blanket size is a 7×9 square project, you can, of course, add or decrease squares to fit a small or large size baby doll.

Let’s Begin!

Chain 5.

Row 1: Double crochet into the 3 chains from the hook and in the next 2 stitches.

Row 2: Chain 5. Repeat from row one. (This is how we increase.) Then flip your ‘square’, like you are going connect it. Slip stitch in the chain three, from the last square. Chain 2. Make 3 double crochets in that same space.

Repeat until you have 7 squares across. Once you do, after making your last square, slip stitch on the top of the square. (This is how you decrease). Chain 2 and make 3 double crochets in that chain 3 space.

Keep going until the other side has reached 9 squares and on that finally square, slip stitch on the top of the square. Chain 2 and make 3 double crochets in the chain 3 space. As you continue to go back and forth, you’ll notice the rows start to get smaller.

Once you are at your final stitch, slip stitch the top of that last square and fasten off.

Sew in any loose ends in and then repeat this again to create another square.

Border:

Once you have created two of the same size squares, it’s time to put them together!

Place them together, on top of each other, making sure the corners match to each side. Then, taking either a white or colored yarn of your choice, make a slip knot onto your 4.0 mm hook.

Into the first corner, it doesn’t matter which corner you start in, enter your hook in BOTH pieces through the square and pull up a loop and slip stitch.

Then chain 1 and single crochet in that same spot you entered in. Single crochet around and when you reach a corner, make 3 single crochets in that same corner.

When you have single crocheted 3 of the sides, start to stuff your pillow, don’t stuff too much because it can make it very difficult to close. Once your pillow is stuffed, continued single crocheting around until you reach the last corner.

Make 2 single crochet in that same stitch. Then slip stitch into the next stitch.

Cut the yarn and then fasten off your work.

20200121_075352.jpg

There you have it! A simple baby doll set that you can make for anyone!

Make sure you like my Facebook page and follow me on Instagram. I’m more active on my Facebook page than I am on Instagram.


Posted in Crochet

Crafty Sassy 2019 Pattern Recap

Hey Dearies! Sadly, 2019 is coming to the end and I posted my final pattern for this year, but I wanted to do a recap on all the patterns that I have shared with you for the year of 2019!

I will be doing a mini description of them and adding the link, just in case you would like to check out that post or you missed it.

Crochet Mug/Coffee Cozy w/ Pocket

20190108_121100.jpg

This one was super fun to make! I wanted to have a mug cozy that worked for both mugs and regular coffee cups, not to mention, having a pocket for holding sugar or a tea packet, especially if you are on the go!


Crochet Coin/Gift Card Purse

20190205_210348.jpg

I came up with this idea for my daughter since she was only a year old, this purse fit her size. Not to mention, I wanted to make sure it would fit the size for a gift card because I didn’t find any patterns that looked this cute!


Crochet Stuffed Easter Egg

20190226_112352.jpg

This one I thought about selling these with a basket that I made during Easter, but they were a pain in the butt to make, so I decided to have the pattern free for all of you! They look perfect for baby’s first Easter!


Crochet Tablet Cover 

20190312_090346.jpg

I made this for my kindle, since the case it came in was very broken, not to mention, I wanted to try this pattern out for it. However, I made it too small, as to why I choose to work around it with a different color. But in the end, I came out really cute!


Crochet Completely Solid Granny Square

20190416_084708.jpg

I wasn’t going to post this pattern, but at the time, I was working on a project and was looking everywhere for a pattern of a completely solid granny square. I figured there was someone else that was looking for the same thing. These are perfect for creating a pixel blanket, however, it will take forever to sew them together.


Crochet Adult Size Dragon Ball Z Hat

20190521_164846.jpg

My fiance requested this one, saw it on Pinterest and I had to make him one. Sadly, the owner of the original hat didn’t sell the pattern, but the hats themselves, so I decided to create it but looking at the picture, which is harder than it looks, but not impossible.


Crochet Ice Pop Cozy

20190611_101847.jpg

These were pretty simple to make and when I first got into crocheting, ice pop cozies are one of the basic projects that every beginner should make because they not only give you some practice working in rounds but are really easy and quick to make quickly for a craft fair.


Crochet Striped Washcloth

20190709_123421.jpg

Usually, washcloths are the first thing beginners make, when they first start to get into crocheting, but I didn’t make one until a customer asked me. Don’t get me wrong, making washcloths were on my list to make, but I wanted to do something that was a challenge for myself.


Crochet Circle Coaster 

20190716_095621.jpg

Coasters are another fun and cool idea to make, if you have been following for a while, you know that I love to crochet coasters! The only downfall with some of these coasters that they have out there, they don’t make them big enough for a normal size mug, I make sure to make my coasters to be as big, if not bigger, for all mug sizes.


Crochet C2C Phone Case

20190723_094737.jpg

Ever since I learned the C2C stitch, I love working with it! It’s just so much fun to create and so many ideas I can’t wait to make in the future with it! Once you know how to work with the C2C stitch, the ideas of making pixel designs are endless!


Crochet C2C Wrist Pocket

20190730_085129.jpg

Again, this year I was trying out new patterns that had to do with the C2C stitch. I figured this idea would be useful for holding cash, when out and about. Or for kids who lose their teeth. Another idea would be to use this to hold your buttons or stitch markers as you crochet or knit!


Crochet Can Cozies

20190806_162214.jpg

Cozies are also one of my favorite things to make, as well! Whether they are for cans, mugs, or coffee cups, I love to decorate my drinks, cold or hot! Don’t be surprised to see some more of them coming up in 2020.


Crochet Basic Square Coaster

20190813_083031.jpg

As I have said, I love making coasters! You’ll be most likely seeing more of them in the new year, but I want to make it more creative and festive for all the seasons and holidays.


Crochet Travel Bag

20190816_160820.jpg

Crocheted bags and purses are always something that I loved to see made, they aren’t always the easiest bags to make, but seeing how creative some of the bags come out is so amazing! Made this one for my niece, she loved it!


Crochet Halloween Coaster

20191001_160937.jpg

These coasters aren’t just for Halloween, but if you try out different colors, you can make them for any time of year! This one goes with a placemat, which I love the placemat sets that have coasters!


Crochet Halloween Placemat

20191009_130822.jpg

Placemats are another pattern that I hope you will see this new year! These aren’t the ones you see all the time, but placemats are something that I think brings out a kitchen or dining room nicely.


Crochet C2C Scarf

20191213_205336.jpg

Scarfs are a first for me to make this year and I hope to come up with more fun and bright ideas as well! This idea came from the C2C Grinch scarf but made it like a candy cane or peppermint stick.


Crochet Child Size Mittens

20191213_205605.jpg

Are these super cute? Yes, but they were a real pain in the butt to make, especially when it came to the thumb part of the mitten. Not to mention, I wanted to make my nieces and nephews all a set, but because of how I don’t like working in small circles, I ended up making something else instead.


Crochet Child Size Hat w/ Pom Pom

20191213_205419.jpg

Last, but not least, the hats! These are based on how the Dragon Ball Z hat, but sized to fit a child. When it comes to hats, go bigger than the actual size. Going bigger isn’t a bad idea because, knowing how fast kids grow, they can just grow into them.


There they are! All the patterns from 2019! I know I haven’t been as active as I wanted to, but with starting college and being a stay at home mom with a 2-year-old, it’s been really busy!

However, I am planning out how I want to be more active for 2020. If you have any ideas or have something you would like me to create or come up with, feel free to let me know!

And as always, make sure to follow me on my Facebook page, Instagram, and Twitter. I’m more active on my Facebook, so make sure you are following!

I hope you all have a wonderful rest of the year and we will see you all back in 2020 for new patterns, crafts, stories, and so much more!

Posted in Crochet Blanket 2019

Temperature Blanket Update – October 2019

Halloween has come and gone, but I know everyone is interested in what our temperature blanket is starting to look like. Since we are officially in the fall season, the temperature has cooled down quite a bit!

With only two months left of this year, I can’t wait for it to be completely finished! This is one project I can’t wait to see, once it is completed, but as you can see, I might need to fill in the blanks, to complete the blanket, since I didn’t plan this one well.

20191106_133358.jpg

I also wanted to mention that with this year coming to an end, time for another blanket to create for next year, but I will be making another post and giving out some tips for anyone who wanted to create their own temperature blanket themselves!

As well, here is the color list that I’ve been using:

20181222_124142
100 degrees – Fire Red (I Love This Yarn)
90 degrees – Pumpkin (Red Heart Super Saver)
80 degrees – Bright Yellow (Red Heart Super Saver)
70 degrees – Jelly Bean (I Love This Yarn)
60 degrees – Green (Main Stays Basic Yarn)
50 degrees – Turqia (Red Heart Super Saver)
40 degrees – Soft Blue (I Love This Yarn)
30 degrees – Dark Orchid (Red Heart Super Saver) *Changed to the following – Violet (Red Heart With Love)
20 degrees – Orchid (I Love This Yarn) *Changed to the following – Orchid (Red Heart Super Saver)
10 and below – Light Gray (I Love This Yarn)

How do you tell which color to use?

I, personally, go with the overall temperature. So, let’s go by today, for example:

Today in Maine, the overall temperature is 17 degrees. I would choose the light gray.

Let’s say that it was an overall temperature of 22 degrees, I would choose the Orchid color. All my temperatures, for my colored yarn, has to have the same number first number. If that makes any sense, I’m sorry if it doesn’t!

What was the highest temperature for this month?

The highest our temperature has gotten is 60-degrees, but as we go into winter, 60-degree weather is something that we will want to have back!

What was the lowest temperature for this month?

The lowest we hit was actually 40-degrees, so make sure you have oil in your tanks or firewood ready to go if you haven’t already started keeping your house warm. I’m sure we will be seeing more of the colder temps pretty soon!

Do you post daily updates?

Yes, I do. On my Facebook page, I post a picture of the square for each day. I also tried to post every week’s worth, but it was hard to keep track of, so I’ll be posting monthly and daily instead.

If you haven’t liked my Facebook Page, here is the link below! It keeps you posted and updated on my temperature blanket and any updates for my blog and YouTube channel, as well!

https://www.facebook.com/katiesblog96971617/?ref=bookmarks


Posted in Arts and Crafts, Crochet, Top Projects for Crochet/Knitting

Crafty Sassy: Top 10 Free Crochet Costumes for Newborns

Hey Dearies! So, I wanted to make this post last year, but I changed my mind. Even tho my daughter will be turning two at the end of this month, I wanted to share some links to some super amazing patterns for newborns!

I didn’t get into crocheting until after my daughter was born and really missed out on making her one of these costumes to do a photoshoot for her. However, just because I missed out, I still want to keep in mind, just in case I ever get asked to make them in the future.

When it comes to looking for free patterns, for this type of project, it is a little bit of slim picking, but if you don’t mind paying for the pattern itself, you can find more Disney characters. (Which I will be making a post with links to those very soon!)

Even if you don’t know how to make them, always see if your friendly crocheters wouldn’t mind creating them for you. I love to getting sent a project to do, such as this, it gives me a challenge and something new to try out!

Disclaimer: None of the patterns shown are mine, all rights go out to their creators. I have left links to where the free patterns come from. Make sure that if you chose to make these, or have them made, that you give credit where credit is due to the original creator.

  • Baby Turtle

Turtle-Newborn-Photo-Prop-Free-Crochet-Pattern.jpg

Here is the link for this free pattern: https://coolcreativity.com/crochet/crochet-turtle-newborn-photo-prop-with-free-pattern/

  • Baby Cinderella

cinderella-dress-free-crochet-pattern--217x300.jpg

Here is the link for this free pattern: https://lovableloops.com/patterns/free-cinderella-dress-crochet-pattern/

  • Baby Chick

Baby+Chick+Infant+Cocoon+Photo+Prop.jpg

Here is the link for this free pattern: https://www.leftinknots.com/home/baby-chick-infant-hat-and-cocoon-free-crochet-pattern

  • Baby Dino

教程-副本-11.jpg

Here is the link for this free pattern: https://letscrochet.org/crochet/free-patterns/babys-dino-hat-cape-crochet-free-pattern/

  • Hello Kitty

IMG_0556-e1369147994896.jpg

Here is the link for this free pattern: http://dearestdebi.com/crochet-newborn-hello-kitty

  • The Hungry Caterpillar

教程-副本-14.jpg

Here is the link for this free pattern: https://letscrochet.org/clothing/baby-caterpillar-cocoon-crochet-free-pattern/

  • Baby Santa

1-Baby-Santa-Hat-and-Cocoon-Bunting-Free-Crochet-Pattern-1024x600.jpg

Here is the link for this free pattern: https://yourcrochet.com/baby-santa-hat-cocoon-bunting-free-crochet-pattern-video-tutorial/

  • Baby Firefighter 

Fireman Set.png

Here is the link for this free pattern: https://snugglyfoxdesigns.blogspot.com/2019/02/firefighter-overalls-and-hat-free.html

  • Baby Mermaid 

2e59f5756ff6ed7b22fe9f60f087794f.jpg

Here is the link for this free pattern: https://knitting-bordado.com/crochet-mermaid-baby-outfit-pattern-free/

  • Baby Unicorn

free-crochet-pattern-unicorn-hat-and-diaper-cover-225x300.jpg

Here is the link for this free pattern: https://lovableloops.com/patterns/free-unicorn-diaper-cover-crochet-pattern/

There you have it! A big shout out to the creators of these amazing patterns! Especially for beginners who are looking for something different to try out!


Posted in Crochet, Easy Patterns

Crafty Sassy: Crochet Halloween Placemat (Easy)

Hey Dearies! Sorry, this is a day late, but with my college midterms coming up, it’s been pretty busy, but without further ado, here is the pattern for this super cute placemat!

20191009_130841.jpg

If you want to create the placemat with the coaster, here is the link for the coaster that I posted last week: https://katiesblog96971617.com/2019/10/01/crafty-sassy-crochet-halloween-coaster-easy/

Note: It has been brought to my attention that I need to clarify the yarn, especially with placemat, potholders, or oven mitts. This pattern, with the yarn chosen, is for DECORATION and shouldn’t have anything hot on top of it.

Acritic yarn MELTS! If you want to use this as an everyday placemat, make sure you use cotton! It doesn’t have to be the same brand that I use, as long as it is the same size.

Let’s talk about what you will need:

  • 5.5mm hook
  • Medium Yarn (In black and orange)
    • I am using Red Heart Super Saver in Pumpkin and I Love This Yarn in Black.
    • Please make sure you see my note if you are making this placemat for everyday use!
  • Sewing needle

Placemat

With orange or black yarn, chain 23.

Round 1: Double crochet in the 4th chain from the hook. Double crochet in each of the next 18 chains. Make 5 double crochets in the last chain. Working on the opposite side in the unused loops of the beginning chain, double crochet in each of the next 19 loops. Make 6 double crochets in the next chain. Join in at the beginning of the chain 3. (50 dc)

Round 2: Chain 3. Double crochet in each of the next 19 double crochets. Make 2 double crochets in each of the next 5 double crochet. Double crochet in each of the next 20 double crochet. Make 2 double crochets in each of the next 5 double crochets. Join in at the beginning of the chain 3. (60 dc)

Round 3: Chain 3. Double crochet in each of the next 19 double crochet. Make 2 double crochets in the next 10 double crochets. Double crochet in each of next 20 double crochets. Make 2 double crochets in the next 10 double crochets. Join in at the beginning of the chain 3. (80 dc)

Round 4: Chain 3. Double crochet in each of the next 22 double crochets. Make 2 double crochets in each of the next 14 double crochets. Double crochet in each of the next 26 double crochets. Make 2 double crochets in each of the next 14 double crochets. Double crochet in each of the next 3 stitches. Join in at the beginning of the chain 3.  (108 dc)

Round 5: Chain 3. Double crochet in each double crochet. Join in at the beginning of the chain 3.

Round 6-8: Repeat round 5.

Round 9: Chain 3. Double crochet in the next 23 double crochets. Make 2 double crochets in the next 26 double crochets. Double crochet in each of the next 28 double crochets. Make 2 double crochets in the next 26 double crochets. Double crochet in each of the next 4 double crochets. Join in at the beginning of the chain 3. (160 dc)

You can fasten off, but if you want a nice border, switch to your other color.

Border

Round 1: Chain 1. Single crochet in the same chain as joining. Working in the back loops, single crochet in each remaining double crochet around. Join with the first single crochet.

Round 2: *Skip the next single crochet, make 5 double crochets in the next stitch, skip the next single crochet, slip stitch into the next stitch.* Repeat around. Slip stitch into the first stitch. Fasten off.

There you have it! A perfect placemat for Halloween! The best part about this is that you can mix and match different colors for whatever theme you have in your kitchen! I actually make one with white and a lite purple border for my Mother’s Day giveaway!

Also, don’t forget to like my Facebook page, I update it on a daily and it let’s you know when another blog post or free giveaway is!

https://www.facebook.com/katiesblog96971617/

Posted in Crochet, Easy Patterns

Crafty Sassy: Crochet Travel Bag (Easy)

Hey Dearies! Back with another super cute pattern! This is a market back that I had a blast making! Plus it was super simple to make as well. I ended up making this for my nieces 5th birthday and she loved it!

I would say that this bag a normal size for a bag, it’s not huge, but it’s big enough to fit what you would normally put in your purse. Well, for me, but you can use it for anything!

This pattern is going to be split into 3 parts. The base, handle, and gussett (which is a long part than connects both of the bases, I will explain more as we get there to hopefully make a little more sense).

Let’s begin talking about what you will need for this project:

  • Medium Yarn
    • Make sure you have 2 skiens of the colors you want to use. You will be working with 2 strains of yarn with this project.
    • I used Red Heart in white and orchard. You don’t have to change colors unless you want to, but I did just to see how it would look like.
    • 5.0 mm hook
    • Sewing needle
    • Stitch markers

Base and Handle (Make 2 of these)

Grab 2 strains of yarn, of your choice, chain 37. 

Row 1: Single crochet in the second chain from your hook and in each chain across. Turn. (36)

Row 2: Chain 1. single crochet across. (36)

Rows 3-12: Repeat row 2. Once row 12 is done, you can change into another 2 strains of color. I dropped the white by cutting it and crocheting over it. I just grabbed the other end of the yarn I was working on to replace my white.

Note: You don’t have to switch colors, but I did.

Row 13: Chain 3 (counts as a double crochet), skip the first stitch, double crochet in the next stitch and in each st across. Turn. (36)

Rows 14-19: Repeat row 13. Once at row 13, go back to using the 2 main colors that you were working with before. (You don’t have to do this unless you want to!)

Rows 20-27: Repeat row 2. Turn.

Now, we are going to be working on the handle part, we are NOT fasting off, not yet, but I just wanted to make sure before you start to fasten off. 

Row 28: Chain 1, single crochet in the next 6 stitches. Chain 50. Single crochet the last 6 stitches.

Row 29: Chain 1. Single crochet in the 6 stitches. Work a single crochet in each of the chains. Single crochet in the last 6 stitches. Fasten off and sew in any loose ends.

Once you have made two of the bases with handles, lets start on the gussett, or the part we are going to use to connect it all together!

Gussett (Make only 1 of these)

Working with 2 strains, again.

Row 1: Single crochet in the second chain from the hook. Single crochet across. Turn. (5)

Row 2: Chain 1. Single crochet across. Turn.

Repeat row 2 until it measures out to be about 30in. Fasten off and weave in any loose ends. Fold the gussett, from front to back, at the folded part, place a stitch marker on the row that is in the middle fold.

Assembly: 

There are two ways to do this:

  1. Single crochet around the long sides of the gussett and single crochet around the 3 sides of the bases. Sewing them together.
  2. Single crocheting all the pieces together, using 2 strands.

Whichever way you want to do it, is fine. I found that the first one made it a little bit easier for me to connect them, but I also wanted that nice thick border it has.

When you connect them, the short side of the gussett is the closest to the handles.

If you are single crocheting around, to connect them, make sure that when you get to the corner, you single crochet 3 times.

20190816_160722.jpg

There you have it! I’ve been one of those people that just love the crochet bag idea and I had to share this on with you all! A very simple pattern, but it can be tricky to assemble!

Make sure you follow my Facebook page for updates on my blog and more extra fun stuff! I do lots of giveaways!

https://www.facebook.com/katiesblog96971617/?ref=bookmarks


Posted in Beginner Patterns, Crochet

Crafty Sassy: Crochet Can Cozies (Beginner)

Hey Dearies! So, today I have another super easy pattern for you all! Since we are still in the hot weather in Maine, I figured we would make some can cozies for our soda cans! This also goes with a set, so next week, I’ll show you all how to make the coasters that go with them!

If you are just starting out, this is going to be perfect for you! Especially if you don’t want to just make a dishcloth, which is what most crocheters recommend to start out.

Let’s talk about what you will need:

  • Medium Yarn
    • I’m going to be using a multi-colored yarn from Red Heart. I forgot what it was called since I lost the label for it.
  • 5.0 mm hook
  • Sewing needle
  • Stitch Marker

Let’s Begin!

Round 1: Chain 2. Make 7 single crochets in the 2nd chain from your hook. Do NOT join, we will be working into a spiral. (7sc)

Make sure you place a stitch marker at the end of each row. Move the marker up after each row is completed. This will help you stay on track.

Round 2: 2 single crochet in the next 6 single crochets, single crochet in the last single crochet. (13 sc)

Round 3: *Single crochet in the next single crochet, 2 single crochet in the next single crochet* Repeat 6 times. Single crochet in the last single crochet. (19 sc)

Round 4: *Single crochet in the next 2 single crochets, 2 single crochets in the next single crochet* Repeat 6 times. Single crochet in the last single crochet. (25 sc)

Round 5: *Single crochet in the next 3 single crochets, 2 single crochet in the next single crochet* Repeat 6 times. 2 single crochets in the last single crochet. (32 sc)

Round 6: Working in the back loops only. Single crochet in each single crochet around.

Round 7: Single crochet around. Repeat until your project reaches your desired length. I’ll be crocheting until I reach about 3.5 inches tall.

Last Round: Slip stitch in each single crochet around. Fasten off and weave in all loose ends.

20190806_162211.jpg

There it is! Sadly, I didn’t have any cans to actually use and show you how it would look, but I tried my best to shape it so it looks like it was holding a can. I think these are super cute and fun to make or have for guest to use!

Make sure you see next weeks blog post, it will go along with this pattern. It’s a coaster that is perfect for this can cozies!

Make sure you follow my Facebook page for updates on my blog and more extra fun stuff! I do lots of giveaways!

https://www.facebook.com/katiesblog96971617/?ref=bookmarks

Posted in Arts and Crafts, Beginner Patterns, Crochet

Crafty Sassy: Crochet Ice Pop Cozies (Beginner)

Hey Dearies! So, since we are in summer, I wanted to give you all a pattern that was perfect for this season! As I was growing up, one of the favorite cold treat to have on a hot day, other than ice cream, was freeze pops!

We would always have so many of them that the only ones that were left in the fridge were the colors that we didn’t care to have. My favorites were red, pink, and of course blue!

These cozies are not only super cute, but they are perfect for the little ones and those who don’t like holding cold stuff in their hands. These are just a simple and very basic to make, so if you are short on time, these can be finished within a  few minutes, depending on how fast you crochet.

I have also included two sets of the same pattern, one for switching colors and the other one for making just solid colors. The color switching one will be first and the solid color one will be after that.

Here’s what you will need:

  • Medium Yarn (In any color you would like, or have two colors for more fun!)
  • 4.5 mm hook
  • Stitch Markers (This is optional, but if you are a beginner, I highly recommend to use.)
  • Sewing Needle

Let’s Begin! (Color Switching)

20190611_101902.jpg

Chain 13 and slip stitch into the first ch to create a ring.

Round 1: Ch 2. 13 half double crochet in the ring, slip stitch on the top of your ch 2 to close. Work each round continuously; use a stitch marker to help keep track of the rounds.

Round 2: 13 half double crochet around.

Round 3: 13 half double crochet around.

Round 4: 13 half double crochet around. (This is where you can choose to switch colors if you like.)

Round 5: 13 half double crochet around.

Round 6: 13 half double crochet around.

Round 7: 13 half double crochet around. (This is where you would switch your colors again.)

Round 8: 13 half double crochet around.

Round 9: 13 half double crochet around.

Finish off and sew in ends.


Let’s Begin! (Solid Color)

20190611_101853.jpg

Chain 13 and slip stitch into the first ch to create a ring.

Round 1: Ch 2. 13 half double crochet in the ring, slip stitch on the top of your ch 2 to close. Work each round continuously; use a stitch marker to help keep track of the rounds.

Round 2-9: 13 half double crochet.

Finish off and sew in ends.

This is something that can be done very quickly and it’s also fun to mix the colors around. These are also perfect for selling at craft fairs since it is something simple to create!

Also, if you don’t like the size of the cozie, you can always add more rows to make it longer.

Another thing, if you wanted it to sit at the end of the freeze pop, you can always sew the bottom of it. However, I like the cozy being the size it is since it’s easier to move and adjust when you are eating the freeze pop.


Don’t forget to check out my Facebook page! I try to go live on Tuesdays and if you like my page, I do polls and free giveaways as well! Also, this is usually the first place that I post updates on my blog as well!

https://www.facebook.com/katiesblog96971617/


Posted in Crochet Blanket 2019

Temperature Blanket Update 2019: April

Hey Dearies! I know I’m a little behind on the update, but I was currently out of the 50-degree yarn and of course, it was the last square for April. The yarn FINALLY came in yesterday, so I was able to finish up April.

So, this month, as you can see, we are starting to warm up a little more! Although it did rain quite a bit in April, we did have some nice days! We haven’t hit 70-degree weather, yet, but I’m pretty sure that we will see some next month for sure!

20190514_140308.jpg
January, February, March, and April!

Now, as you can see, this blanket is getting pretty big! The more we get into summer, we will start to see the rise in temperatures quite a bit. In Maine, once it gets hot, it gets hot pretty quick before it stays like it.

Right now, this is my kind of weather. Not too hot, but not too cold. Just enough where you might need a sweatshirt, but even if you sit in the sun, you won’t want to have keep taking it off.

Just in case you forgot what colors and yarn I’m using, here it is:


20181222_124142
100 degrees – Fire Red (I Love This Yarn)
90 degrees – Pumpkin (Red Heart Super Saver)
80 degrees – Bright Yellow (Red Heart Super Saver)
70 degrees – Jelly Bean (I Love This Yarn)
60 degrees – Green (Main Stays Basic Yarn)
50 degrees – Turqia (Red Heart Super Saver)
40 degrees – Soft Blue (I Love This Yarn)
30 degrees – Dark Orchid (Red Heart Super Saver) *Changed to the following – Violet (Red Heart With Love)
20 degrees – Orchid (I Love This Yarn) *Changed to the following – Orchid (Red Heart Super Saver)
10 and below – Light Gray (I Love This Yarn)

How do you tell which color to use?

I, personally, go with the overall temperature. So, let’s go by today, for example.

Today in Maine, the overall temperature is 17 degrees. I would choose the light gray.

Let’s say that it was an overall temperature of 22 degrees, I would choose the Orchid color. All my temperatures, for my colored yarn, has to have the same number first number. If that makes any sense, I’m sorry if it doesn’t!

What was the highest temperature for this month?

We are still in that 60-degrees mark. We haven’t hit 70-degrees, yet, but we were pretty close to it. As we begin May, we should at least see a few days that will hit 70-degrees.

What was the lowest temperature for this month?

We didn’t get as cold as 20-degrees is, but we did have a few days that were pretty low, which was 30-degrees

Do you post daily updates?

Yes, I do. On my Facebook page, I post a picture of the square for each day. I also tried to post every week’s worth, but it was hard to keep track of, so I’ll be posting monthly and daily instead.

If you haven’t liked my Facebook Page, here is the link below! It keeps you posted and updated on my temperature blanket and any updates for my blog and YouTube channel, as well!

https://www.facebook.com/katiesblog96971617/?ref=bookmarks

Posted in Arts and Crafts, Crochet

Crafty Sassy: Crochet Hooks, What Should I Get? (For Beginners)

Hey Dearies! Since I am working on a few projects, I figured I would talk to you about the many crochet hooks that you can come to choose from. Especially if you are a beginner, knowing what hooks to get can is very important!

20190423_090427.jpg

As a beginner myself, I jumped right into buying a set of crochet hooks from Wish and went from there. However, since I got lucky and only paid 3 bucks for a mini set, I wish I would’ve known there was more than just one type of hooks.

Each type of hooks can have a different feel or how they are in general, but before we get into how they feel, let’s talk about the different kinds of hooks you can get:

  • Aluminum Hooks
  • Plastic Hooks
  • Steel Hooks
  • Wooden/Bamboo Hooks
  • Japanese Hooks

I’m going to break each of these down just so you can get a picture of how they are like and if they are for you. The only ones that I don’t have in my possession, are the Japanese Hooks, but I will still explain and have a photo of them just so you know what they look like.

Also, I am going to put a chart of the different sizes of hooks you can get and how they are labeled, as well.

Image result for crochet hooks size chart

As you can see, there are 3 different types of labels for these hooks. USA, English, and Metric. The easiest one to go by is Metric, I found that it was easier to find hook sizes by using their actually metric size.

To me, using letters to determine which size hook, has been confusing and usually if a pattern says a hook size as a letter, I always end up looking up in my crochet books or search in Google, to get the metric size. Hence why my patterns, don’t have the hooks in letter sizes.

If you are a beginner, Metric is the way to go, but you can determine which one you feel most comfortable following. If you are wondering how small these hooks can be, they can get pretty small or really huge.

Now, let’s get down to talking about the actual hooks themselves.


Aluminum Hooks 

WIN_20181220_14_45_00_Pro

There are one of the most common hooks you can get. I prefer them/use them, for almost every project! These hooks were one of the first ones that I bought to get into crocheting. They can come in all different colors and can go as little as 0.60!

However, for the little hook sizes, you have to be VERY careful. I actually have a few of the tiny ones and let me tell you, they can bend very easily. I haven’t even used them once, but they bent trying to get them out of the packaging!

Lucky, I haven’t reached a project where I’m required to use them, yet.

Another thing to look out for is that they can’t get wet! When I mean by that is if you have sweaty palms or hands, they can tend to be more difficult to work. First time I used them, I was so excited and nervous that it made it difficult to want to work with them.

Although, you can get grips or even use tape to place around the handle of the hook, making it easier to grip and easier to handle your work better!

Overall, they are perfect for beginners! Plus, I love the different colors you can get them in. My family usually get me crocheting books, and some of them come with these hooks, so I have already started a collection with my metal hooks!


Plastic Hooks

Image result for crochet plastic hook

These next hooks are another fun-coloring type of crochet hook. Now, I want to let you all know that I haven’t had the pleasure to work with a plastic hook in a ‘normal’ size, meaning the only sizes I have are an 8.0-11.5.

Have I worked with them? Yes, I actually used one of them to make a basket for my mini balls of yarn. I do plan on getting myself a plastic set, just so I can have them for an option, which a lot of crocheters tend to so that.

These hooks work pretty well, I don’t have any complains, although I have seen and heard from a few people, that they are very easy to break, which I figured they would because they are made up of plastic.

However, I haven’t had one break on me, ‘knock on wood’, but I can see the smaller ones breaking a lot quicker than the bigger ones.

Overall, I see more people use the bigger plastic hooks more than I do the smaller ones.


Steel Hooks

20190423_090234.jpg

I know you are probably thinking, ‘What’s the difference between these and the aluminum ones?’. Well, there are a few differences, but let me explain why.

These hooks have a built-in handle, which is perfect for if you have sweaty hands, as I do from time to time. Not only that, having a handle makes it easier for you to grip the hook better, but it makes it easier to control smaller hooks.

Yes, they do make them in smaller hooks. I actually bought myself a set, that also came with a storage bag, because I was looking for something to help me better grip my smaller hooks, especially, since I crochet a lot of towel toppers.

Although, these are one of my ‘go to’s’, the only problem I have with them is the grips. Now, the set that I bought, had rubber grips, but they were starting to slide off and it made it bothers me when they do that. Especially, when you are crocheting.

If you do want to get yourself a set of these hooks, go for the ones that are built onto the hook itself. If you do end up getting a rubber set, take some hot glue or craft glue, and glue the inside of the rubber piece, and slide your hook back on.

Overall, they do have some very cute grip holders and they can come in multiple colors. These are definitely a must, especially, if you are a beginner!


Wooden/Bamboo Hooks

20190423_085900.jpg

These hooks were the first thing that I really wanted, as soon as I got into crocheting! They were handmade and hand-carved, but I really just wanted them as an option and to grow my hook collection.

They are so smooth to the touch and have a point at the top of the hook, which makes going into stitches easier. The size of every hook is hand carved into the hook itself. These were so pretty I didn’t want to use them, but I did have some problems.

The ones I have, they felt weird to use, but when it comes to trying out different hooks, it can take a while to adjust, but it felt weird to use them. It’s not that I didn’t like them, I just the hook itself is very awkward.

I even put on a handle, which I didn’t want to do, but with the handle, it was a little easier.

The smallest size they go, in carving them with would, is a 3.0. Anything smaller is just a metal hook with a wooden grip, which I would like to note, the wooden grip is very strong and I haven’t had any problems with it.

Overall, I like to have a set, just to have it, but I have used them before. It does take some type to get used to, but you also need to be careful because since these are made up of wood/bamboo, they are very easy to break. Hence why they don’t go smaller with size!


Japanese Hooks

Image result for japanese crochet hooks

Now, as I said in the beginning, I’ve never tried these, so I can’t really give a good detailed explanation whether they are good or bad. I do see quite of bit of other crocheters that do use them.

What I have read, from my crocheting books, these hooks are perfect for people who have small hands and it helps with arthritis. From the looks of these hooks, they do look very comfortable.

Overall, you have to try them to get the feel from them. I do plan on getting a set in the near future.


In order to find out what hook works for you, try them all out! Of course, you don’t have to buy the entire set of them, you can always get just one of each and see how they are for you!

I like to have options, especially when crocheting. Have a set of each different hook can give me more options to choose from, no matter what size hook I need!

Leave a comment down below letting me know what kind of hook you prefer to use! I’d love to know!

Don’t forget to follow my Facebook page, I update my temperature blanket daily on there, go live crocheting, and even have free giveaways! Link is down below!


https://www.facebook.com/katiesblog96971617/

Posted in Crochet Blanket 2019

Temperature Blanket Update 2019: March

Hey Dearies! If you have been following me on my Facebook page, you would’ve noticed that I was behind on my daily squares, due to running out of yarn, which can happen when doing a temperature blanket!

Anyway, let’s talk about how this month went, we are FINALLY getting some warmer days and we also had our very first 60-degree day, which was also on the last day of the month.

20190401_125126.jpg

January, February, and March!

So, if you are wondering how big this blanket is going to get, well, it’s going to get pretty big! This blanket is also being laid on a King size bed, so by the time this blanket will be finished, it will most likely go over the sides and fit perfectly on the bed.

We already have about 90 squares on this blanket. In the upcoming month of April, we will be able to start seeing different colors since it is beginning to warm up and make it feel like spring!

Also, you might have noticed a slight color change for my dark purple, this one also one of the colors that I did up end up running out of and had to substitute it with a different type of purple.

It’s still the same Red Heart brand, but a different line of yarn, so I will add that to the list of colors, as well. Hopefully, I won’t have to make any more color changes to this temperature blanket, but it is my first one, so mistakes are bound to happen.

Just in case you want to see what the colors will start to look like, as the temperatures get warmer:

20181222_124142
100 degrees – Fire Red (I Love This Yarn)
90 degrees – Pumpkin (Red Heart Super Saver)
80 degrees – Bright Yellow (Red Heart Super Saver)
70 degrees – Jelly Bean (I Love This Yarn)
60 degrees – Green (Main Stays Basic Yarn)
50 degrees – Turqia (Red Heart Super Saver)
40 degrees – Soft Blue (I Love This Yarn)
30 degrees – Dark Orchid (Red Heart Super Saver) *Changed to the following – Violet (Red Heart With Love)
20 degrees – Orchid (I Love This Yarn) *Changed to the following – Orchid (Red Heart Super Saver)
10 and below – Light Gray (I Love This Yarn)


How do you tell which color to use?

I, personally, go with the overall temperature. So, let’s go by today, for example.

Today in Maine, the overall temperature is 17 degrees. I would choose the light gray.

Let’s say that it was an overall temperature of 22 degrees, I would choose the Orchid color. All my temperatures, for my colored yarn, has to have the same number first number. If that makes any sense, I’m sorry if it doesn’t!

What was the highest temperature for this month?

Well on the last day of March, we got a 60-degree day! So, the light green is just the beginning of what temperatures will start to look like in the upcoming weeks!

What was the lowest temperature for this month?

So, our lowest temperature was actually 20-degrees, but on those days, it felt a lot colder than that!

Do you post daily updates?

Yes, I do. On my Facebook page, I post a picture of the square for each day. I also tried to post every week’s worth, but it was hard to keep track of, so I’ll be posting monthly and daily instead.

If you haven’t liked my Facebook Page, here is the link below! It keeps you posted and updated on my temperature blanket and any updates for my blog and YouTube channel, as well!

https://www.facebook.com/katiesblog96971617/?ref=bookmarks

Posted in Crochet Blanket 2019

Temperature Blanket Update 2019: February

Hey Dearies! So, if you have been following my daily squares on Facebook, you will know that I was going to do the update yesterday, but I totally forgot about it, so I’m doing it now!

February has come and left us and I wanted to show you guys what the blanket looks now!


20190301_085856.jpg
What my temperature blanket looks now! This is both January and February together!

As you can see, this blanket is going to get pretty big and I didn’t realize it until now. My granny squares are 5 rows, tall and wide, so this blanket is going to get super big! It might actually be too big, but it will definitely warm me up on a cold winters day!

If you haven’t already noticed, there has been a new color in the mix, so let me explain. Due to not being able to get the store to go get the color yarn, I had to end up changing it. Plus, I didn’t want to put the blanket on hold when it came time to crochet the squares together.

This light purple that I switched it to will still represent as a 20 degrees color, it just isn’t as light as the color before it.

Hopefully, this will be the only color change that I will end up doing. I’ve planned it out, so if I start getting really low on a particular color, I am going to grab or order another roll the next time I go to the store.

Anyway, here is the colors and what they will represent:

20181222_124142
100 degrees – Fire Red (I Love This Yarn)
90 degrees – Pumpkin (Red Heart Super Saver)
80 degrees – Bright Yellow (Red Heart Super Saver)
70 degrees – Jelly Bean (I Love This Yarn)
60 degrees – Green (Main Stays Basic Yarn)
50 degrees – Turqia (Red Heart Super Saver)
40 degrees – Soft Blue (I Love This Yarn)
30 degrees – Dark Orchid (Red Heart Super Saver)
20 degrees – Orchid (I Love This Yarn) *Changed to the following – Orchid (Red Heart Super Saver)
10 and below – Light Gray (I Love This Yarn)         *Note: Due to one of the color changes, I won’t be updating this picture, the only one that has changed is the 20 degrees one and there is a note, with the new color I’ll be using.*


How do you tell which color to use?

I, personally, go with the overall temperature. So, let’s go by today, for example.

Today in Maine, the overall temperature is 17 degrees. I would choose the light gray.

Let’s say that it was an overall temperature of 22 degrees, I would choose the Orchid color. All my temperatures, for my colored yarn, has to have the same number first number. If that makes any sense, I’m sorry if it doesn’t!

What was the highest temperature for this month?

We actually reached another 50-degree day, but as usual, it doesn’t last long. Hopefully, in March we will start to see more days starting to warm up!

What was the lowest temperature for this month?

Well, we reach single digits, but the way my temperature blanket is set up, we can’t really tell, other than it would be a light gray square!

Do you post daily updates?

Yes, I do. On my Facebook page, I post a picture of the square for each day. I also tried to post every week’s worth, but it was hard to keep track of, so I’ll be posting monthly and daily instead.

If you haven’t liked my Facebook Page, here is the link below! It keeps you posted and updated on my temperature blanket and any updates for my blog and YouTube channel, as well!

https://www.facebook.com/katiesblog96971617/?ref=bookmarks


Posted in Arts and Crafts, Crochet, Easy Patterns

Crafty Sassy: Crochet Stuffed Easter Egg (Easy)

Good Morning Dearies! So, I am going to shake it up a bit and we are doing something for Easter! I know it is a little early, but with my crocheted Easter Baskets up for orders, I wanted to show everyone how to make these cute little eggs, just in time for Easter!

20190226_112506.jpg

These are great for babies for their first Easter or for toddlers if you want them to find something other than jelly beans and candy! These eggs don’t take long to make, but they add the perfect touch to a crocheted Easter Basket!

So, before I begin, I want to talk to you about this pattern. I’ve made about 3 of these eggs, 4 if you include the tutorial I’ll be doing for you all. I’ve used a different brand type of yarn, just to see if there is a difference, and I believe it was my tension, but I’m still unsure.

20190226_112352.jpg

The pattern recommends Red Heart Yarn, so I would just use Red Heart, you can try it with different brands and if you do, and they turn out great, feel free to let me know in the comments!

Anyway, let’s talk about all that you will need:

  • 5.0 mm hook
  • Red Heart Yarn
    • I will be using the color aqua. I’m just guessing because I lost the yarn label for it, but I know it’s Red Heart.
  • Stitch Marker
  • Stuffing of your choice
    • I’m using the stuffing that you get from Walmart in the craft section. Basic stuffing for stuffed animals.
  • Sewing Needle
  • Row Counter (optional)
    • I wrote down the numbers of rows and crossed them off as I go. You don’t need a row counter, but if you are a beginner, I highly recommend that you use one.

Let’s begin!

Round 1: Chain 2. Make 6 single crochets in the second chain from your hook. Don’t connect. (6 stitches)

20190226_100235.jpg

Round 2: Make a single crochet in the next stitch and place a stitch marker(You’ll be moving this stitch marker for every row), then make another single crochet in that same stitch. In the next stitches, make 2 single crochets in each until you reach the stitch marker. (12 stitches)

Round 3: Single crochet in each stitch.

Round 4: Make *2 single crochet in the next stitch, single crochet in the next.* Repeat (18 stitches)

Note: The * are for repeating an amount of different stitches for a round or row.

Round 5: Rep Rnd 3.

Round 6: Work *2 single crochets in the next stitch, single crochet in the next 2 stitches.* Repeat. (24 stitches)

Round 7: Rep Rnd 3.

Round 8: Work *2 single crochets in the next stitch, single crochet in the next 3 stitches.* Repeat. (30 stitches)

Round 9-11: Rep Rnd 3.

Round 12: *Single crochet decrease in the next stitch, single crochet in the next 3 stitches.* Repeat. (24 stitches)

Round 13: Repeat Rnd 3.

Round 14: Single crochet decrease 12 times. (12 stitches)

Round 15: Rep Rnd 3. Stuff the egg. (I used the other side of my crochet hook to help stuff the egg because the hole is really small.)

Round 16: Single crochet decrease 6 times. (6 stitches)

Finish off, leaving a long tail to weave through the remaining 6 stitches. Pull tight and secure the end and make sure to weave it in, as well.

20190226_112520.jpg

There you have it! Perfect pretty Easter eggs for the kiddos!

Posted in Arts and Crafts

Crafty Sassy: What Are C2C?

When you first get into crocheting, the first thing you do, before you even get into it, is figuring out what you want to learn how to make. For me, other than my great-grandmother’s crocheted towel toppers, was the C2C. C2C is a ‘corner to corner’ type of stitch that you would find in blankets.

A corner to corner is something that you would usually see for a blanket, but I have seen many for scarfs and rugs as well. They are perfect for testing the limits to see what you can do with your crocheting skills. Here are a few examples that other’s have made:

Image result for c2c crochet

Image result for c2c crochet

You can get really creative with these types of projects! I will say, these are a lot easier to understand than graphgans. If this is something that you have saved in your Pinterest folder, or you are waiting for all your projects are done before starting something new, sit back and relax! I’m going to answer a few questions and give some tips, I have picked up, on C2C!

What will you need?

Depending on the pattern or idea you have in mind, you will need to start out on graph paper. If you are going for the basic C2C, having a graph will help you keep track of where you are, but graphs are used for more characters or lettering. For example, I am going to use this pixel picture:

Related image

Since we are going to be using this heart, as an example, we need to figure out how many bobbins and colors we will need. I also want to note that you can always change the colors for any of these types of projects. It won’t change how you make the C2C, only the colors.

For this project we need 4 different colors:

  • White
  • Black
  • Dark Red
  • Red

Now, let’s talk about bobbins, if you don’t know what they are, here is a picture of what they look like, you will need these, unless, you are using multiple skiens, which I don’t recommend because you have to turn the project back and forth, when you are done with a row.

Image result for crochet bobbins
These ones aren’t exactly for ‘crocheting’, but the reason why I like these, is because you can clip them onto your work as you are working.

From looking back at the graph, I see that we will need about 9 bobbins, but like i said, every project will be different and you will have to determined what you will need for each project.

How do you start one?

After you have figured out what you need, you can then start. A lot of people start by chaining 6, but I prefer chaining 5. The reason for this is because I am one of those picky people that doesn’t like giant gaps or holes in my projects and I like to keep it that way.

Chaining 6, is what people normally do, but it doesn’t change the C2C. The only other difference is that, when you connect the squares together, they won’t be the same. For now, here is the video I followed:

*Note: This is not my video, this is to show what type of C2C I am currently using. All credit goes to Heart Hook Home.*

Is it easy?

Once you get the hang of it, it isn’t that hard to do! The only parts that I struggle with is changing color, but there are so many videos on YouTube that have helped me out with that!

What videos do you recommend?

I can recommend a few, but you’ll have to find someone that you can follow. Everyone is different, especially, when it comes to crocheting. I am also one of those people that likes to get right down to the point, especially, when it comes to tutorials.

Keep in mind, that some people can give you way too much information, to the point where you aren’t sure what you are doing. Heart Hook Home, did an awesome job explaining a C2C, I highly recommend you watching her tutorial.

If you want to learn, almost everything that is to know about a C2C, then the Crochet Crowd is your best option, although, I personally, don’t recommend him to anyone who is a beginner. I honestly found his video, on C2C, very confusing and especially as a beginner.


This was just a little more information, not a lot, but enough, to possibly get you going in the right direction of C2C. Once you learn how to do it, you won’t want to stop!

If you haven’t liked my Facebook page, I will be going live, tonight, with a surprise, that I am making for this month of January! Make sure to like my page and check it out!


Posted in Arts and Crafts, Beginner Patterns, Crochet

Crafty Sassy: How to Crochet a Basic Headband (Beginners)

20180925_150307.jpg

So, there was a tie on my Facebook page on whether I should make the Rose or the Headband, but since the headband has been in the last few polls, I figured I would show you how to make one.

Now, I haven’t mastered this pattern completely, but it is a very fun pattern to make! Especially, if you are a beginner. The Rose actually goes with this headband, so I figure we can make the headband and I then can show you how to make the rose and show you how to put it on, as well.

As always, let’s talk about the supplies you will need:

  • Medium Yarn (Color of your choice)
    • I decided to used the ‘I Love This Yarn’ multi-color yarn to show you guys what it should look like.
  •  5.0 mm Crochet Hook
  • And of course, a sewing needle!

20180925_150444.jpg

So let’s get started!

Step 1:  Chain 44. Now, found it easier to count out loud, while making the chains, just so I don’t lose track of how many chains I made.

Step 2: Make 2 double crochet’s in the 3rd chain from the hook(NOT counting the chain that the hook is on!). *Skip 2 chains, single crochet in the next chain. Chain 2. Make 2 double crochets in that same stitch.* Repeat until you reach the other end, then make a single crochet in that last chain.

Note: The * represent where you start and end. Basically, you are repeating the same step until you reach the end. I will be putting in * to help you know what you need to do! A lot of crochet books use them and they are very helpful! If you are stuck or need help, let me know down in the comments!

Step 3:  Chain 2 and turn your work. Make 2 double crochets in the next available stitch. *Single crochet in the chain-2 part of the work. Chain 2. Make 2 double crochets in that same space.* Repeat until you reach to the other side and then single crochet the top of the last row.

Step 4: Repeat Step 3. Twice. You should have 4 rows altogether.

Step 5: Chain 30. Then slip stitch to the opposite side of your project. Slip stitch across that small side and then chain 30. Slip stitch to the other side and slip stitch across that side. Once you are done, cut your yarn and pull your crochet hook up and pull that end piece of yarn tight.

Step 6:  Sew in any yarn that is hanging around and then you are done!

Note: If your headband does not fit, you can always 4 chains add or decrease 4 chains, to fit your size head. If you are looking for it to fit a baby or child’s head, this might not be the project for that, but you can try and make it work!

For Example: If the headband was too small, I would chain 48. If the headband was too big, I would chain 40. 

If you have any questions, feel free to ask me! I’ll try my best to help you out!

20180925_150941.jpg

Also, don’t forget to check out my Facebook page, I have a poll up every week on what project I should do next! Since Halloween is just around the corner, be prepared to be Spooked!
https://www.facebook.com/katiesblog96971617/

Posted in Arts and Crafts, Beginner Patterns, Crochet

Crafty Sassy: How To Make A Towel Topper (For Beginners)

20180828_080830.jpg

Today, I’m going to try to teach you guys how to make these simple towel toppers. My great-grandmother has been making these for years and we always had a few of these hanging around the house. To this day, she still makes them, but not as much as she used to.

I am basing this pattern off of what I have seen on YouTube, other free patterns that they have on the internet, and going by one of her towels. I have NOT perfected this pattern. My great-grandmother never really wrote down her pattern or anything like that, she is one of those ‘make it as you go’ type of crocheters.

I will make a better blog post on the towel topper, but for now, I’m gonna show you how I managed to make my first one.

So, first thing first, lets list off the supplies you will need for this project:

  • Kitchen Towel
    • Any type of towel you can use, but use one with more of a thickness, it makes it easier to work with, in my opinion.
  • Medium or Size 4 Yarn
    • Chose a color that would match with your towel design, if it has any. Try not to chose black, it is harder to work with, same with darker colors.
  • Button
    • I chose to get a pack of white big (not giant) buttons. White matches with mostly anything, and for this being my first towel, I figured it would be easier to work with. You can chose whatever color buttons that you think would fit for your towel, as long as they aren’t the small buttons.
  • Sewing Needle
    • Normal sewing needle, nothing really special. It can help with poking holes through the towel.
  • Crochet hooks: 2.25mm and a 4.5mm
    • These are the hooks I used, I might change the sizes, but the reason why you need two is the smaller one will be for bring the yarn through the towel itself, while the other one will be for the actual crochet part of the towel.

Now that you know what you need, let’s begin!

Step 1: Take the towel, you have chosen to use and fold it in half, hamburger fold, if that makes it easier to visualize. Cut the towel in half.

The reason for this is that if you have a long kitchen towel with the same design, on each side, you’ll be able to make two different towels.

Image result for kitchen towels

Step 2: This next step is going to be a little tricky. You can use the sewing needle to help poke holes in the top of the towel, I found that easier than taking the small crochet hook (2.25mm) and poking it through.

Once you poke your crochet hook through and pull through you yarn. Then, you are going to yarn over and pull through both loops, basically doing a slip stitch.

You repeat this step until you reach the other side of the towel.

*Remember to try not make your holes too close or too far apart. A few of the videos that I watched recommend being a quarter of an inch away from the top of the towel and from your last stitch, or hole you made. It doesn’t have to be exact, but whatever works for you.*

Step 3: Turn your work over. Now, we are going to switch our crochet hook, switch to the 4.5mm. Chain 1.

We are going to double crochet in between each of the stitches of the towel. You are going to keep doing that until you reach the other side of the towel.

*How to double crochet*

For this project, you are going to yarn over, go through or in between the stitches and then yarn over again, go through the first two loops, yarn over and go through the last two loops.

Image result for double crochet stitch

Step 4: You are going to repeat Step 3, for this next row. Instead of going in between the stitches, you are going to go in between each double crochet that we made in the first row of double crochets.

Once you reach to the other side, turn your work over and chain 1.

Step 5: For this next row, we are going to still double crochet, but we are going to skip every other one. For your first double crochet, you are going to double crochet in the first spot, but skip the one next to it.

You keep going until you reach the other side. Make sure to turn your working and chain 1.

Step 6: Repeat Step 5, making sure to skip every other one. Once you reach to the other end of the towel, turn your work and chain 1.

Step 7: As you can see, the towel topper is now starting to become smaller, which is what we want it to do. Now, we are going to repeat Step 3, making sure we double crochet into each one. When you get to the other side, turn your work and chain 1.

Step 8: Repeat Step 3. Turn work over and chain 1.

You are going to repeat Step 3, and making sure you turn your work when done that row and chaining 1. For the next 5 rows.

Step 9: Once you are done double crocheting those last 5 rows, it is now time to finish off the project and make the opening for the button to go through.

Now, everyone does this differently, but I am going to do it differently from what my great-grandmother does.

After you turned your work and chained one, you are going to do 2 double crochets. Chain 2. Skip the next 2 stitches. Then do 3 double crochets.

Step 10: This is the last row we are going to crochet. So, make sure you turn your work and chain 1. We are basically going to double crochet, for the last row.

When you get to the open space, you are going to double crochet twice in that opening.

We you get to the end, bind off by cutting the yarn you were working on and pull your crochet out, don’t remove the crochet hook from the loop, pull it up, so that the yarn is bind off.

Step 11:  The last step is simple, all you have to do is sew the button into the middle of the project, just like shown in the picture above. Then it is complete!

Like I said in the beginning, I will have a better post, when I have mastered a pattern and will update you guys on it. These towels have been a gift for any event or celebration. I love having these because you can hook in on your stove handle, especially if you have one made for the theme for your kitchen.

If you are intersected in learning how to do this, I will be going LIVE on my Facebook page, tonight! Like my Facebook page, because I do post all my blog posts on their, as well as my twitter. Click the link below:
https://facebook.com/katiesblog96971617/


Posted in Arts and Crafts, Beginner Patterns, Crochet

Crafty Sassy: How To Make A Heart-Shape Bookmark (For Beginners)

This project, that I’m about to show you, is a very simple to make and is great for beginners, just like myself! I’m going to break down each step with pictures, and explain the process a little easier for you! I will also have a YouTube video in the makes for those who prefer videos to learn from.

First things first, let’s talk about what items you will need:

  • Meduim (Size 4) Yarn
    • If you are a beginner, I suggest working with light colors than dark ones. Lighter colors you will be able to see a bit better than dark colors.
    • Also, you will need 2 different colors, one for the heart and one for the stem, but if you want to stick with the same color, that is fine as well.
  • Crochet Hook: 4.5 mm/U.S. 7
  • Sewing Needle

Next, I will let you know what type of stitches that are involved with this stitch, I find it useful to know what kind of stitches the project requires, so that I can practice or get to know the stitches before hand:

  • Chain stitch (ch)
  • Double Crochet (dc)
  • Treble Crochet (tr)
  • Slip Stitch (sl st)
  • Small or Large Picot (For the stem)

I also what to remind you that if the first time you make this, it doesn’t come out perfect, that’s okay! It takes a lot of time and practice to make your projects come our perfect.

*Remember: You can always push your work back, if you feel you don’t have enough room to work your stitches in.*

Step 1: Make a magic circle. (Down below I have a slide show on how to make a magic circle. However way you make a magic circle, is totally up to you! This was how I learned to make them.

This slideshow requires JavaScript.

Step 2: Now that we have our magic circle, we can begin! Chain 4 (ch).

Step 3: Next, you will need to crochet 2 tr (Treble Crochet) into the circle. If you don’t know what a treble crochet is, here is a picture that can help you out with that!

Image result for treble crochet stitch

Step 4: Double crochet (dc) into the circle 3 times. Down below will be a picture on how to double crochet.

Image result for double crochet stitch

Step 5: Chain 1 (ch).

Step 6: 1 Treble Crochet (tr) into the circle. (You can look back up to the picture if you forget.)

Step 7: Chain 1 (ch).

Step 8: Double crochet (dc) into the circle 3 times. (You can look back up to the picture if you forget.)

Step 9: Treble crochet (tr) into the circle 3 times.

Step 10: Chain 3 (ch).

Step 11: Make a slip stitch (sl st) into the circle to secure your work.

That’s how you make the heart part of the circle. The next part is the stem or the actually bookmark itself. This might be difficult, so I’m going to try my best to explain it.

Step 12: Make a slip stitch (sl st) into the heart circle with a different color, or with the same color.

Step 13: Chain 42 (ch), or however long you would like it to be. You can make it longer or shorter, but I would stick to chaining 42, just so you can see how long or short you might want it to be.

Step 14: Count from your hook the 6th chain and make a slip stitch (sl st) into that 6th stitch.

Step 15: Then you are going to slip stitch (sl st) into each chain, until you reach the 6th chain.

Step 16: Now, we are going to make a small picot. Chain 3 (ch), insert your hook into the 3rd chain from your hook, the first chain that you made if it is a little easier for you. Then, yarn over and pull through all the loops.

Step 17: Repeat Step 15 and slip stitch (sl st) into each chain until you reach the 6th chain.

Step 18: We are going to now do a large picot. It’s basically the same thing as a small, but you just chain more. So, chain 5 (ch), insert your hook into the 5th chain from your hook. Then, yarn over and pull through all the loops.

Step 19: Repeat Step 15.

Step 20: Repeat Step 16.

Step 21: Repeat Step 15

Step 22: Repeat Step 17.

Step 23: Slip Stitch (sl st) all the way up til you reach the heart and slip stitch into the middle of the hole, in the heart and you are done!

20180821_123805.jpg

Here is what the finished product should look like! Mine isn’t perfect, but no one’s will be perfect the first time. Practice makes perfect!

*If you have already liked my Facebook page, I will be going LIVE tonight on my Facebook page showing how to make this! If you are interested, here is the link to my Facebook page! Please like and don’t forget to share!
https://facebook.com/katiesblog96971617/

Posted in Arts and Crafts, Top Projects for Crochet/Knitting

Crafty Sassy: 5 Easy To Do Beginner Projects For Crocheting

Looking at crocheting project, just looking at them makes you want to learn how to do it, if you are like me, you like to save the page you see them on and come back to it whenever you have time.

Some projects can be very tricky or confusing, so then you forget all about it and never look back until you see it again. This has happened to me so many times, that now that I know how to crochet, I try to go back and find them and see if I am ready to attempt them.

So, if you are truly wanted to enter into this fun and amazing hobby, sit back and check out these easy to do projects, if you are a beginner! Lets begin!

  1. Granny Square Blanket

20180724_070620.jpg

This is the current project that I am working on for my fiance. This is perfect for beginners! If you want to just make a simple blanket, this is perfect to do! Whenever I looked at a granny square blanket, I didn’t think I could make one.

If you don’t know, but I am a visual learner and need everything broken down step by step. YouTube was the first place I looked to find a video that would slow it down, and I finally found one, The Nervous Knitter.

She broke the granny square steps as slow as you can go, but it was easy to understand and learn. I always watch the videos first, before trying them, so I picked up on the steps very quickly. Once you learn how to do it once, it is like riding a bike, something you can’t forget.

If you want to check out her video, here is the link!


2. Scarf

Image result for crocheted scarves

Scarves will always be something that is easy to do. The only difficult thing about them is the patterns you choose. I didn’t understand why my grand-grandmother makes scarfs so much, but after realizing how quit they are to make, I understood why kept making them.

3. Bookmarks

Image result for crocheted bookmarks

You are probably thinking to yourself, bookmarks?? Yes, almost anything you can think of, you can crochet. Now, not all bookmarks are easy and I will be posting a how-to on how to do these ones.

These ones are as simple as granny squares, plus they are cute and pretty quick to make. Why have a plain boring paper or plastic bookmark when you can have a bright and colorful one instead!

4. Beanie Hat

Image result for crochet beanie

Just like the scarves, this is another quick and easy thing to learn how to do. So, if you are a beginner and don’t have any gifts in mind for a birthday or Christmas, you can always crochet a hat and scarf.

I haven’t had a chance to learn how to crochet, but really can’t wait!

5. Granny Square Patchwork Blanket (Mini Granny Squares)

Image result for crochet granny square blanket

I know that I already have the giant granny square blanket on here, but here is the other version that your grandmother might have around her house. The difference between this blanket and the other one I mention is that this is just smaller squares you sew together.

While the other one is just a giant granny square, this one you can get creative and mess around with different colors and see what works and what doesn’t.


Which one would you like to try out? Or which one should I show you how to make? Or which ones have you already made? Leave a comment down below!


Posted in Arts and Crafts

Crafty Sassy: Types of Yarn

Image result for different types of yarn

As a beginner, if we ever wanted to start a project, using yarn, we would just find the color we wanted and grab it, right? Then once we get home, we find out that the knitting needles or crochet hooks, aren’t for that type of yarn.

The chart that is shown above, will be your best friend while shopping for the right kind of yarn. Most of the yarn, that you can get, have one of this pictures with the yarn on it, saying the number of what kind the yarn is.

Image result for yarn weight symbols

Something like this. I will tell you what size the yarn is and even recommends what size crochet hook or knitting needles you should use with this yarn. Most of them have this on their packaging, which is very helpful for everyone.

Now, let’s get into detail with each one.

Related image

The picture that is shown about, shows the thickness of what each one looks like. I will be going through them all and explaining which one would be ideal for the project you are looking for.

0: Lace

Image result for lace yarn

This is one of the thinnest yarns that will be on this chart. If you are looking to make fashionable clothes, scarfs, hats, or hand warmers, this is what you would mostly use.

Lace yarn makes the project look more ‘perfect’ or it looks better in presentation. If you are a beginner, I would hold off on going right to the thinnest yarn.

1: Fingering/Super Fine

Image result for super fine yarn

Fingering yarn, or what the chart likes to call ‘Super Fine’ yarn, is used for making baby socks or anything clothes wise. Or, what you can find a bunch on, shawls. I’ve seen a few that have actually made a table cloth, for decoration.

2:  Sport/Fine

Image result for fine yarn

Sport, or Fine yarn can be used to make headbands, for babies, little cute stuff animals/characters. If you are looking to make some baby booties, this might be the yarn for you as well!

3: DK/ Light

Image result for dk yarn

If you are looking to make some 3D objects for your projects, such as flowers, this would be the yarn you work with. If you are looking to make a baby set, or baby blanket, this yarn will be soft enough to use to make them.

4: Worsted/Medium

Image result for medium weight yarn

This is the typical yarn that you would get for most of your projects, the possibilities are endless with this type of yarn. If you are a beginner, this is the type of yarn that you can basically make whatever you want with it.

I’ve seen people make blankets, hats, gloves, scarfs, handbags, baby blankets, baby shoes, crochet flip flops, etc. I’ve been using this yarn to make the backing of my latch hooks and also used my loom knit with is as well.

5: Chunky/Bulky

Image result for bulky weight yarn

If you are looking to make some stuff for the winter time, then you would use this. The type of yarn is thick to make great blankets with, or have a hat, scarf, and mittens for yourself. Although, you might need bigger crochet hooks and knitting needles for these projects.

My son and daughter’s blankets, I used this type of yarn, of course, they didn’t come out perfect, for my first time, but they loved them both!

6: Super Bulky

Image result for super bulky weight yarn

With this type of yarn, you can Arm Knit with this type of yarn, which I have always wanted to try, but with the price of Super Bulky yarn being very pricey, it’s something that will have to wait for me.

You can even finger crochet with this as well, or just make a nice big pillow to go on your couch.

Image result for all yarn types

With all of these yarns, the projects are endless. The best part of buying yarn, is that each one comes with a pattern, so if you have been throwing them away, you have been missing out.

Next Tuesday, I WILL have a tutorial on how to make a bookmark, crocheting. I just forgot about it and haven’t had a chance to get into it, due to I am working on a blanket for my fiance, which I will blog about when I am finished! Happy Crafting Dearies!


Posted in Arts and Crafts

Crafty Sassy – Intro to Latch Hook Projects

I mentioned that I have worked with a few latch hooks, but I never went in detail on what they really are. Latch Hooks are like rugs that are made up of yarn on a grid. There are many things you can with latch hooks. I personally, like making pillows, but they are a lot of hard work.

Image result for latch hook grid

The picture above is what a latch hook looks before you start or add on anything. Also, that is the tool you use to ‘tie on’ the yarn. Now, if you are intersected in making one of these and you are just a beginner, I recommend buying a latch hook kit. It will come with everything you need: the grid, the cut up yarn, and the hook tool.

Image result for latch hook kit

Not all kits are the same! The picture above shows what you would get in a kit, but be warned, not all kits have their colored yarn organized perfectly like this! Some grid might actually have the print of the picture already on the grid, to help guide you through the process.

Also, if you haven’t noticed, most of the latch hook grids have multiple blue squared on them, that helps with knowing where to start, it you aren’t lucky enough to have a kit with the picture printed on the grid. Most of the squares are 10×10, by counting them, but some grid might be different and be like a 10×9 or 9×10.

Image result for latch hook how to

The process is very simple. I didn’t think so, at first, but it is very easy to do. The picture above with show you a little better than how I explain it.

  1. Take a piece of yarn, whatever color you need and wrap it around your hook, your latch hook tool.
  2. Take the hook, while holding on to the yarn that is wrapped around it, and insert into the grid, just the hook and make sure that the hooks open, as shown above.
  3. Next, take your end pieces of your yarn, remember, you still have it wrapped around you hook, and pull it into your hook, making sure that your latch hook tool flap, we will call it, doesn’t close. You have to make sure that stays open for this step!
  4. Then, take your latch hook and pull it through that square, where you want to place the yarn. The hook tool flap will close to keep the yarn in it’s place when you pull through the square.
  5. Last, but not least, tighten the knot and make sure it is on tight!
  6. Once that is done, you keep repeating until the project is done!

Image result for latch hook how to

Sorry, if I didn’t explain it very well. This picture above does a better job, but I figured I would give it a shot and try.

When you finish your project, you will noticed that you have extra strands of yarn leftover. Some kits will add more than enough to finish, other’s might give you enough to just barely finish the project. If you are like me and keep everything, keep the extra strands, just in case you need them for another project, you never know.

If the kit didn’t give you enough yarn, there is another way to get some more. You can always go to a craft store, or look online, and find the color yarn and cut it yourself, but using the size of what the kit gave you. Or, some craft stores will have the yarn cut up already for you, so if you are making the latch hook for someone, they have it for you to grab and go.

Latch Hooks is great for all ages, plus, if you are just starting to get into crafts and such, this would be the way to start out. You can do so much with latch hooks, they don’t just have to be a rug. They can be pillows, stuff animals, wall hangings, etc. They even have blank grids that you can freestyle.

The only downfall with the latch hooks, is that it can take up a lot of your time, sometimes. It’s nothing that you can pick up and finish all in one sitting, maybe if you are quick and did it all in one night, or had a small one to work with. This type of project is a pick up and finish later type of project.

Anyway, I will had a few pictures below of the latch hooks that I have finished. So far, I have made two pillows and two pillow cases. None of which have been for me, but all the ones I have given away, have loved them. Not because I did a great job, but it was something that I made for them and those are the best kinds of gifts!

20170416_094834.jpg

20161212_185354.jpg20180218_152714.jpg20180612_175756.jpg

If you are very intersected in wanting to make one of these, check out your local craft store. You won’t have much luck at a Walmart or Kmart, but Amazon does have a very wide selection!