

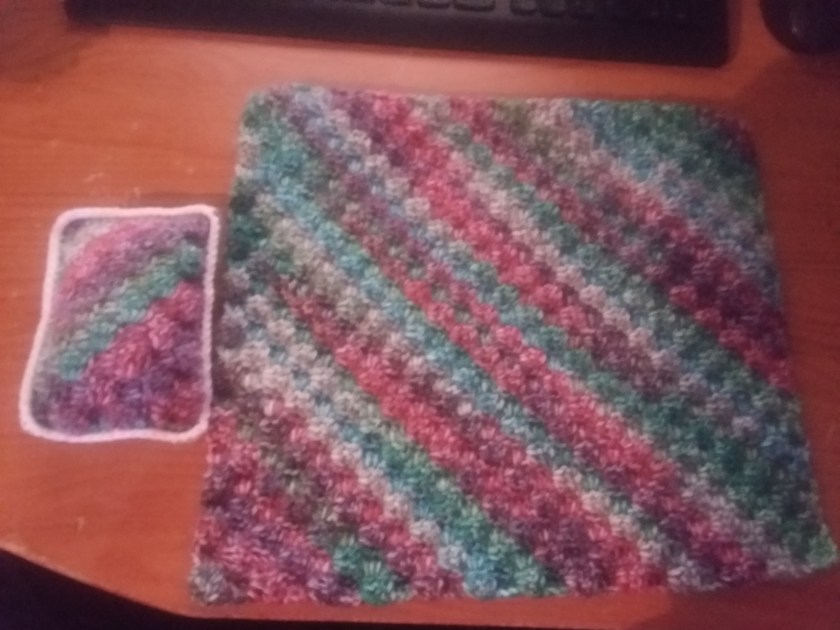
Hey Dearies! So, last week I posted a pattern on a baby doll blanket, but I wanted to take a further step and make a pillow to go with it. This pattern is simple too, working with that C2C stitch, again.
I also wanted to make sure that it matched the blanket as well. The only thing I didn’t get a chance to do for the blanket was adding a white border around it, like I did for the pillow.
If you haven’t seen or want to make the complete set, check out my C2C Baby Doll Blanket pattern that goes with this pattern:
https://katiesblog96971617.com/2020/01/14/crafty-sassy-crochet-c2c-baby-doll-blanket-beginner/
Now, let’s talk about what you will need:
- Medium Size Yarn
- I used I Love This Yarn in the color Green, Turquoise & Red Print.
- You’ll only need 1 skein.
- If you would like to add another color for the border, you can, but you don’t have to.
- 4.0 mm hook
- Any type of stuffing
- I used cotton stuffing.
- Sewing needle
Now, if you aren’t familiar with the ‘C2C’ stitch, here is a wonderful video that Heart Hook Home has, that not only helped me understand how to do the stitch but also shows how to increase and decrease. Here is the video:
This pattern is great for learning and getting familiar with the ‘c2c stitch before moving on to bigger and more complicated projects.
The blanket size is a 7×9 square project, you can, of course, add or decrease squares to fit a small or large size baby doll.
Let’s Begin!
Chain 5.
Row 1: Double crochet into the 3 chains from the hook and in the next 2 stitches.
Row 2: Chain 5. Repeat from row one. (This is how we increase.) Then flip your ‘square’, like you are going connect it. Slip stitch in the chain three, from the last square. Chain 2. Make 3 double crochets in that same space.
Repeat until you have 7 squares across. Once you do, after making your last square, slip stitch on the top of the square. (This is how you decrease). Chain 2 and make 3 double crochets in that chain 3 space.
Keep going until the other side has reached 9 squares and on that finally square, slip stitch on the top of the square. Chain 2 and make 3 double crochets in the chain 3 space. As you continue to go back and forth, you’ll notice the rows start to get smaller.
Once you are at your final stitch, slip stitch the top of that last square and fasten off.
Sew in any loose ends in and then repeat this again to create another square.
Border:
Once you have created two of the same size squares, it’s time to put them together!
Place them together, on top of each other, making sure the corners match to each side. Then, taking either a white or colored yarn of your choice, make a slip knot onto your 4.0 mm hook.
Into the first corner, it doesn’t matter which corner you start in, enter your hook in BOTH pieces through the square and pull up a loop and slip stitch.
Then chain 1 and single crochet in that same spot you entered in. Single crochet around and when you reach a corner, make 3 single crochets in that same corner.
When you have single crocheted 3 of the sides, start to stuff your pillow, don’t stuff too much because it can make it very difficult to close. Once your pillow is stuffed, continued single crocheting around until you reach the last corner.
Make 2 single crochet in that same stitch. Then slip stitch into the next stitch.
Cut the yarn and then fasten off your work.
There you have it! A simple baby doll set that you can make for anyone!
Make sure you like my Facebook page and follow me on Instagram. I’m more active on my Facebook page than I am on Instagram.

One thought on “Crochet C2C Baby Doll Pillow (Craft Odysseys)”