Posted in Arts and Crafts

Basic Stitches & Terms Should Know For Crocheting

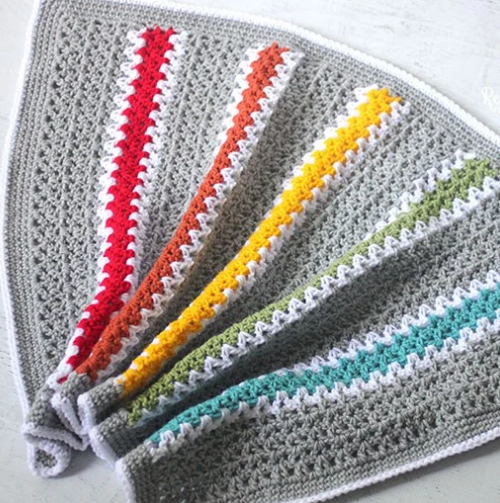
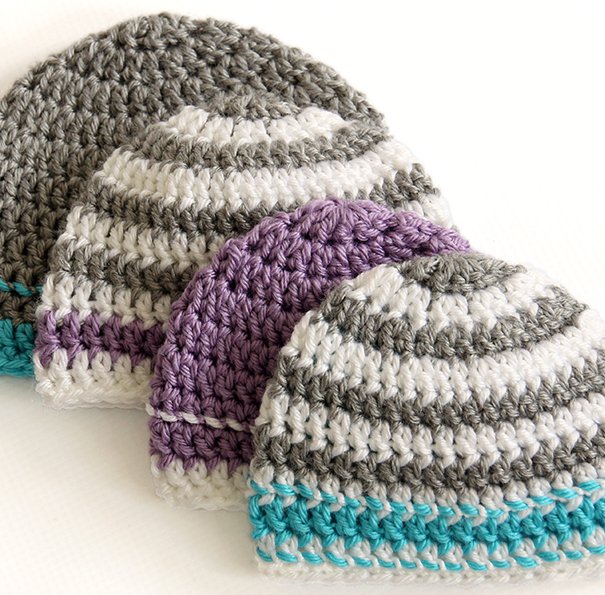
I was a beginner to crocheting, in the beginning of the year, but I got hooked into it the moment I first learned how to crochet. I thought it was going to be very difficult to pick up, unlike knitting, which my grandmother taught me to do.

If you are interested in learning how to crochet, please keep reading! There were a lot to learn and a lot of different terms. I do consider myself still a ‘beginner’, but I do know most of the stitches and terms, which I have learned over time.

First thing is first, if you are a true beginner, I suggest getting a set of crochet hooks. The first set I ever bought was on Wish, but if you don’t want to wait weeks on end for stuff, you can find a set on Amazon for about $10-$15. Some sets will even come with markers, tape measures, plastic needles, scissors, and some other stuff as well!

Image result for crochet hooks

If you don’t have the extra money to buy a set, you can always go to your local craft store or Walmart, and get the following:

  • Crochet Hook
    • Start with a 5.0mm hook. Most projects require this size and it is also the size I am going to use to show you each stitch.
  • Yarn Size 4 (Medium)
    • If you are unsure what size the yarn is, you can always check on the back of the yarn label, and it will tell you what size it is. It also tells you what hook it ‘recommends’ to use, but most crocheting projects use this type of yarn.
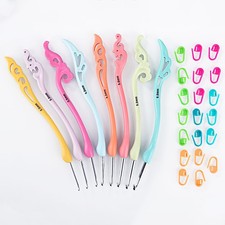
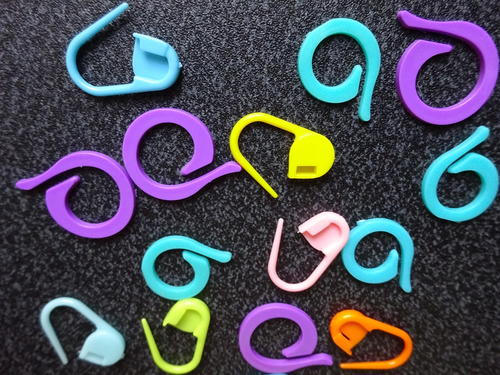
    • Image result for yarn size
    • Image result for yarn size on the yarn label
  • Markers
    • Markers aren’t really needed, but are very helpful for marking when your stitches begin and end.
    • You don’t necessary need the actually crocheting stitch markers, you can use a paper clip, bobby pin, or anything that is small enough for you to use for crocheting. You can check out the picture and see what I mean.
    • Image result for crochet markers
  • Sewing Needle
    • You will always need a sewing needle for every project you do. When a project is finished, you use them to sew in the ‘unwanted’ strands from the beginning, middle and end of your project.
    • Doesn’t matter what size you use for a yarn needle, a basic size works for most projects and you can also find a pack of needles that has different sizes on Amazon or your local craft store.
  • Scissors
    • You will also always need scissors, for all your projects, to cut off any loose ends. I suggest getting embroidery scissors because they are small and easy to travel with.
    • Image result for embroidery scissors
    • Normal pair of scissors works fine as well.

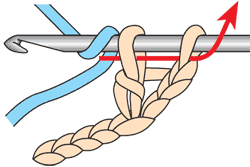
Now that you have an idea of what you are going to need, let’s talk about some stitch and abbreviation terms, before starting to crochet. I have created a mini ‘cheat sheet’, for you beginners, which will also be posted on all of my social medias. If you were to look at the entire list of crochet abbreviations, your head might spin, so that is why I’m breaking it down for the new comers. Crochet Beginner Cheat Sheet.jpg

The reason why we use ‘abbreviations’ for crocheting, is that some of the terms, that are used, are very long and it would make the pattern, we are reading, very difficult to understand. Most crochet books have a page or two, on what the abbreviations mean and how to do that particular type of stitch.

There are other terms that aren’t listed in crochet books. If you join a crochet group on Facebook, some of them, in the group, will use different terms that aren’t really in the crochet books, or the ones that I have.

Here are a list of ‘slang’ crochet terms, that some people might use, that aren’t necessary in the crochet books:

  • Ami – Short for Amingurumi.
    • Amingurumi are the stuffed animals that you can crochet and make, they just aren’t called ‘stuffed animals’.
  • BiStitchtual – Someone who crochets and knits.
    • I’ve never heard this term before, I don’t think anyone has really used this term, but then again, I haven’t come across someone saying it or calling themselves it.
  • C2C – Corner to Corner.
    • C2C are blankets that you make, using a grid or graph.
  • CAL – Crochet Along,
  • De-stash – Selling or giving away yarn you stash.
    • Most people who do this are ones that might have a lot of yarn just sitting around. Since some brands of yarn are very pricey, you might get them cheaper from someone else who isn’t using them.
  • FO – Finished object.
  • FOTH – Fresh off the hook.
  • Freehand – Making a project without following a pattern.
    • Lots of experience people make these, while writing the pattern as they go. When you become more advance, this is something a lot of people do to make money from crocheting, by selling their patterns.
  • Frogging – Ripping out rows or rounds of crochet (Ribbit, Ribbit)
    • I have done this so many times. Especially if I find I missed a stitch or it doesn’t look ‘neat’ and ‘pretty’. You’ll be doing it too!
  • HOTH – Hot off the hook.
  • Hooker – A proud and happy crocheter.
  • HSPY – Haven’t started project yet.
  • ISO – In search of.
    • If you are in search of a pattern, particular yarn brand, stitch, or any supplies that have to do with crocheting, most groups on Facebook, can be helpful to help you find what you are looking for.
  • JOTH – Just off the hook.
  • LYS – Local or little yarn store.
  • MAM – Mile a minute afghan.
  • MGBTC – Must get back to crocheting.
  • OCD – Obsessive crocheting disorder.
    • Once you get the hang of it, you’ll want to keep going and try different patterns and projects.
  • PABLE – Pattern accumulation beyond life expectancy.
  • PHD – Projects half done.
  • PIGS – Projects in grocery sacks.
  • PTP – Permission to post.
    • Some use these word for posting on social media or sharing it on their personal social media, or blogging sites.
    • This is VERY important to know because if you buy a pattern, most creators do NOT want you to post it on another website or share it with anyone, unless they bought it.
  • SABLE – Stash accumulation beyond life expectancy.
  • STASH – Special treasures all secretly hidden meant to be discovered unexpectedly.
  • TALC – Take along crochet.
  • TIA – Thank you in advance.
  • TOAD – Trashed object abandoned in disgust.
  • UFO – Unfinished object.
  • USO – Unstarted object.
  • Yarn Cakes – The small skeins of yarn that result from using a yarn winder.
  • WIM – Work in mind.
  • WIP – Work in progress.
    • A lot of crocheters will use this term.
  • WIVSP – Work in very slow progress.
  • YAP – Yet another project.
  • Yarn Barf – The tangled mess of yarn from the center of a skein.
    • This happens to me, because I usually use the center string for when I crochet. I love using it because I know have to unravel yarn, but it can be a pain in the ass to unravel, when you use the middle string.
  • Yarn Bomb – A decorative piece of crocheted or knitted art that is strung up in a public place.
  • YART – Yarn acquisition road trip.

Make sure to follow my blog for more beginner posts on crocheting! I will be breaking down everything in little parts and I will also have videos for you to view, if you find it easier to understand and learn!

I also go live on my Facebook page on Tuesdays! Check it out and don’t forget to like it, so you can stay in the loop for whenever I post a blog post or go live!
https://www.facebook.com/katiesblog96971617/


Posted in Arts and Crafts

Crafty Sassy: How To Make Bigger Coaster Sizes

Since I have explored more on Pinterest, I can upon this beautiful peppermint coaster. The Purple Poncho was nice enough to make this pattern free for us to use, here is the original link to the coaster here:

https://www.thepurpleponcho.com/peppermint-coasters-free-crochet-pattern/

So, with that in mind, all credit goes to her and a big thanks goes out to her for making this pattern completely free to use!

However, as lovely as this pattern is, I had one problem with it. It wasn’t big enough for my ‘standards’, which is why I am going to tell you how to make the coaster bigger. If you are like me and have giant coffee mugs, the original pattern is too small. The pattern, in my view, is more for wine glasses or just for decoration.

This also might work for some other coaster patterns as well, as long as it has the same ‘basic beanie circle’ idea, then it should work, as long as you use the correct stitch for the project.

I’ll be using the peppermint coaster pattern as an example. After you have checked out the pattern and read through the rounds, after round 4, you start making that beautiful ‘peppermint’ design. Before you start with that design, let’s make it bigger.

This is called ‘increasing stitches’, which you can or do for most projects that require it, or you choose to do so. It’s very simple to do, but can be confusing.

Round 5: Ch 2, make 1 half double crochet (hdc) in the first stitch, then 2 half double crochet (hdc) in the next 2 stitches. Make 2 half double crochet (hdc) in the next stitch (meaning you make 2 half double crochet’s in the same stitch. Repeat.

Just keep adding a single half double crochet stitch (or the type of stitch that you are working on.) to each new row, until you feel like it is where you want the size to be. Then follow the next step in the peppermint boarder.

Does this work with all coaster patterns?

No, it does work for this pattern because this started out like we were going to make a simple basic beanie. Every coaster is different, but depending what it is, you can always figure it out or as the creator if they know how to fix it to be smaller or larger to what you are looking for.

I did go live on showing you how to make the peppermint coaster, if you would like to check that out, visit my Facebook page and don’t forget to like my page, so that you can know when I next go live or for any of my free giveaways. It is also the best place to find updates for my blog.

https://www.facebook.com/katiesblog96971617/

Posted in Arts and Crafts, Crochet, Easy Patterns

Crafty Sassy: Crochet Towel Topper (Easy)

44664318_1911676305807353_5391009887280955392_n

Hey dearies! I wanted to give you guys an updated pattern on the towel topper! I finally mastered it to my liking and I wanted to share it with you guys. If you didn’t know, my great-grandmother has been making these towels since I was really little and I’ve always wanted to know how.

Now that I have more knowledge on how to make them, I created a pattern that is, to me, perfect. Not too much yarn, but just enough to complete the towel itself. As you can see in the picture above, one of them is very long, that was one of my trial ones that I practiced on.

We are going to be making these ones:

20181024_121320.jpg

What you will need:

  • Medium Yarn
    • Find a color that you would think, would go good with the towel.
  • 2 different sizes of crochet hooks. You don’t have to use just one size, you can use whatever size you would like, these are what I prefer to use.
    • 5.0mm – This one, we will use to crochet the actual towel.
    • 3.0mm – This one, we will use to start off the towel.
  • Towel
  • A button, color of your choice
    • The size can be whatever size you would like, but nothing smaller than an inch.
  • Sewing needle
  • Ruler (Optional)
  • Black Marker (Optional)

Let’s begin!

Part 1: Starting the towel –

The first thing we need to do it cut the towel in half, like this:43592885_483374518835072_2761795955673006080_n

As you can see, mine, isn’t completely even, which in normal because of the brand of towel I am using. It doesn’t have to be perfect!

Take one of the sides, of the towel, that you want to work with and lay it flat in front of you. If this is your very first time making this towel, I suggest grabbing a fine point black marker, it will make this next part easier.

Starting from the right side, take a ruler and measure 1/4 of an inch, place a dot with your marker and do that all across the towel. Make sure you are also 1/4 of an inch away from the top of your towel.

Untitled.png
If you aren’t good with measurements, here is 1/4 of an inch on a ruler.

Once you are done making the dots, you can begin! Take the smaller crochet hook (3.0mm) and some yarn. Poke your crochet hook in the very first dot, where you started on the right, pull some yarn threw that first hole and slip stitch (sl st) to lock in the yarn.

You are going to do this all across the towel, until you reach the end. Be careful that you don’t snag any of the towel strings, it can happen for some towel, especially for thin ones.

20181024_130853.jpg
This is what it should look like after you finish the first part.

When you reach the end, turn your work and switch the crochet hook to a bigger hook (5.0mm), and chain 1.

Part 2: Crocheting the towel –

Row 1 – Single crochet (sc) in between each stitch. Chain (ch) 1.

*Note – I am considering this as the first row because this is when we are actually starting to crochet.

Row 2 – Double crochet together (dc2tog) for the entire row. If you end up with an extra stitch that you can’t double crochet together, just do a simple double crochet (dc). Turn your work and chain (ch) 1.

Row 3 – Double crochet (dc) across. Turn your work and chain (ch) 1.

Row 4 – Single crochet (sc) across. Turn your work and chain (ch) 1.

Row 5 – Double crochet together (dc2tog) across. Turn your work and chain (ch) 1.

Row 6 – Single crochet (sc) across. Turn your work and chain (ch) 1.

Row 7 – Double crochet together (dc2tog) across. Turn your work and chain (ch) 1.

Row 8 – Single crochet (ch) across. You should end up with 8 stitches. This is needed for the button hole!

  • If you have 1 extra: Make a single crochet together (sc2tog) in the last two stitches.
  • If you are missing a stitch: Add another single crochet (sc) in that last stitch.

Turn your work and chain (ch) 1.

Row 9-13 – Double crochet (dc) across. Make sure that each row still ends with 8 stitches. Turn your work and chain (ch) 1.

Row 14 – For the last row, I’m going to break it down:

  • Single crochet together (sc2tog) in the first 2 stitches.
  • Half double crochet (hdc) in the next stitch.
  • Double crochet (dc) in the next stitch.
  • In the same stitch you just made the double crochet (dc), treble crochet (tr) in that same stitch. Chain (ch) 3.
  • In the next stitch, make a treble crochet (tr) and in that same stitch, make a double crochet (dc).
  • Half double crochet (hdc) in the next.
  • Single crochet together (sc2tog) in the last 2 stitches.

Fasten off and weave in any extra strands.

Part 3 – Button

Sew on the button in between the middle of the 8th row. Make sure that it is in the middle.

And you are finished!

These are a perfect gift to make for anyone! Especially, for craft fairs and such. Enjoy this pattern and if you make one of these towels using my pattern, please feel free to tag me on Instagram by using the hash tag #KatiePurrPurr.

*I created this pattern to my own liking, I do own it and you are more than welcome to use it or share it, but please do not take this pattern to sell as your own. When sharing this pattern, please make sure that you link it back to my blog. Any questions on the pattern, feel free to contact me*

Posted in Arts and Crafts, Crochet, Intermediate Patterns

Crafty Sassy: Halloween Jar Cozies (Intermediate)

Hey dearies! So, the Halloween Jar Cozies won for me to make on tonight’s live on my Facebook page! If you would like more information about that, scroll all the way to the end.

This is probably going to be on the the most challenging projects that I have tried, so bare with me! I want to shout out to Red Heart for this free pattern! Here is the link of the actually pattern:

Click to access LW4910.pdf

*Note: I don’t own this pattern, all rights go to the owner of the pattern. I make the pattern easier to understand, in my own words, but I DO NOT own this pattern!*

Here’s what you will need:

  • Medium Yarn
    • Red Heart Pumpkin, is what I’ll be using when I go live.
  • Crochet hook sizes 5.0mm and 3.75mm.
    • The smaller crochet hook is used to make some of the faces, you don’t have to do that.
  • Black Fabric
    • This is an option if you are a beginner.
  • Stitch marker
  • Sewing Needle
  • Row Counter
    • You can use a piece of paper, but I recommend using a counter, whether you use one on your phone or have a digital one like myself.

Let’s begin!

Grab your 5.0mm crochet hook and some yarn. Make a magic circle or an adjustable ring.

Round 1: Make 6 single crochets in the magic circle. Make sure that you don’t join this round! Place a stitch marker at the beginning of the round.

*Note: As we keep working up, move the marker up after the end of every round. It will make it easier to keep track of where we are at for each round. 

Round 2: Make 2 single crochets in each of the stitches, until you reach where the marker is.

Round 3: Single crochet in each of the next 2 stitches. Make 2 single crochets in the next stitch. Repeat until your reach the marker.

Round 4: Single crochet in each of the next 2 stitches. Make 2 single crochet in the next stitch. Repeat until you reach the maker.

Round 5: Single crochet in each of the next 3 stitches. Make 2 single crochet in the next stitch. Repeat until you reach the maker.

Round 6: Single crochet in each of the next 4 stitches. Make 2 single crochet in the next stitch. Repeat until you reach the maker.

Round 7: Single crochet in each of the next 5 stitches. Make 2 single crochet in the next stitch. Repeat until you reach the maker.

Round 8: Single crochet in each of the next 6 stitches. Make 2 single crochet in the next stitch. Repeat until you reach the maker.

Round 9: Single crochet in each of the next 11 stitches. Make 2 single crochet in the next stitch. Repeat until you reach the maker.

Round 10: Single crochet in the back loop only, of each stitch around.

*Note: If you don’t know how to single crochet from the back loop only, here is a link to a video that will show you how:
https://www.youtube.com/watch?v=phf7Nj0_LJg

Round 11-15: Single crochet in each stitches around.

Round 16: Single crochet together over the next 2 stitches. Single crochet in each of the next 24 stitches. Repeat once more.

Round 17-33: Single crochet in each stitch around.

Fasten off and you can remove the marker!

Now that we have completed the base, you can leave it how it is or take some black fabric and shape it to look like a pumpkin.

Best part about this pattern is that you can use whatever color you want and it would be the perfect cover for gifts, especially if you can! If you are looking to make it for a larger jar, check the pattern and look at the gauge.

I will be going live on my Facebook page tonight, showing you how to make this! If you are intersected in watching me make this, check out my Facebook page and make sure that you like my page, so that you can keep up to date on when I go live or make sure you don’t miss the polls!

Posted in Arts and Crafts, Beginner Patterns, Crochet

Crafty Sassy: How To Crochet A Flower Pin (Beginners)

20180928_123311.jpg

Hey dearies! You are probably wondering why you are getting a Crafty Sassy on a Friday, so let me tell you why! Since this coming up week will be the beginning of October, I have decided to go live twice, for the month of October!

So, I wanted to show you guys how to make this flower pin, because it also goes with the headband I showed you guys how to make on Tuesday. So, I will be going live on my Facebook Page. More information on that will be at the bottom of this!

Let’s get started! First thing, let’s talk about what you will need for this project:

  • Medium Yarn
    • Any color of your choice. Since this flower goes with the headband, you can match a color to go with it or whatever color you feel works best!
  • Crochet Hook 4.5 mm
  • Sewing needle
  • 1 Pin back
    • It doesn’t required any fancy pin, a safety pin would work find as well!

Part 1: Making the flower

  • Step 1: Chain 53
  • Step 2: Double crochet in the 3rd chain from the hook. Double crochet in every following chain across.
  • Step 3: Chain 1 and turn your work. *Single crochet in the next space. Make 5 double crochets in the next space* (The stars are to let you know that you have to repeat, until you reach the end or if they say otherwise)
  •  Step 4: Fasten off and make sure you leave a long tail because we will be using it to sew the flower altogether.

Part 2: Sewing the flower together

  • Step 1: Loosely arrange the layers to form a flower.
  • Step 2: Using a threaded yarn/sewing needle, stitch each layer of the flower together, ending on the back side.
  • Step 3: Draw the threaded needle through the pin back. Secure the pin back onto the back of your flower and cut the excess yarn to complete the flower pin. And your done!


Having a pin, on the back of your flower, can make it so you can wear it on hats, scarfs, headbands, necklace, etc. So there’s not just one use for this project.

Anyway, I will be going live tonight on my Facebook Page. If you haven’t like my Facebook Page, here is the link!
https://www.facebook.com/katiesblog96971617/

Let’s talk about the NEW plans for the month of October!

I plan on bring Crafty Sassy to you on Tuesday’s and Thursday, just for this month! Instead of the normal stuff that is for beginners and such, I’ve decided to make this month a ‘holiday special’. I will be doing the same for November and December.

If you have any projects that you want me to show you how to make, leave a comment down below, message my Facebook page, or even e-mail me at katie_farrington@aol.com!


Posted in Arts and Crafts, Beginner Patterns, Crochet

Crafty Sassy: How to Crochet a Basic Headband (Beginners)

20180925_150307.jpg

So, there was a tie on my Facebook page on whether I should make the Rose or the Headband, but since the headband has been in the last few polls, I figured I would show you how to make one.

Now, I haven’t mastered this pattern completely, but it is a very fun pattern to make! Especially, if you are a beginner. The Rose actually goes with this headband, so I figure we can make the headband and I then can show you how to make the rose and show you how to put it on, as well.

As always, let’s talk about the supplies you will need:

  • Medium Yarn (Color of your choice)
    • I decided to used the ‘I Love This Yarn’ multi-color yarn to show you guys what it should look like.
  •  5.0 mm Crochet Hook
  • And of course, a sewing needle!

20180925_150444.jpg

So let’s get started!

Step 1:  Chain 44. Now, found it easier to count out loud, while making the chains, just so I don’t lose track of how many chains I made.

Step 2: Make 2 double crochet’s in the 3rd chain from the hook(NOT counting the chain that the hook is on!). *Skip 2 chains, single crochet in the next chain. Chain 2. Make 2 double crochets in that same stitch.* Repeat until you reach the other end, then make a single crochet in that last chain.

Note: The * represent where you start and end. Basically, you are repeating the same step until you reach the end. I will be putting in * to help you know what you need to do! A lot of crochet books use them and they are very helpful! If you are stuck or need help, let me know down in the comments!

Step 3:  Chain 2 and turn your work. Make 2 double crochets in the next available stitch. *Single crochet in the chain-2 part of the work. Chain 2. Make 2 double crochets in that same space.* Repeat until you reach to the other side and then single crochet the top of the last row.

Step 4: Repeat Step 3. Twice. You should have 4 rows altogether.

Step 5: Chain 30. Then slip stitch to the opposite side of your project. Slip stitch across that small side and then chain 30. Slip stitch to the other side and slip stitch across that side. Once you are done, cut your yarn and pull your crochet hook up and pull that end piece of yarn tight.

Step 6:  Sew in any yarn that is hanging around and then you are done!

Note: If your headband does not fit, you can always 4 chains add or decrease 4 chains, to fit your size head. If you are looking for it to fit a baby or child’s head, this might not be the project for that, but you can try and make it work!

For Example: If the headband was too small, I would chain 48. If the headband was too big, I would chain 40. 

If you have any questions, feel free to ask me! I’ll try my best to help you out!

20180925_150941.jpg

Also, don’t forget to check out my Facebook page, I have a poll up every week on what project I should do next! Since Halloween is just around the corner, be prepared to be Spooked!
https://www.facebook.com/katiesblog96971617/

Posted in Arts and Crafts, Beginner Patterns, Crochet

Crafty Sassy: How To Crochet Mug Cozies (Beginners)

Hey dearies! So, today I am going to tell you how to make these super cute mug cozies! Since summer is slowly starting to change into fall, I figured I would show you how to make these cozies, which are perfect for giving away, with mugs, as a gift for the holidays!

This was also the winner for me to make on this weeks Facebook Live! If you don’t know anything about that, scroll all the way down for more information about it!

Image result for mug cozy

As always, before we begin a project, let’s talk about the stuff you’ll need:

  • Medium Yarn (a color of your choice)
  • Crochet Hook 4.5mm or a 7 in U.S
  • A button of your choice
  • As always, a sewing needle

Let’s begin!

Step 1: Make a slip knot onto your crochet hook and chain 8.

Step 2: Single crochet and double crochet in the 2nd chain from the hook. Remember, we are NOT counting the chain that is on the hook itself.

Step 3: Skip the next chain and then single crochet and double crochet in the same chain. Repeat this til you are at the end of row 1. Chain 1 and turn your work.

Step 4: Skip the next stitch and do a single crochet and a double crochet in the next stitch. Repeat til the end of the row. Chain 1 and turn your work. Repeat this step until your work measures 8 in., from the beginning of your work.

Step 5: Skip the first stitch and slip stitch in the next 2 stitches. Then do 1 half double crochet in the next 4 stitches. Chain 1 and turn your work.

Step 6: Now, we are going to work on the buttonhole strip for the next 4 stitches. Do 1 half double crochet in each stitch. Chain 1 and turn your work. Repeat this step until your buttonhole strip measures 2 in. long.

You can always put a marker, if this helps with keeping track from where the buttonhole strip starts, you don’t need to do this, but it can help with making sure it’s measured correctly.

Step 7: Do 1 half double crochet in the first stitch. Chain 2. Skip the next 2 stitches. Make 1 half double crochet in the last stitch.

Step 8: This step, is for making a boarder around the project. Work a single crochet stitch evenly around. Working 3 single crochets in the corners and 2 single crochets in the chain 2 buttonhole space. Join them all with a slip stitch in the first single crochet from where you started.

Step 9: Fasten off the extra strands into your project and sew on your button! Then you are done!

*Tip* – For attaching the button, wrap your cozy around your mug so you can see where you want to put the button. Mark it with a pin, thread your needle and sew on the button, making sure to remove the pin. You don’t have to do this, but it was very helpful for me!

I will be going LIVE on my Facebook page, showing you how to do this. If you haven’t already liked my Facebook page, please do! I give updates on my blog and YouTube channel.

I also post polls on what I should make next on my Facebook page, and which ever one wins, I go live and show you how to make them!

Check out the link!
https://www.facebook.com/katiesblog96971617/


Posted in Arts and Crafts, Beginner Patterns, Crochet

Crafty Sassy: How To Crochet A Granny Square (Beginner)

Today, we are going to talk about the most basic and easier square you can crochet. Granny square can be used to make mini squares, or one giant square! We are going to make a small, simple one.

I am going to point out that everyone has their way of crocheting the granny square. So, if you don’t think it looks right or you don’t like that pattern, then you can always search and find a pattern that works for you!

So, one of my kinda BIG crocheting projects, was the giant rasta color granny square, that I am making for my fiance. Its’ basically a giant granny square. It’s not done, but the bigger it gets, the more difficult it can be on your wrists.

Let’s talk about what you will need:

  • Medium Yarn (If you want, you can choice multiple colors, but I will be using just one solid color, to make it easier for you.)
    • Remember: If you are a beginner, try to stay away from dark colors.
  • Crochet Hook: 5.5mm
    • For the hook, it doesn’t have to be that size, but I found it was easier to work with in the video I watched.
  • Sewing Needle


Now that we having everything we need, we can get this project started!

Step 1: We are going to create a slip knot and pull tightly onto our hook. We are then going to chain 6. Then slip stitch the other end of the chain.

Step 2: Now that we have our circle, we are going to start by chaining 3 (Remember: This counts as 1 double crochet.) Then we are going to double crochet 2 times into the circle. I left a picture done below, just in case you need a refresher.

Image result for double crochet stitch

Step 3: Now, we are going to crochet 3 double crochets in the ring and then chain 3. Do that 2 more times. You should have something like this.

Image result for granny square first step

Slip stitch in the top of the chain to fasten off the base of the granny square.

Step 4: Now we are going to create the second row of the granny square. You can add on another color, if you would like, I’ll leave a picture down below showing how you can do that.

Image result for changing color stitch

Chain 3. (Remember: This will count as our first double crochet!) I always turn my work, but because this is a granny square, you don’t have to turn your work. We are going to now working in the open space with the following:
-Work 2 double crochets. Chain 3. Work 3 double crochets. Chain 1.

Step 5: 3 double crochet, chain 3, 3 double crochet, chain 1, into each space. Slit stitch to finish the second row.

Depending on how big you want your square to be, you are basically repeating steps 2-5.

I will be going live on my Facebook page, if you want to see it done. Make sure to like my page and follow me for more updates on when I post any posts on my blog or for when I go live! Here is the link:
https://www.facebook.com/katiesblog96971617/

I will be working on a video tutorial and create another blog post for those who aren’t beginners and just want the simple pattern.

I’m going to leave this link down below, if you would like to see a slowed down version of the granny square that helped me when I first started to learn how to make one. The Nervous Knitter is amazing and you should check out her other videos:


Posted in Arts and Crafts, Beginner Patterns, Crochet

Crafty Sassy: How To Make A Towel Topper (For Beginners)

20180828_080830.jpg

Today, I’m going to try to teach you guys how to make these simple towel toppers. My great-grandmother has been making these for years and we always had a few of these hanging around the house. To this day, she still makes them, but not as much as she used to.

I am basing this pattern off of what I have seen on YouTube, other free patterns that they have on the internet, and going by one of her towels. I have NOT perfected this pattern. My great-grandmother never really wrote down her pattern or anything like that, she is one of those ‘make it as you go’ type of crocheters.

I will make a better blog post on the towel topper, but for now, I’m gonna show you how I managed to make my first one.

So, first thing first, lets list off the supplies you will need for this project:

  • Kitchen Towel
    • Any type of towel you can use, but use one with more of a thickness, it makes it easier to work with, in my opinion.
  • Medium or Size 4 Yarn
    • Chose a color that would match with your towel design, if it has any. Try not to chose black, it is harder to work with, same with darker colors.
  • Button
    • I chose to get a pack of white big (not giant) buttons. White matches with mostly anything, and for this being my first towel, I figured it would be easier to work with. You can chose whatever color buttons that you think would fit for your towel, as long as they aren’t the small buttons.
  • Sewing Needle
    • Normal sewing needle, nothing really special. It can help with poking holes through the towel.
  • Crochet hooks: 2.25mm and a 4.5mm
    • These are the hooks I used, I might change the sizes, but the reason why you need two is the smaller one will be for bring the yarn through the towel itself, while the other one will be for the actual crochet part of the towel.

Now that you know what you need, let’s begin!

Step 1: Take the towel, you have chosen to use and fold it in half, hamburger fold, if that makes it easier to visualize. Cut the towel in half.

The reason for this is that if you have a long kitchen towel with the same design, on each side, you’ll be able to make two different towels.

Image result for kitchen towels

Step 2: This next step is going to be a little tricky. You can use the sewing needle to help poke holes in the top of the towel, I found that easier than taking the small crochet hook (2.25mm) and poking it through.

Once you poke your crochet hook through and pull through you yarn. Then, you are going to yarn over and pull through both loops, basically doing a slip stitch.

You repeat this step until you reach the other side of the towel.

*Remember to try not make your holes too close or too far apart. A few of the videos that I watched recommend being a quarter of an inch away from the top of the towel and from your last stitch, or hole you made. It doesn’t have to be exact, but whatever works for you.*

Step 3: Turn your work over. Now, we are going to switch our crochet hook, switch to the 4.5mm. Chain 1.

We are going to double crochet in between each of the stitches of the towel. You are going to keep doing that until you reach the other side of the towel.

*How to double crochet*

For this project, you are going to yarn over, go through or in between the stitches and then yarn over again, go through the first two loops, yarn over and go through the last two loops.

Image result for double crochet stitch

Step 4: You are going to repeat Step 3, for this next row. Instead of going in between the stitches, you are going to go in between each double crochet that we made in the first row of double crochets.

Once you reach to the other side, turn your work over and chain 1.

Step 5: For this next row, we are going to still double crochet, but we are going to skip every other one. For your first double crochet, you are going to double crochet in the first spot, but skip the one next to it.

You keep going until you reach the other side. Make sure to turn your working and chain 1.

Step 6: Repeat Step 5, making sure to skip every other one. Once you reach to the other end of the towel, turn your work and chain 1.

Step 7: As you can see, the towel topper is now starting to become smaller, which is what we want it to do. Now, we are going to repeat Step 3, making sure we double crochet into each one. When you get to the other side, turn your work and chain 1.

Step 8: Repeat Step 3. Turn work over and chain 1.

You are going to repeat Step 3, and making sure you turn your work when done that row and chaining 1. For the next 5 rows.

Step 9: Once you are done double crocheting those last 5 rows, it is now time to finish off the project and make the opening for the button to go through.

Now, everyone does this differently, but I am going to do it differently from what my great-grandmother does.

After you turned your work and chained one, you are going to do 2 double crochets. Chain 2. Skip the next 2 stitches. Then do 3 double crochets.

Step 10: This is the last row we are going to crochet. So, make sure you turn your work and chain 1. We are basically going to double crochet, for the last row.

When you get to the open space, you are going to double crochet twice in that opening.

We you get to the end, bind off by cutting the yarn you were working on and pull your crochet out, don’t remove the crochet hook from the loop, pull it up, so that the yarn is bind off.

Step 11:  The last step is simple, all you have to do is sew the button into the middle of the project, just like shown in the picture above. Then it is complete!

Like I said in the beginning, I will have a better post, when I have mastered a pattern and will update you guys on it. These towels have been a gift for any event or celebration. I love having these because you can hook in on your stove handle, especially if you have one made for the theme for your kitchen.

If you are intersected in learning how to do this, I will be going LIVE on my Facebook page, tonight! Like my Facebook page, because I do post all my blog posts on their, as well as my twitter. Click the link below:
https://facebook.com/katiesblog96971617/


Posted in Arts and Crafts, Top Projects for Crochet/Knitting

Crafty Sassy: Top 10 Crochet Projects You Can Profit From

Everyone loves hand-made crafts. Not a lot of people invest their time into them, but others, like myself, have more projects on your mind that you just don’t know where to start. Well, since I am a stay-at-home mom, I figure I would list some projects that could make you some extra cash on the side.

  1.  Towel Tops
    Image result for crochet towel toppers
    This is probably one of the most popular items you can make and they can sell pretty fast! You just buy a regular kitchen or hand towel and crochet the top so that you can hang it on your stove hanger.

    My great-grandmother always made these and they would be gone before you know it. They are very simple to make and there are a lot of videos on YouTube that can show you how to make these.

    Best part about making these is that you can use any towel, even for holidays! Which is pretty amazing! You always don’t have to do the same pattern either, there are many patterns out there that you can use. From one button to two, it’s completely up to you!

  2.  Towel Hangers
    Image result for crochet towel holder pattern
    I found this a few days ago and this would probably sell like hotcakes, just like the towel tops. The only difference between these and the towel  toppers is that you can hang whatever towel you would like.

    Instead of crocheting the towel itself, you crochet along a hair tie or an elastic band. These too, are pretty simple to make. Best part about these, is that you can make them any color you want them. Again, you can find a few great tutorials on this on YouTube.

  3.  Blankets
    Image result for crochet blanket
    These will always be on the list, but they do take up a good amount of your time, depending what kind of design you are going for. However, baby blankets might be the easiest thing to make, just because they are the smaller version of a big blanket.

    I know a lot of people will save the bigger blankets for family. Don’t get me wrong, they can make you some cash, you just have to be very detailed on how long it might take and you might have to use all of your spare time to finish it in time.

  4.  Hats
    Image result for crochet hats
    These will always be on the list. Hats are a quick and easy thing to make, especially kid hats. A lot of people would buy these with a gloves, scarf combo. Depending on how good the work is, you could make some serious cash(Not enough to pay rent, though. Unless you can supply the demands.)
  5.  Scarfs
    Image result for crochet scarf
    I loved getting scarfs, my great-grandmother would always make the fuzzy ones and get them to us, in our favorite color, for Christmas. I still  have a few from when I was little. Like I said with the hats, it would be a great combo to do together!
  6.  Place mats
    Image result for crochet placemats
    Not a lot of people have crocheted place mats, but they are something someone could sell. You could also be able to customize them for holidays, with different colors and patterns! A set of four would most-likely sell like hotcakes, too!
  7.  Coasters
    Image result for crochet coasters
    Coaster aren’t something you would see at a craft fair, but they are an amazing idea to make for one! A lot of people don’t have coaster, but they don’t want to spend too much money on them.

    These are very easy to make and they can be crocheted, but some of them can be made by hand!These would go great with place mats.

  8.  Gloves/Mittens/Arm Warmers
    Image result for crochet arm warmers
    Gloves might be a expect level project, but mittens would be a lot easier to make. Same with arm warmers, they might be easier to make as well. Arm warmers could also be part of the combo, you can either replace the gloves, or add it to the combo of hats, scarfs and gloves.
  9.  Pins
    Image result for crochet pin
    Yes, there is such a thing as crocheted pins! Although, you would have to work with smaller and finer yarn, they are very amazing to make. Especially, flower ones!
  10.  Mini Stuffed Animals/Characters
    Image result for crochet stuffed animals
    You probably seen these all over the internet or Facebook. They can be very challenging for a beginner. They have all kinds of different characters or objects that you can crochet into stuffy’s.

    Amazon has a wonderful Disney Princess Crocheting Kit, that I haven’t tried out yet. They have a booklet on how to make every princess, but they only give enough yarn to make two. I highly recommend getting it, just for the booklet!


Are there any projects that you see at craft fairs that I missed? Comment down below and comment of which one you see would be more in an high demand!

*Note*

  • These aren’t a quick way to earn millions of dollars. This would be something you would earn on the side for some quick cash. If you make them with great quality and passion, I’m sure you could make a living doing it.
  • I just wanted to make a note, so that everyone knows this isn’t something you can get rich quick and fast. A lot of people make these as a hobby of theirs and put a lot of effort into their projects.
Posted in Arts and Crafts, Top Projects for Crochet/Knitting

Crafty Sassy: 5 Easy To Do Beginner Projects For Crocheting

Looking at crocheting project, just looking at them makes you want to learn how to do it, if you are like me, you like to save the page you see them on and come back to it whenever you have time.

Some projects can be very tricky or confusing, so then you forget all about it and never look back until you see it again. This has happened to me so many times, that now that I know how to crochet, I try to go back and find them and see if I am ready to attempt them.

So, if you are truly wanted to enter into this fun and amazing hobby, sit back and check out these easy to do projects, if you are a beginner! Lets begin!

  1. Granny Square Blanket

20180724_070620.jpg

This is the current project that I am working on for my fiance. This is perfect for beginners! If you want to just make a simple blanket, this is perfect to do! Whenever I looked at a granny square blanket, I didn’t think I could make one.

If you don’t know, but I am a visual learner and need everything broken down step by step. YouTube was the first place I looked to find a video that would slow it down, and I finally found one, The Nervous Knitter.

She broke the granny square steps as slow as you can go, but it was easy to understand and learn. I always watch the videos first, before trying them, so I picked up on the steps very quickly. Once you learn how to do it once, it is like riding a bike, something you can’t forget.

If you want to check out her video, here is the link!


2. Scarf

Image result for crocheted scarves

Scarves will always be something that is easy to do. The only difficult thing about them is the patterns you choose. I didn’t understand why my grand-grandmother makes scarfs so much, but after realizing how quit they are to make, I understood why kept making them.

3. Bookmarks

Image result for crocheted bookmarks

You are probably thinking to yourself, bookmarks?? Yes, almost anything you can think of, you can crochet. Now, not all bookmarks are easy and I will be posting a how-to on how to do these ones.

These ones are as simple as granny squares, plus they are cute and pretty quick to make. Why have a plain boring paper or plastic bookmark when you can have a bright and colorful one instead!

4. Beanie Hat

Image result for crochet beanie

Just like the scarves, this is another quick and easy thing to learn how to do. So, if you are a beginner and don’t have any gifts in mind for a birthday or Christmas, you can always crochet a hat and scarf.

I haven’t had a chance to learn how to crochet, but really can’t wait!

5. Granny Square Patchwork Blanket (Mini Granny Squares)

Image result for crochet granny square blanket

I know that I already have the giant granny square blanket on here, but here is the other version that your grandmother might have around her house. The difference between this blanket and the other one I mention is that this is just smaller squares you sew together.

While the other one is just a giant granny square, this one you can get creative and mess around with different colors and see what works and what doesn’t.


Which one would you like to try out? Or which one should I show you how to make? Or which ones have you already made? Leave a comment down below!


Posted in Arts and Crafts

Crafty Sassy – Intro to Latch Hook Projects

I mentioned that I have worked with a few latch hooks, but I never went in detail on what they really are. Latch Hooks are like rugs that are made up of yarn on a grid. There are many things you can with latch hooks. I personally, like making pillows, but they are a lot of hard work.

Image result for latch hook grid

The picture above is what a latch hook looks before you start or add on anything. Also, that is the tool you use to ‘tie on’ the yarn. Now, if you are intersected in making one of these and you are just a beginner, I recommend buying a latch hook kit. It will come with everything you need: the grid, the cut up yarn, and the hook tool.

Image result for latch hook kit

Not all kits are the same! The picture above shows what you would get in a kit, but be warned, not all kits have their colored yarn organized perfectly like this! Some grid might actually have the print of the picture already on the grid, to help guide you through the process.

Also, if you haven’t noticed, most of the latch hook grids have multiple blue squared on them, that helps with knowing where to start, it you aren’t lucky enough to have a kit with the picture printed on the grid. Most of the squares are 10×10, by counting them, but some grid might be different and be like a 10×9 or 9×10.

Image result for latch hook how to

The process is very simple. I didn’t think so, at first, but it is very easy to do. The picture above with show you a little better than how I explain it.

  1. Take a piece of yarn, whatever color you need and wrap it around your hook, your latch hook tool.
  2. Take the hook, while holding on to the yarn that is wrapped around it, and insert into the grid, just the hook and make sure that the hooks open, as shown above.
  3. Next, take your end pieces of your yarn, remember, you still have it wrapped around you hook, and pull it into your hook, making sure that your latch hook tool flap, we will call it, doesn’t close. You have to make sure that stays open for this step!
  4. Then, take your latch hook and pull it through that square, where you want to place the yarn. The hook tool flap will close to keep the yarn in it’s place when you pull through the square.
  5. Last, but not least, tighten the knot and make sure it is on tight!
  6. Once that is done, you keep repeating until the project is done!

Image result for latch hook how to

Sorry, if I didn’t explain it very well. This picture above does a better job, but I figured I would give it a shot and try.

When you finish your project, you will noticed that you have extra strands of yarn leftover. Some kits will add more than enough to finish, other’s might give you enough to just barely finish the project. If you are like me and keep everything, keep the extra strands, just in case you need them for another project, you never know.

If the kit didn’t give you enough yarn, there is another way to get some more. You can always go to a craft store, or look online, and find the color yarn and cut it yourself, but using the size of what the kit gave you. Or, some craft stores will have the yarn cut up already for you, so if you are making the latch hook for someone, they have it for you to grab and go.

Latch Hooks is great for all ages, plus, if you are just starting to get into crafts and such, this would be the way to start out. You can do so much with latch hooks, they don’t just have to be a rug. They can be pillows, stuff animals, wall hangings, etc. They even have blank grids that you can freestyle.

The only downfall with the latch hooks, is that it can take up a lot of your time, sometimes. It’s nothing that you can pick up and finish all in one sitting, maybe if you are quick and did it all in one night, or had a small one to work with. This type of project is a pick up and finish later type of project.

Anyway, I will had a few pictures below of the latch hooks that I have finished. So far, I have made two pillows and two pillow cases. None of which have been for me, but all the ones I have given away, have loved them. Not because I did a great job, but it was something that I made for them and those are the best kinds of gifts!

20170416_094834.jpg

20161212_185354.jpg20180218_152714.jpg20180612_175756.jpg

If you are very intersected in wanting to make one of these, check out your local craft store. You won’t have much luck at a Walmart or Kmart, but Amazon does have a very wide selection!