Posted in Mom Talk

Mom Talk: Why I Decided To Fix An Old Friendship

Image result for best friend quotes

So, if you have been reading or following my blog since April of this year, I talked about how I had to get rid of one of my best friends because it was too much unwanted drama and stress. I didn’t fix that relationship, believe me, it’s not worth fixing, to me.

I’m talking about another relationship that I destroyed back in my senior year of high school. I can’t really remember why I got rid of her as a friend. I believe it was because I thought she was more drama, but I don’t have a set reason on why I did what I did.

I’ve known her since the 10th grade, but we really connected and became best friends in 11th grade. We had many fights, but always fixed them as soon as possible. When senior year was coming to an end, I ended the friendship. Maybe because I didn’t think I would see her as much? Maybe I wanted to end the pain of losing her as a friend?

The only thing I can think of is that I was very immature and everyone in high school can be immature. What really made me look back and realized all the stupid shit I did and all the people I pushed out of my life, was when I lost my son.

When you go through something as difficult and it changes you. You think of things differently, you rethink all your actions, and you become more mature after going through something as difficult as death or anything.

After my son died, I deleted my old Facebook and created a new one a few months after, I wanted time away from social media. Well, in the past couple weeks, I saw her profile pop up on my suggestions list for friends. I debated on whether on messaging her or not, just because on how I ended things so quickly and without reason.

I’ll be honest, when I finally got the courage to message her, I literally had it all wrote out on my phone, planning on what I was gonna say to her. Deep down, I knew that I should at least be an adult and say sorry for all the crap I caused. All I thought she would do is have my ass handed to me, which I totally deserved, but I was shocked.

I think she was shocked too when I sent that message, but I’m glad I did. She forgave me, something I didn’t think that would happen, but she did. It shows how much we have both grown up in the past almost 3 years.

We ended up telling each other everything we have done within the past 3 years. We even talked about our high school days. I was shocked to find out that she had been thinking about me too, wondering why I got rid of her as a friend.

If I looked back at the only really close friendships I had, the one I had with her, was probably the best because we clicked a lot better that I did with my other ex best friend. The ex best friend, we had a few things in common, but I feel I was more issues and drama because she wanted to be center of attention.

I’m glad I took the shot to fix a broken friendship that I ruined. It felt good to know that after 3 years, we clicked back, just like that. Even now, that I have kids, she still would’ve stayed if I just kept her in my life, but the past is in the past. I’m going to try my best to, hopefully, keep this friendship for many more years and years to come.

Posted in Arts and Crafts, Top Projects for Crochet/Knitting

Crafty Sassy: 5 Easy To Do Beginner Projects For Crocheting

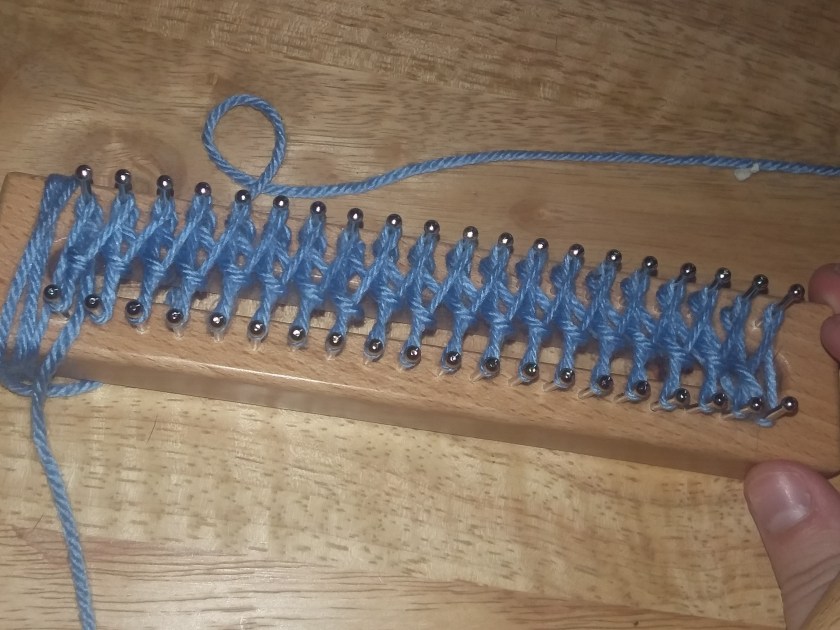
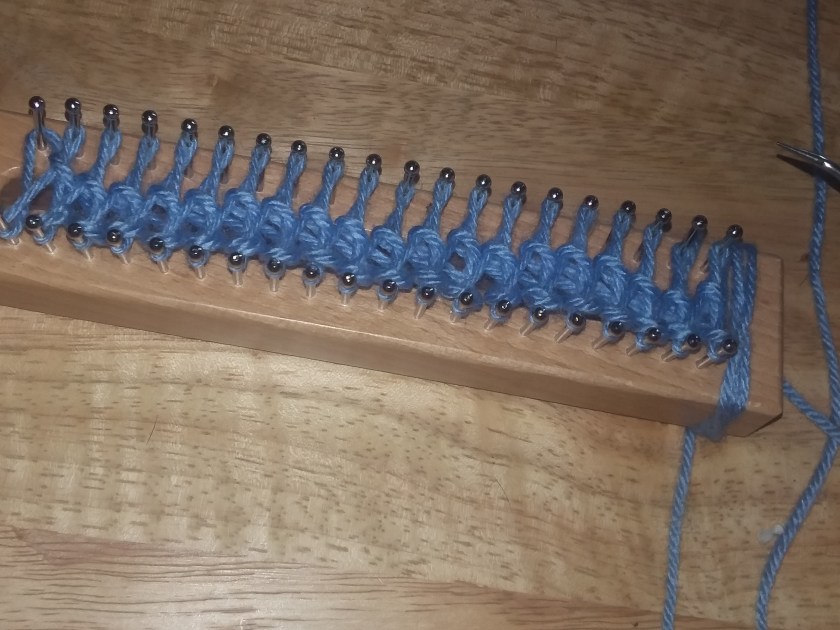
Looking at crocheting project, just looking at them makes you want to learn how to do it, if you are like me, you like to save the page you see them on and come back to it whenever you have time.

Some projects can be very tricky or confusing, so then you forget all about it and never look back until you see it again. This has happened to me so many times, that now that I know how to crochet, I try to go back and find them and see if I am ready to attempt them.

So, if you are truly wanted to enter into this fun and amazing hobby, sit back and check out these easy to do projects, if you are a beginner! Lets begin!

  1. Granny Square Blanket

20180724_070620.jpg

This is the current project that I am working on for my fiance. This is perfect for beginners! If you want to just make a simple blanket, this is perfect to do! Whenever I looked at a granny square blanket, I didn’t think I could make one.

If you don’t know, but I am a visual learner and need everything broken down step by step. YouTube was the first place I looked to find a video that would slow it down, and I finally found one, The Nervous Knitter.

She broke the granny square steps as slow as you can go, but it was easy to understand and learn. I always watch the videos first, before trying them, so I picked up on the steps very quickly. Once you learn how to do it once, it is like riding a bike, something you can’t forget.

If you want to check out her video, here is the link!


2. Scarf

Image result for crocheted scarves

Scarves will always be something that is easy to do. The only difficult thing about them is the patterns you choose. I didn’t understand why my grand-grandmother makes scarfs so much, but after realizing how quit they are to make, I understood why kept making them.

3. Bookmarks

Image result for crocheted bookmarks

You are probably thinking to yourself, bookmarks?? Yes, almost anything you can think of, you can crochet. Now, not all bookmarks are easy and I will be posting a how-to on how to do these ones.

These ones are as simple as granny squares, plus they are cute and pretty quick to make. Why have a plain boring paper or plastic bookmark when you can have a bright and colorful one instead!

4. Beanie Hat

Image result for crochet beanie

Just like the scarves, this is another quick and easy thing to learn how to do. So, if you are a beginner and don’t have any gifts in mind for a birthday or Christmas, you can always crochet a hat and scarf.

I haven’t had a chance to learn how to crochet, but really can’t wait!

5. Granny Square Patchwork Blanket (Mini Granny Squares)

Image result for crochet granny square blanket

I know that I already have the giant granny square blanket on here, but here is the other version that your grandmother might have around her house. The difference between this blanket and the other one I mention is that this is just smaller squares you sew together.

While the other one is just a giant granny square, this one you can get creative and mess around with different colors and see what works and what doesn’t.


Which one would you like to try out? Or which one should I show you how to make? Or which ones have you already made? Leave a comment down below!


Posted in Arts and Crafts

Crafty Sassy: Types of Yarn

Image result for different types of yarn

As a beginner, if we ever wanted to start a project, using yarn, we would just find the color we wanted and grab it, right? Then once we get home, we find out that the knitting needles or crochet hooks, aren’t for that type of yarn.

The chart that is shown above, will be your best friend while shopping for the right kind of yarn. Most of the yarn, that you can get, have one of this pictures with the yarn on it, saying the number of what kind the yarn is.

Image result for yarn weight symbols

Something like this. I will tell you what size the yarn is and even recommends what size crochet hook or knitting needles you should use with this yarn. Most of them have this on their packaging, which is very helpful for everyone.

Now, let’s get into detail with each one.

Related image

The picture that is shown about, shows the thickness of what each one looks like. I will be going through them all and explaining which one would be ideal for the project you are looking for.

0: Lace

Image result for lace yarn

This is one of the thinnest yarns that will be on this chart. If you are looking to make fashionable clothes, scarfs, hats, or hand warmers, this is what you would mostly use.

Lace yarn makes the project look more ‘perfect’ or it looks better in presentation. If you are a beginner, I would hold off on going right to the thinnest yarn.

1: Fingering/Super Fine

Image result for super fine yarn

Fingering yarn, or what the chart likes to call ‘Super Fine’ yarn, is used for making baby socks or anything clothes wise. Or, what you can find a bunch on, shawls. I’ve seen a few that have actually made a table cloth, for decoration.

2:  Sport/Fine

Image result for fine yarn

Sport, or Fine yarn can be used to make headbands, for babies, little cute stuff animals/characters. If you are looking to make some baby booties, this might be the yarn for you as well!

3: DK/ Light

Image result for dk yarn

If you are looking to make some 3D objects for your projects, such as flowers, this would be the yarn you work with. If you are looking to make a baby set, or baby blanket, this yarn will be soft enough to use to make them.

4: Worsted/Medium

Image result for medium weight yarn

This is the typical yarn that you would get for most of your projects, the possibilities are endless with this type of yarn. If you are a beginner, this is the type of yarn that you can basically make whatever you want with it.

I’ve seen people make blankets, hats, gloves, scarfs, handbags, baby blankets, baby shoes, crochet flip flops, etc. I’ve been using this yarn to make the backing of my latch hooks and also used my loom knit with is as well.

5: Chunky/Bulky

Image result for bulky weight yarn

If you are looking to make some stuff for the winter time, then you would use this. The type of yarn is thick to make great blankets with, or have a hat, scarf, and mittens for yourself. Although, you might need bigger crochet hooks and knitting needles for these projects.

My son and daughter’s blankets, I used this type of yarn, of course, they didn’t come out perfect, for my first time, but they loved them both!

6: Super Bulky

Image result for super bulky weight yarn

With this type of yarn, you can Arm Knit with this type of yarn, which I have always wanted to try, but with the price of Super Bulky yarn being very pricey, it’s something that will have to wait for me.

You can even finger crochet with this as well, or just make a nice big pillow to go on your couch.

Image result for all yarn types

With all of these yarns, the projects are endless. The best part of buying yarn, is that each one comes with a pattern, so if you have been throwing them away, you have been missing out.

Next Tuesday, I WILL have a tutorial on how to make a bookmark, crocheting. I just forgot about it and haven’t had a chance to get into it, due to I am working on a blanket for my fiance, which I will blog about when I am finished! Happy Crafting Dearies!


Posted in Gaming, Sims

The Sims Saga: Which Do I Prefer?

Image result for the sims

When you here the game Sims, what comes to mind? I think about The Sims games, creating a character and controlling their life. A lot of people forget that the Sims first originated from SimCity, where you created a city and made sure that it was successful.

I’m not going to talk about SimCity, though. This is mainly about The Sims. I’ll be honest, I’ve never actually played the Sims, but for it’s time, it was amazing. To be able to control their life, made them do whatever our hearts wanted them to do.

It was like GTA, but without the violence and free will to move your Sim manual. You could even create your dream house, have a family, or get the job of your dreams. When I got hooked, it wasn’t with the first The Sims, it was The Sims 2.

The Sims 2

Image result for the sims 2

The first time I saw The Sims 2, was when I was on YouTube. I had came across it and it was recommend to me. A lot of people actually used The Sims 2 game, to create movies or series, or what got me hooked on, was the teen pregnancy series.

You must think that I’m weird to like to watch them, but seriously, look up the series ‘My Life’. The creator of that series, she really got me to thinking that I wanted to do something creative like that. If you actually watch her series, from her very first episode, to her newer ones, she has come a long way.

The Sims 2 had more to offer, as well. There were more add-on’s to the game, such as the different seasons, hobbies, and even jobs. It made the game play more like real life.

I finally had a chance to buy it for myself, and I am currently, trying to learn how to film and make a good series, that I will post on my YouTube channel.

Even if you aren’t trying to make a series, its a great way to past the time on a rainy day. Hell, I even when forward and created my fiance, son, daughter, and myself into the game. I highly recommend getting this game! It’s the best of both worlds.

Now, let’s talk about its, aftermath…The Sims 3.

The Sims 3

Image result for the sims 3

I’m going to try my best not to bash this game. It wasn’t a bad sequel to The Sims 3. They added a lot of new things, such as making it easier to custom clothes and items, you didn’t have to wait for loading times to get from one place to another, and you could follow your Sim to work, the hospital, etc.

There was one BIG issue with this game. It is SO buggy. If you didn’t have the best computer in the world, you were bugging because your game would lag. Brand new or with mods, it would lag, or the loading time would take forever. Especially if you are in create-a-sim.

To me, the creators wanted to get this game out, as soon as possible because of the high demand that The Sims 2 was, so they did rush it, a little, by adding some stuff that the other games never had.

The one thing that I LOVED about it, was that you could follow your Sim anywhere without having to deal with those loading screens and the way you could custom, almost everything.

The Sims 3 was the first Sims game that I have ever own and I had the season, pets, and supernatural packs that made the game play so much fun! I wonder, now that I have a better computer, if it would run better?

Last, but not least, let’s get to the newer Sims game that came out in the last few years, The Sims 4.

The Sims 4

Image result for the sims 4

Again, this is another game I haven’t touched, yet, and I have looked into seeing if it is really worth getting, but to me, the creators went back a couple steps. You think with a newer game, it would be better and would fix the problems from the last game, well, they did, but not very well.

I have heard that the game play is okay, graphics are okay, etc. It is missing A LOT from The Sims 3 game. You have loading screens for EVERYWHERE you go, even if you are going to the next door neighbor.

It’s not as buggy or laggy, as The Sims 3 was, but they had to get rid of a lot of stuff, in order to fix it, which a lot of people were disappointed in. The Sims 4, seems to me, boring. Just because they didn’t add anything new that would make us get excited.

Although, they did add a pack that basically makes you do your Sims job. Which was something that we could do in the other games, but I would rather just fast-forward my Sim’s job, then doing it, I’m already controlling pretty much them, why should I have to do their work for them?

Which is worth playing?

Image result for the sims

The Sims 2, hands down. I would recommend it to everyone. It plays great on Windows 10, there is a few glitches, but it’s still playable. I like how the Sims are in this game and how you can do so much.

Plus, it still has that SimCity feeling to it, so that I could make my own town, I could. I am hoping to get a few more packs, just to play around with it some more. I do have the the Late Night and University packs, so I am hoping to either get Pets or Seasons next.

If you are a Sims fan, which game do you prefer? Leave a comment down below! There has also been a rumor that they are working on The Sims 5, do you thinks they should have another Sims? If so, what do you think they need to improve or leave alone?

Posted in Arts and Crafts

Crafty Sassy: How To Make A Latch Hook Pillow/Pillow Case (My Version)

Image result for latch hook pillow

Good Morning all of my dearies! So, I figured I would show you how I make my latch hook pillows. I have already done a tutorial on the latch hook, and how simple and easy it is to do.

Now, I did this all on my own, I didn’t find this online, I came up with the idea because of the fact that some of the latch hooks were too amazing to just have as a rug. So, I figured that I would make a latch hook and turn it into a pillow. Not all of my latch hook pillows are perfect, I haven’t really mastered it, but I try to be better than the last time.

These are great gifts for family or friends, I would say for everyone, but it depending on the size of the latch hook and making the backing, it can be a very long process. The quickest that I was able to do, was about 2 months, but that was a small foot by foot latch hook. If you have kids, expect the project to take longer.

So, first things first, you need to have the following supplies:

  • Latch Hook kit
    • If you are a beginner, I recommend with starting out with a small latch hook, a foot by foot one would be perfect to start on and it won’t take as long as a bigger one.
  • Yarn (Medium)
    • The backing I just basically knitting small squares together or two long parts that I end up sewing together. The color can be any color you want it to be, as long as it is medium thickness and somewhat matches your latch hook.
    • I would try and get two yarn rolls, just to start out, but do keep in mind that you will also need it to sew the pillow together.
    • *Note* Try and avoid black yarn, especially if you are a beginner, black yarn is very hard to work with. Dark colors might be okay, but try and avoid them, if you are just starting out.
  • Metal Thick Needle
    • You’ll need this to sew your pillow together, or pillow case. I recommend using a thicker needle (Not talking about knitting needles!), the reason is because it will make it easier to sew them together. Plus, with the thinner needles, you can tend to break them, believe me, I have broken a few.
  • Scissors
  • Knitting Needles
    • Make sure that you have the knitting needles suggested size, it is on the yarn roll and suggests a size.
  • Rug Binding
    • This you will used around the sides for the latch hook, making sure that it doesn’t fall apart when finished.
  • Fabric Glue
    • I found that it was easier to use fabric glue to keep the rug binding together. You can use an iron, but I have tried and It didn’t work, I’m not sure if I did it right or not.
  • Stuffing (for making a pillow)
    • You can stuff it and then close it, or if you or anyone you are giving the latch hook pillow has any pets, I would take a pillow case and fill it and then put it into the pillow. It’s totally up to you.

Once you have everything, that I have suggested to have, you can finally start! First, before we can begin our pillow, we need to complete the latch hook, first. This might be the longest part that you need to do to make this pillow.

Then, knit the backing, you can either knit a classic square, or make it longer and have different pieces that you end up sewing together. Whatever is easier for you to do, I found that the squares were easier, depending how big your latch hook is, it made it easier to see the progress versus just knitting a long part.

The reason why we should make the latch hook first, is because once we trim it down, it will be easier to measure or know how long or wide you need to go. Some latch hooks don’t have a printed picture on them, some of them are blank and give you a big blank latch hook, just to make sure that you have enough to make the latch hook.

That’s only with the bigger latch hooks, a since foot by foot is usually has a printed design on it, so that you can follow the pattern.

After both parts are completely, just sew them onto the latch hook, making sure that you cover the latch hook grid. If you are making a pillow case, only sew around it, leave the top untouched, so that you are able to place a pillow into the opening.

20180612_175756.jpg

It should, almost look like the picture above, this was a project that I made for my aunt for her birthday. Her favorite Disney princess is Belle, so I made her a small foot by foot pillow.

This latch hook, I got from Hobby Lobby, but I am pretty sure you can find it on Amazon, you might be lucky and find it at Walmart, but I wouldn’t get your hopes up. This latch hook did not have a grid, with the picture, so that you can follow it on key.

The picture was printed on the latch hook and I made the best judgement for each one. The background isn’t green, it’s purple, I changed it to my aunt’s favorite color, instead. Another note, for this latch hook, the yarn is SUPER thick and was a pain in the ass to hook on.

However, the yarn I used for the background was a simple medium yarn, what most latch hooks use, so I was glad that the background wasn’t as difficult to do.

Next Tuesday, I have a surprise! I am going to show you how to make a book mark! Not just any kind of book mark, a crochet-made bookmark!

Posted in Mom Talk

Mom Talk: Is It Possible To Work From Home As A Stay-At-Home Parent?

Image result for work from home mom

Yes, I know it’s been a while since I have done a ‘Mom Talk’, but I wanted to go into detail to see if it is really possible to work from home as a stay-at-home parent. Whether you are trying to make extra cash for spending or looking to create a permit career.

Every since I had my kids, I’ve always wanted to be a stay-at-home mother and also have a career from home as well. There is a lot of scams, but their are a few that are very legit and could even give you benefits for you and your family.

I search everyday for a work at home career or even just a part-time job, but there is always an issue. Either I don’t have the experience, I don’t have a quiet place, or don’t have the sale mind to bug people to buy the products I’m pushing to sell.

So, I looked into doing survey’s for cash. However, there is always a catch. You either can’t cash out until you make, at least, $20-$30 bucks, which takes forever to do. Plus the survey’s were either the same thing, that I would spend 30 minutes to an hour to complete and only got less than .25 cents, or I wouldn’t qualify for most of the survey’s.

Let me tell you something, it IS possible to work from home. You just have to find it at the right opportunity.

Image result for work at home jobs for stay at home moms

I’ve heard so many stories of people that are making enough money for even their spouses don’t have to work, plus still having enough money to buy their dream home, or have that car they always wanted, or even have a big family, like they have always dreamed of having.

I’ve always thought that if the time was right, the opportunity will come to me, I just can’t stop searching. Although, I’ve been trying to get back into the Customer Service pool, but the two things that stop me are: I have a loud, barking at whatever moves or makes a loud sound, dog and not feeling confident enough to do both working and taking care of my daughter.

That’s why I started this blog. I wanted to have a job where I could work whenever, but still have time for my kids. I still haven’t found a way to actually make money off of it, yet, but it’s possible. I just can’t give up.

Maybe one day, I’ll be able to look back on this all and enjoy my life as a stay-at-home mom and a working mom. Like I have always told myself, if it’s meant to be, then its meant to be. If it isn’t, just keep on swimming and don’t give up.

Posted in Arts and Crafts

Crafty Sassy: How To Loom Knit A Scarf (Figure 8 Stitch)

Happy Tuesday to all my crafters! Today, I’m going to take you step-by-step on how to loom knit a basic scarf. I’m going to break it down, just in case some others go way too fast.

20180703_145052.jpg


Now, I am going to be using a solid blue color yarn, I figured using a plan color would be easier to focus on. I’m also using a medium size yarn, which is a basic yarn that you would get from the craft store.

If you don’t have a looming set or kit, you can buy them on Amazon, Walmart, or your local craft store. The one I have is the KB Tadpole Loom, I got this from either Walmart or Kmart. It comes with the loom set and a little booklet, that shows you how to 8 different thinks with the loom.

So, first thing is first, we need to create a slip knot. Now, if you don’t know what a slip knot is, that’s okay because I am going to explain it too you. A slip knot is a basic knot that is used for knitting, crocheting, looming, etc, projects. I basically holds the start of your work together.

A lot of people do a slip knot differently, you don’t have to do it my way, but I would look on how other’s make a slip knot and choose whatever makes you comfortable. Here is a quick visual on how I make a slip knot:

  1. Find the start of your yarn and hold on to it. I have used this yarn before, as you can see. If you are using a brand new yarn, you can either find the start of it by grabbing the middle string, that might be sticking out, or look around the yarn and see if you can find the other end. Personally, I rather grab from the outside, because mostly every time that I grab onto the middle and pull, sometimes it be in a knot.
    1. 20180703_145501.jpg
  2. Wrap the yarn around your finger, leaving a enough space in between them. See photo below:
    1. 20180703_145513-1.jpg
  3. Next, you are going to pull the first yarn over the second yarn, like this, see below:
    1. 20180703_145557.jpg
  4. Then, you are going to pull the end of the yarn, so that it’s tight, not too tight on your finger, though.
    1. 20180703_145616.jpg
      • And there you have your slip knot!

Now that we have a slip knot, we can begin! So, take the slip knot off of your finger and place it on one of the end pegs, and tighten it, not too tight, though. Like shown below:

20180703_145650.jpg

What we need to do next is wrap the yarn around the pegs. Pay very close attention to how we do the figure 8 stitch.

It will look tricky at first, but it’s very simple, just make sure that you are wrapping each and every peg, as shown in the picture above. Once you get to the other side, see below, go back and re-wrap all the pegs, using the same stitch that you just did.

When you finish wrapping all the pegs again, your work should look like this, if I explained it well enough. This is the top view:

20180703_150058.jpg

Here is what the side view will look like:

20180703_150113.jpg

If you haven’t already noticed, that there was one peg that was only wrapped once. That is okay! It is supposed to be like that. Every time that you wrap them a second time, there will always be one that isn’t wrapped twice.

Now, because this loom doesn’t have a end peg that you can wrap around, I wrapped the yarn around the side of my loom, because if you don’t, your work will come undone. That is the only down fall with this loom, it doesn’t have a place to wrap your yarn.

Anyway, here comes the more difficult part. You will need your hook for this step. Take your hook and grab, from the first set of yarn that we cased on, you are going to pull it over the peg and over the second yarn. Note: It doesn’t matter which side you start on, but which every one you decide to start on, finish it before moving on to the other side. 

20180703_150230.jpg


You keep doing this, on the side you are working on, it should look like this, when you finish your first side.

20180703_150345.jpg

It’s okay if they are a little loose, most of them will end up in the middle anyway, so it’s okay that they don’t, at first.

Once you have completed the other side, your work should look like this:

20180703_150500.jpg

Then, just gently push the middle of your work down and recast another figure 8 stitch, until you get it to the length you desire. I have added a chart, for the average lengths, but if you want a scarf that fits perfect, for you or whoever you are making it for. Hold you arms out side and have someone measure from fingertip to fingertip, that will give you the exact length you need.

Image result for scarf sizes

How To End Your Work

I don’t have any pictures on how to cast off, so I am going to explain the best I can. I will be making a YouTube video about this blog post and will attach, once it is uploaded. I will make sure to have pictures, as well.

Basically, you’ll be transforming one side to the other and then binding off. So, grab your hook and take one of your yarn, from your first peg, and wrap it around the peg across from that peg. Note: I’m pretty sure you can start from either side, when you bind off. But don’t quote me on it. 

 Once you have finished that, and got to the final hook, your work should just come off and you should be all set.

There you have it! I’m sorry if I didn’t explain it a little better. I will be making a video on how to do it, as soon as possible and I will edit at this post, once I do! If you have any ideas or want me to try out something new, let me know in a comment or send me an e-mail at katie_farrington@aol.com!