Posted in Mom Talk

Mom Talk: Where Have I Been and Plans for My Blog

Hey Dearies! So, if you haven’t noticed, I haven’t been as active as I would like and I wanted to talk about what changes have been going on in my life. Not to mention, I want to talk about the future of this blog as well.

Currently, I’ve been working on college quite a bit and I haven’t had a free moment to work on my blog, not to mention, I’m also chasing around my almost 3-year-old daughter. I’m working on getting my degree for medical coding and billing.

I originally wanted to become a teacher, I still do, but I don’t want to go through the schooling and then not going forward to be a teacher. It’s something that I’m still interested in doing, but its just something that I’m still debating about it.

I’m still crocheting, if you are wondering and still follow me on Instagram. Since we are getting closer to the holiday months, hookers and knitters, like myself, are preparing gifts for our family and stuff. I’m hoping to have some patterns posted for you all this season, but if not, I’ll have some holiday gifts ideas.

I don’t plan on stopping this blog, but I’m going to try my best to become more active, make sure to share or like any of the patterns that I post or any of my written books or short stories.

Also, I’ve been job searching as well and with lots of applying and searching, I have one! I’m really excited to get back into the workforce after being a stay-at-home mom. I’m really excited and I can’t wait until I begin this new chapter in my life.

So, please stay patient with me as I tackle on the new job, college, and of course motherhood all in one. I can’t wait to post more stuff for both arts and crafts, gaming, and writing.

Posted in Arts and Crafts

Crafty Sassy: Types of Yarn

Image result for different types of yarn

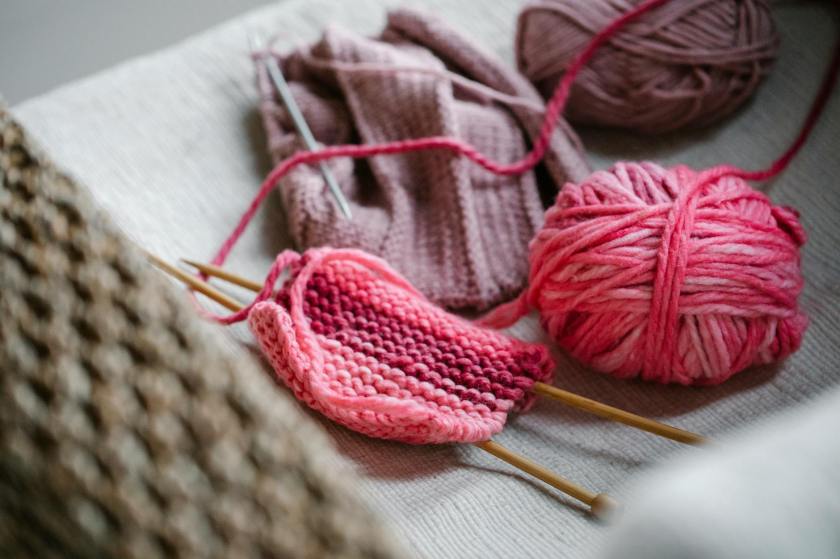
As a beginner, if we ever wanted to start a project, using yarn, we would just find the color we wanted and grab it, right? Then once we get home, we find out that the knitting needles or crochet hooks, aren’t for that type of yarn.

The chart that is shown above, will be your best friend while shopping for the right kind of yarn. Most of the yarn, that you can get, have one of this pictures with the yarn on it, saying the number of what kind the yarn is.

Image result for yarn weight symbols

Something like this. I will tell you what size the yarn is and even recommends what size crochet hook or knitting needles you should use with this yarn. Most of them have this on their packaging, which is very helpful for everyone.

Now, let’s get into detail with each one.

Related image

The picture that is shown about, shows the thickness of what each one looks like. I will be going through them all and explaining which one would be ideal for the project you are looking for.

0: Lace

Image result for lace yarn

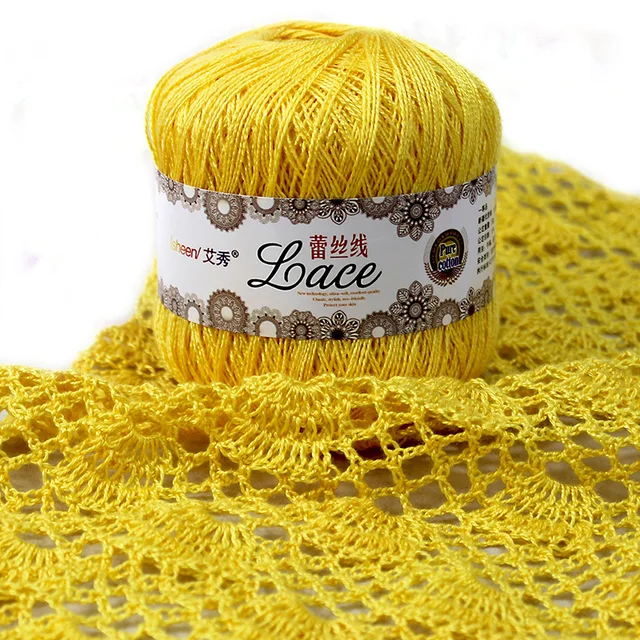
This is one of the thinnest yarns that will be on this chart. If you are looking to make fashionable clothes, scarfs, hats, or hand warmers, this is what you would mostly use.

Lace yarn makes the project look more ‘perfect’ or it looks better in presentation. If you are a beginner, I would hold off on going right to the thinnest yarn.

1: Fingering/Super Fine

Image result for super fine yarn

Fingering yarn, or what the chart likes to call ‘Super Fine’ yarn, is used for making baby socks or anything clothes wise. Or, what you can find a bunch on, shawls. I’ve seen a few that have actually made a table cloth, for decoration.

2:  Sport/Fine

Image result for fine yarn

Sport, or Fine yarn can be used to make headbands, for babies, little cute stuff animals/characters. If you are looking to make some baby booties, this might be the yarn for you as well!

3: DK/ Light

Image result for dk yarn

If you are looking to make some 3D objects for your projects, such as flowers, this would be the yarn you work with. If you are looking to make a baby set, or baby blanket, this yarn will be soft enough to use to make them.

4: Worsted/Medium

Image result for medium weight yarn

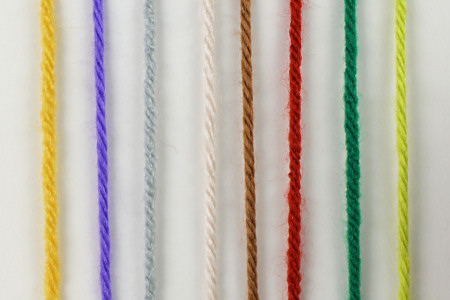
This is the typical yarn that you would get for most of your projects, the possibilities are endless with this type of yarn. If you are a beginner, this is the type of yarn that you can basically make whatever you want with it.

I’ve seen people make blankets, hats, gloves, scarfs, handbags, baby blankets, baby shoes, crochet flip flops, etc. I’ve been using this yarn to make the backing of my latch hooks and also used my loom knit with is as well.

5: Chunky/Bulky

Image result for bulky weight yarn

If you are looking to make some stuff for the winter time, then you would use this. The type of yarn is thick to make great blankets with, or have a hat, scarf, and mittens for yourself. Although, you might need bigger crochet hooks and knitting needles for these projects.

My son and daughter’s blankets, I used this type of yarn, of course, they didn’t come out perfect, for my first time, but they loved them both!

6: Super Bulky

Image result for super bulky weight yarn

With this type of yarn, you can Arm Knit with this type of yarn, which I have always wanted to try, but with the price of Super Bulky yarn being very pricey, it’s something that will have to wait for me.

You can even finger crochet with this as well, or just make a nice big pillow to go on your couch.

Image result for all yarn types

With all of these yarns, the projects are endless. The best part of buying yarn, is that each one comes with a pattern, so if you have been throwing them away, you have been missing out.

Next Tuesday, I WILL have a tutorial on how to make a bookmark, crocheting. I just forgot about it and haven’t had a chance to get into it, due to I am working on a blanket for my fiance, which I will blog about when I am finished! Happy Crafting Dearies!


Posted in Arts and Crafts

Crafty Sassy: How To Make A Latch Hook Pillow/Pillow Case (My Version)

Image result for latch hook pillow

Good Morning all of my dearies! So, I figured I would show you how I make my latch hook pillows. I have already done a tutorial on the latch hook, and how simple and easy it is to do.

Now, I did this all on my own, I didn’t find this online, I came up with the idea because of the fact that some of the latch hooks were too amazing to just have as a rug. So, I figured that I would make a latch hook and turn it into a pillow. Not all of my latch hook pillows are perfect, I haven’t really mastered it, but I try to be better than the last time.

These are great gifts for family or friends, I would say for everyone, but it depending on the size of the latch hook and making the backing, it can be a very long process. The quickest that I was able to do, was about 2 months, but that was a small foot by foot latch hook. If you have kids, expect the project to take longer.

So, first things first, you need to have the following supplies:

  • Latch Hook kit
    • If you are a beginner, I recommend with starting out with a small latch hook, a foot by foot one would be perfect to start on and it won’t take as long as a bigger one.
  • Yarn (Medium)
    • The backing I just basically knitting small squares together or two long parts that I end up sewing together. The color can be any color you want it to be, as long as it is medium thickness and somewhat matches your latch hook.
    • I would try and get two yarn rolls, just to start out, but do keep in mind that you will also need it to sew the pillow together.
    • *Note* Try and avoid black yarn, especially if you are a beginner, black yarn is very hard to work with. Dark colors might be okay, but try and avoid them, if you are just starting out.
  • Metal Thick Needle
    • You’ll need this to sew your pillow together, or pillow case. I recommend using a thicker needle (Not talking about knitting needles!), the reason is because it will make it easier to sew them together. Plus, with the thinner needles, you can tend to break them, believe me, I have broken a few.
  • Scissors
  • Knitting Needles
    • Make sure that you have the knitting needles suggested size, it is on the yarn roll and suggests a size.
  • Rug Binding
    • This you will used around the sides for the latch hook, making sure that it doesn’t fall apart when finished.
  • Fabric Glue
    • I found that it was easier to use fabric glue to keep the rug binding together. You can use an iron, but I have tried and It didn’t work, I’m not sure if I did it right or not.
  • Stuffing (for making a pillow)
    • You can stuff it and then close it, or if you or anyone you are giving the latch hook pillow has any pets, I would take a pillow case and fill it and then put it into the pillow. It’s totally up to you.

Once you have everything, that I have suggested to have, you can finally start! First, before we can begin our pillow, we need to complete the latch hook, first. This might be the longest part that you need to do to make this pillow.

Then, knit the backing, you can either knit a classic square, or make it longer and have different pieces that you end up sewing together. Whatever is easier for you to do, I found that the squares were easier, depending how big your latch hook is, it made it easier to see the progress versus just knitting a long part.

The reason why we should make the latch hook first, is because once we trim it down, it will be easier to measure or know how long or wide you need to go. Some latch hooks don’t have a printed picture on them, some of them are blank and give you a big blank latch hook, just to make sure that you have enough to make the latch hook.

That’s only with the bigger latch hooks, a since foot by foot is usually has a printed design on it, so that you can follow the pattern.

After both parts are completely, just sew them onto the latch hook, making sure that you cover the latch hook grid. If you are making a pillow case, only sew around it, leave the top untouched, so that you are able to place a pillow into the opening.

20180612_175756.jpg

It should, almost look like the picture above, this was a project that I made for my aunt for her birthday. Her favorite Disney princess is Belle, so I made her a small foot by foot pillow.

This latch hook, I got from Hobby Lobby, but I am pretty sure you can find it on Amazon, you might be lucky and find it at Walmart, but I wouldn’t get your hopes up. This latch hook did not have a grid, with the picture, so that you can follow it on key.

The picture was printed on the latch hook and I made the best judgement for each one. The background isn’t green, it’s purple, I changed it to my aunt’s favorite color, instead. Another note, for this latch hook, the yarn is SUPER thick and was a pain in the ass to hook on.

However, the yarn I used for the background was a simple medium yarn, what most latch hooks use, so I was glad that the background wasn’t as difficult to do.

Next Tuesday, I have a surprise! I am going to show you how to make a book mark! Not just any kind of book mark, a crochet-made bookmark!

Posted in Arts and Crafts

Crafty Sassy: How To Loom Knit A Scarf (Figure 8 Stitch)

Happy Tuesday to all my crafters! Today, I’m going to take you step-by-step on how to loom knit a basic scarf. I’m going to break it down, just in case some others go way too fast.

20180703_145052.jpg


Now, I am going to be using a solid blue color yarn, I figured using a plan color would be easier to focus on. I’m also using a medium size yarn, which is a basic yarn that you would get from the craft store.

If you don’t have a looming set or kit, you can buy them on Amazon, Walmart, or your local craft store. The one I have is the KB Tadpole Loom, I got this from either Walmart or Kmart. It comes with the loom set and a little booklet, that shows you how to 8 different thinks with the loom.

So, first thing is first, we need to create a slip knot. Now, if you don’t know what a slip knot is, that’s okay because I am going to explain it too you. A slip knot is a basic knot that is used for knitting, crocheting, looming, etc, projects. I basically holds the start of your work together.

A lot of people do a slip knot differently, you don’t have to do it my way, but I would look on how other’s make a slip knot and choose whatever makes you comfortable. Here is a quick visual on how I make a slip knot:

  1. Find the start of your yarn and hold on to it. I have used this yarn before, as you can see. If you are using a brand new yarn, you can either find the start of it by grabbing the middle string, that might be sticking out, or look around the yarn and see if you can find the other end. Personally, I rather grab from the outside, because mostly every time that I grab onto the middle and pull, sometimes it be in a knot.
    1. 20180703_145501.jpg
  2. Wrap the yarn around your finger, leaving a enough space in between them. See photo below:
    1. 20180703_145513-1.jpg
  3. Next, you are going to pull the first yarn over the second yarn, like this, see below:
    1. 20180703_145557.jpg
  4. Then, you are going to pull the end of the yarn, so that it’s tight, not too tight on your finger, though.
    1. 20180703_145616.jpg
      • And there you have your slip knot!

Now that we have a slip knot, we can begin! So, take the slip knot off of your finger and place it on one of the end pegs, and tighten it, not too tight, though. Like shown below:

20180703_145650.jpg

What we need to do next is wrap the yarn around the pegs. Pay very close attention to how we do the figure 8 stitch.

It will look tricky at first, but it’s very simple, just make sure that you are wrapping each and every peg, as shown in the picture above. Once you get to the other side, see below, go back and re-wrap all the pegs, using the same stitch that you just did.

When you finish wrapping all the pegs again, your work should look like this, if I explained it well enough. This is the top view:

20180703_150058.jpg

Here is what the side view will look like:

20180703_150113.jpg

If you haven’t already noticed, that there was one peg that was only wrapped once. That is okay! It is supposed to be like that. Every time that you wrap them a second time, there will always be one that isn’t wrapped twice.

Now, because this loom doesn’t have a end peg that you can wrap around, I wrapped the yarn around the side of my loom, because if you don’t, your work will come undone. That is the only down fall with this loom, it doesn’t have a place to wrap your yarn.

Anyway, here comes the more difficult part. You will need your hook for this step. Take your hook and grab, from the first set of yarn that we cased on, you are going to pull it over the peg and over the second yarn. Note: It doesn’t matter which side you start on, but which every one you decide to start on, finish it before moving on to the other side. 

20180703_150230.jpg


You keep doing this, on the side you are working on, it should look like this, when you finish your first side.

20180703_150345.jpg

It’s okay if they are a little loose, most of them will end up in the middle anyway, so it’s okay that they don’t, at first.

Once you have completed the other side, your work should look like this:

20180703_150500.jpg

Then, just gently push the middle of your work down and recast another figure 8 stitch, until you get it to the length you desire. I have added a chart, for the average lengths, but if you want a scarf that fits perfect, for you or whoever you are making it for. Hold you arms out side and have someone measure from fingertip to fingertip, that will give you the exact length you need.

Image result for scarf sizes

How To End Your Work

I don’t have any pictures on how to cast off, so I am going to explain the best I can. I will be making a YouTube video about this blog post and will attach, once it is uploaded. I will make sure to have pictures, as well.

Basically, you’ll be transforming one side to the other and then binding off. So, grab your hook and take one of your yarn, from your first peg, and wrap it around the peg across from that peg. Note: I’m pretty sure you can start from either side, when you bind off. But don’t quote me on it. 

 Once you have finished that, and got to the final hook, your work should just come off and you should be all set.

There you have it! I’m sorry if I didn’t explain it a little better. I will be making a video on how to do it, as soon as possible and I will edit at this post, once I do! If you have any ideas or want me to try out something new, let me know in a comment or send me an e-mail at katie_farrington@aol.com!


Posted in Arts and Crafts

Crafty Sassy: Crocheting VS Knitting

Happy Tuesday! I have another Crafty Sassy coming to you! I am going to talk about the difference between Crocheting versus Knitting and how they are different from each other. Let’s jump right in!

So, the major difference between the two is that you don’t use the same tools. For crocheting, you use a hook and for knitting, you use long needles. The better thing about crocheting is that you can see more progress than you can knitting, depending on what you are knitting.

Image result for knitting vs crocheting

Crochet

Now, I’m not an pro at crocheting, but I have managed to crochet a granny square and I am working on a granny square blanket for my fiance. To me, at first, crocheting looked very difficult. Even when I tried to practice a single crochet square, I always seemed to mess up, somehow.

Image result for crocheting projects

After trying for a while, I gave up. More so, I took a long break and headed to YouTube. I am one of those people that can’t just read the book and look at pictures to do something, I have to physically see them doing, what I am trying to learn.

I figured I would start simple and look for a video to make a granny square. I found the best tutorial by the Nervous Knitter. Link for the video – https://www.youtube.com/watch?v=vDdXrZB1FOE

Since crocheting can be very fast, she slowed it down every step and it was much easier to follow. I watched the entire thing, twice, just to make sure I did it right and know, I know it almost by heart.

Image result for crocheting projects

With crocheting, once you get the pattern down, it’s like riding a bike, you don’t forget it very easily. Crocheting, you can do so much, the best part is that you can see your progress, so working on a granny square blanket, I see the progress, which makes me excited to keep on going!

Once I am finished on my fiances blanket, I will post a picture on here and show you how to do a granny square tutorial, as well!

Knitting

Knitting was the first thing that I ever did, or tried out. I knitted my son’s first blanket. It was very simple to do and, at that time, I preferred to knit versus crochet. The only problem with knitting, it felt like my project was never going to be finished.

Image result for knitting projects

Don’t get me wrong, knitting was very basic and was easier to start out, but once your project gets bigger, you don’t have very much, to me, encouragement to keep going. Plus, I also seemed to lose a stitch or two and my project would come out all uneven, and with me trying to make things perfect, I would restart multiple times.

But there is also another way to knit, without using the needles. You can loom knit as well. I just got a giant set of different looming sizes and shapes. (Next Tuesday, I will be going a tutorial on how to loom knit a scarf!)

Image result for loom knitting

Knitting was something that I did for my latch hook pillows, the backings of them. I knitted them like I was making a blanket, but the needles can only hold on so much, unless you have the needles with the wires, which I don’t currently have.

Image result for knitting needles

Although, knitting was a easier way to have my projects looking a little neater, not perfectly neat, but neat as a way, there was not unwanted holes, just a solid pattern. Knitting, to me, is more for making a really great scarf or, if you have the knitting needles with the wire, a hat or even a blanket.

Which one would be better for beginners?

I would trying out knitting first, just because the concept is more simple and easier to follow versus crocheting. Try something simple, such as knitting a scarf or a square, just to get some practice.

Image result for knitting needles

Once you feel like you know the basics for knitting a simple scarf, try challenging yourself and try to crochet a granny square. If you are like me and need to physical see what is going on, I am going to try my best and make little tutorial videos to help you guys out.

If you get really frustrated with any of it, take a break. Taking a break from your work is okay to do! Especially, if you have children and they are making it difficult to work on anything. Your work will still be there when you want to go back to it.

Another tip that really helped me out, before jumping in on crocheting or knitting, or any project, take a step back and just watch videos of people doing those things. Watch how they do their work and whatever tips or things they do, that you feel or know that would help you out, use them!

Watching other people crochet and knit, I’ll pick up the little things that they do, so that I can used to my advantage or help better myself into crocheting or knitting different things.

Also, if you aren’t sure what kind of knitting needles or hooks you should get, try some out. I prefer metal ones, just because it’s easier, although, I haven’t tried out the wooden or ones with handles. I literally, just bought a set off of wish and have stuck with them ever since, although, because they don’t have a handle, my hands can get sweaty and it makes it harder to work the yarn.

I do recommend trying them out and seeing with ones you think, for yourself, make it easier to crochet or knit.

Image result for knitting needles

One thing that I highly recommend, is to work with bigger yarn! I know a lot of people say not to because it will make it harder to work with the less thicker yarn, but it will let you be able to look, up closely, how it is done. So that if you feel you made a mistake, with the less thicker yarn, with the bigger yarn, you will be able to see clearly what you did to mess up.

So, next Tuesday, I will be doing a step-by-step on how to loom knit and simple figure 8 scarf.