

Hey dearies! Today I am back with a NEW pattern that I had to try and recreate. As you all know, some patterns can be available for a limited time or a price. A lot of creators rather create the items instead of having an option to buy the pattern.
Especially, if you know someone or really want something that they have created. Well, that’s what happened to me. As I was scrolling on Pinterest, I happened to see this hat set:
As soon as I saw it, I showed it to my fiance, who is a HUGE Dragon Ball Z fan and loved it! So, I looked into seeing if there was a pattern or someone who sells the pattern itself. Sadly, I didn’t get a pattern or couldn’t purchase a pattern.
When you can’t get a pattern, what do you do?
Recreate it, of course! Now, this was a simple recreate because the beanie is simple and those patterns are free, but I put a little twist to mine. I’m going to show you how to make the orange hat, the green one I am still currently looking for another pattern for the antenna’s, but once I do, I’ll have that pattern up for you all!
Let’s talk about what you will need:
- Medium Size Yarn (In Orange, Black, and White)
- I used Red Heart Super Saver Pumpkin, since I still have a huge skein of that left and same with the white.
- I also used I Love This Yarn for the black, since I didn’t have any Red Heart in black.
- 5.0mm
- You can change the hook size to a 5.5mm or 6.0mm because the beanie will be really snug when it’s finished.
- Sewing Needle
- Scissors
*Note: This size fits an adult. My fiance’s head size is 21 inches, but I did adjust the pattern so that it wasn’t so tight. If anyone wants me to re-adjust the size if you want me to make one for the kiddos or baby sizes!
Let’s Begin!
-Hat-
Starting with the orange yarn, chain 5 and slip stitch in the first stitch chain to form a loop
Row 1: Chain 2. Make 10 double crochets in the loop. Join at the top of the first double crochet with a slip stitch. (10)
Row 2: Chain 2. Make two double crochets in each stitch. Join as you did before in row 1. (20)
Row 3: Chain 2. *Double crochet in the first stitch, Make 2 double crochets in the next stitch* Repeat * around. Join. (30)
Row 4: Chain 2. *Double crochet in the next 2 stitches, 2 double crochets in the next stitch* Repeat *around. Join. (40)
Row 5: Chain 2. *Double crochet in the next 3 stitches, 2 double crochets in the next stitch* Repeat * around. Join. (50)
Row 6: Chain 2. *Double crochet in the next 4 stitches, 2 double crochets in the next stitch* Repeat * around. Join. (60)
Row 7: Chain 2. * Double crochet in the next 5 stitches, 2 double crochets in the next stitch* Repeat * around. Join. (70)
Row 8: Chain 2. *Double crochet in the next 6 stitches, 2 double crochet in the next stitch* Repeat * around. Join. (80)
Row 9-15: Chain 2. Double crochet in each stitch. Join. (80)
Row 16-19: Switch to the black yarn. Chain 2. Double crochet in each stitch. Join. (80)
Row 20: Chain 1. Single crochet in each stitch. Join. Fasten off. (80)
Now that our hat is done, we need to create the circle part.
-Symbol Base (White circle)-
Grab the white yarn, chain 5 and slip stitch into the first chain to create a loop.
Row 1: Chain 2. Make 10 double crochets in the loop. Join. (10)
Row 2: Chain 2. Make 2 double crochets in every stitch. (20)
Row 3: Chain 2. *Double crochet in the first stitch, 2 double crochets in the next stitch* Repeat * around. Join. (20)
Row 4: Chain 2. *Double crochet in the next 2 stitches, 2 double crochets in the next stitch* Repeat * around. Join. (30)
Row 5: Chain 2. *Double crochet in the next 3 stitches, 2 double crochets in the next stitch* Repeat *around. Join. (40)
Row 6: Chain 1. Single crochet in each stitch. Join
Row 7: Change to black yarn. Chain 1. Single crochet in each stitch. Join. Fasten off.
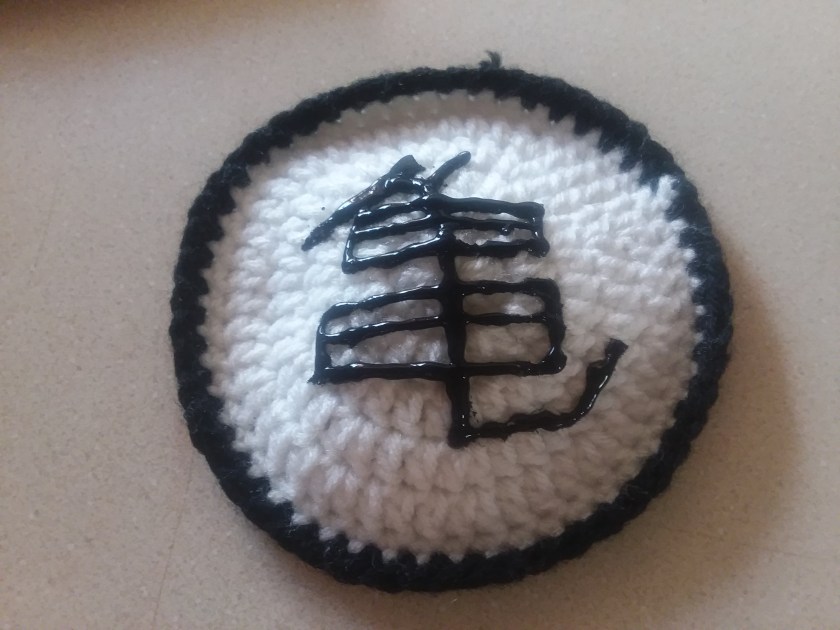
The next part is totally up to you. My fiance didn’t want the symbol that they had, in the original picture, so he wanted me to do this symbol instead:

I’m sorry that I don’t know the symbols, but this is what he chose. You have to do one of two things to get the symbol on the white piece.
- Sew on the symbol.
- Puffy Paint it on.
I’ve never used puffy paint, but I wanted to give it a try and still give the ‘3D’ effect. I can sew, but let’s be honest, I got very frustrated on trying to do so. The good thing about sewing is that you can pull it from your project.
Here’s how the puffy paint came out:
You don’t have to do either of the symbols, get creative and put whatever you would like!
Once you are done with the symbol, make sure that if you used the puffy paint, let it dry for about 4 hours before touching it or doing this next step.
Take your hat and white symbol circle, grab some black yarn and sew on the circle symbol piece to the hat. And you should be all set to wear it!
I’m going to try my best and create the other hat, but make sure you are following my Facebook page! I usually update when I’m about to create a new pattern or if you want to suggest any ideas that you would like me to recreate!


